In the realm of modern project development, you often find yourself immersed in intricate scenarios. Picture this: you’re in the midst of a project when a brilliant idea for a new feature strikes. However, rather than immediately diving into development, your instinct leads you to explore and experiment first. Similarly, you may encounter situations where an existing feature needs a refresh without disrupting its current functionality. Moreover, managing different variants of the same feature can be quite a puzzle. In these complex and ever-evolving landscapes, minimizing risk and optimizing the testing and deployment process is paramount. This is precisely where “Feature Flags and Toggles with Unleash” takes center stage.
In this post, we embark on a journey to master the art of implementing feature flags and toggles with Unleash, skillfully weaving them into both server and UI. By the end of this article, you’ll not only have a deep understanding of feature flags but also a practical guide to leveraging them effectively in modern project development.
Lab setup
To illustrate the implementation of feature flags and toggles with Unleash, I’ve created a practical server-side email validation tool managed through Unleash. Let’s delve into the setup of the project, which I’ve organized using the Turborepo starter:
Turborepo for Monorepo: Leveraging the power of Turborepo, I’ve structured this project as a monorepo, allowing for efficient code sharing and management.
pnpm Package Manager: For seamless package management, I’ve opted for the pnpm package manager, ensuring a streamlined and consistent development environment.
Within this monorepo, you’ll find the following key components:
Shared React UI Library with Tailwind CSS: A shared UI library crafted using React and styled with Tailwind CSS, providing a consistent and visually appealing user interface.
Next.js for Frontend (Port 3000): The frontend of the application is built using Next.js, offering server-side rendering and a smooth development experience, accessible on port 3000.
Express.js for Backend (Port 8000): The backend is powered by Express.js, a robust framework that handles server-side logic, serving content on port 8000.
Unleash Server (Port 4242): The heart of our feature flag management, the Unleash server runs on port 4242, facilitating efficient flag control and experimentation.
PostgreSQL Server (Port 5432): To store and manage data, we have a PostgreSQL server running on port 5432, ensuring data integrity and reliability.
Unleash Client for Express.js: On the backend, we’ve integrated the Unleash client to seamlessly control feature flags and toggles within our Express.js application.
Unleash Proxy for Next.js: For the frontend, a Unleash proxy ensures that Next.js can make real-time decisions based on feature flags, enhancing user experiences.
With this comprehensive lab setup, we’re poised to explore the world of feature flags and toggles with Unleash and witness their transformative power in action.
Set up Unleash server
First and foremost, our journey into feature flag and toggle implementation with Unleash begins with hosting the Unleash server. This server serves as the cornerstone of our feature management system, ensuring that all feature decisions rely on its dependable presence. To accomplish this, I’ve initiated the Unleash server, configuring it to run on port 4242, laying the foundation for our feature flag experimentation and control.
require("dotenv").config();
const unleash = require("unleash-server");

unleash
  .start({
    db: {
      ssl: false,
      host: process.env.UNLEASH_DB_HOST,
      port: +process.env.UNLEASH_DB_PORT,
      database: process.env.UNLEASH_DB,
      user: process.env.UNLEASH_DB_USER,
      password: process.env.UNLEASH_DB_PASS,
    },
    server: {
      port: +process.env.UNLEASH_SERVER_PORT,
    },
  })
  .then((unleash) => {
    console.log(
      `Unleash started on http://localhost:${unleash.app.get("port")}`
    );
  });
As soon as the Unleash server is up and running, it takes the initiative to generate a user profile, complete with the credentials “admin:unleash4all.” Armed with this username and password pair, we gain entry into the server’s inner workings. By using these login credentials, we open the door to a user interface that empowers us to wield the full potential of Unleash in managing and controlling our feature flags.
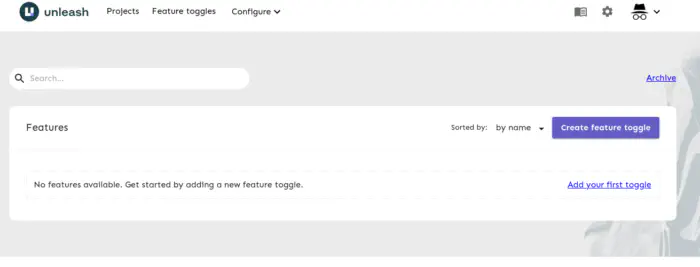
Admin dashboard of unleash server
This intuitive dashboard serves as our control center for feature management. With it, we have the capability to oversee and fine-tune our features precisely to our needs. To get started, let’s embark on creating a feature called “email-validator” by simply clicking on the “Create feature toggle” button. Within this feature, I’ll implement a standard strategy, carefully enabling it exclusively in the development environment. This allows us to execute precise control over the rollout and behavior of our “email-validator” feature, aligning it with our project’s objectives and requirements.
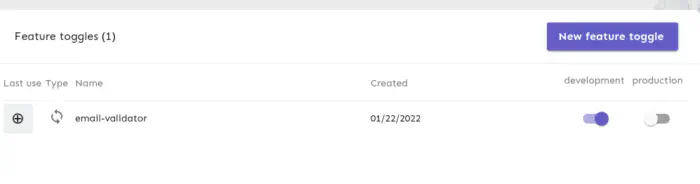
Toggle enabled in development
To enable clients to interact with the server seamlessly, the next crucial step is generating an API token. This can be effortlessly accomplished by navigating to the “Configure” section and selecting “API Access.” From here, we’ll initiate the process to create an API token that will facilitate secure and authenticated communication between our clients and the Unleash server.

API Token for development
Here, I have only created a token for the development environment.
Documentation of Unleash Server
Integrate Unleash in Express.js
After configuring our server, the next crucial step is integrating an Unleash client into our Express.js server. To keep our code organized and modular, I’ve chosen to place the initialization configuration for Unleash in a separate file called ’lib/unleash.ts.’ This approach allows us to effortlessly import the configuration into various files, enhancing code maintainability and readability. However, it’s worth noting that we have the option to bypass this step and directly import the configuration from the Unleash package, simplifying the process even further.
/// <reference path="../types/env.d.ts" />
import { initialize } from "unleash-client";

const unleash = initialize({
  url: process.env.UNLEASH_API_URL,
  appName: "server",
  environment: process.env.APP_ENV || "development",
  customHeaders: {
    Authorization: process.env.UNLEASH_API_KEY,
  },
});

export default unleash;
Furthermore, to ensure a seamless TypeScript integration and prevent potential errors, I’ve included an environment declaration file. This file serves as a crucial piece of our development puzzle, providing type information and safeguarding our codebase against any unexpected issues.
namespace NodeJS {
  export interface ProcessEnv {
    NODE_ENV: string;
    APP_ENV: string;
    PORT: string;
    WEB_URL: string;
    UNLEASH_API_URL: string;
    UNLEASH_API_KEY: string;
  }
}
Following that, I brought the initialized configuration into the spotlight by importing it into the main ‘index.ts’ file of the server. This ‘index.ts’ file now stands as a testament to our successful integration efforts, showcasing the essential role Unleash plays in feature flag management within our Express.js server.
import dotenv from "dotenv";
dotenv.config();
import express from "express";

import unleash from "./lib/unleash";

unleash.on("synchronized", () => {
  console.log(`Synchronized! on ${new Date().toLocaleString()}`);
});

const app = express();
const PORT = +process.env.PORT || 8000;

app.get("/", (_, res) => res.send("Hello from NepCodeX"));

app.listen(PORT, () => {
  console.log(`Server is running at http://localhost:${PORT}`);
});
Up to this juncture, we’ve completed the Unleash configuration process. As a result, we now have a fully functional server that, when accessed at the root path, proudly responds with a warm ‘Hello from NepCodeX.’ Our Express.js server is primed and ready to serve this simple yet significant message, laying the foundation for more advanced feature flag implementations.
Add route for tools
As I mentioned earlier, the main purpose of this website is to develop various utilities. As part of this goal, I have started working on an email address validator.
To achieve this, I created a dedicated ’tools’ route in our Express.js server. Inside this route, I’ve added the initial email validation logic, which is currently at a basic level. It’s important to emphasize that this implementation serves as our starting point, with plans for further refinement and expansion as we proceed. This initial step lays the foundation for building a practical and functional email validation tool that aligns seamlessly with our website’s utility-driven mission.
import { Router } from "express";

const router = Router();

router.post("/email-validator", (req, res) => {
  const pattern = /@/;
  const email = req.body.email;
  let response: Record<string, unknown>;
  if (!email) {
    response = { code: 400, message: "Email address is required." };
    res.status(400).json(response);
  } else {
    const isValid = pattern.test(email);

    if (isValid) {
      response = { code: 200, message: "Email address is valid", email: email };
    } else {
      response = {
        code: 200,
        message: "Email address is invalid",
        email: email,
      };
    }
    res.json(response);
  }
});

export default router;
In this stage, I’ve crafted a rudimentary email validator as a demonstration of our progress. However, it’s crucial to highlight that this validator currently performs a very basic task—it checks for the presence of the ‘@’ symbol in an email address.
To integrate this email validation functionality into our server, I’ve imported the corresponding route and employed it as middleware within the main server file. This strategic integration allows us to apply the email validation logic to incoming requests, showcasing our ability to enhance server functionality with feature flags.
// snip ...
import toolsRoutes from "./routes/toolsRoutes";

app.get("/", (_, res) => res.send("Hello from NepCodeX"));

app.use("/tools", toolsRoutes);

// snip ...
Through this setup, I’ve established accessibility to the route via ‘POST /tools/email-validator.’ Now, it’s time to put our implementation to the test.
❯ curl -XPOST http://localhost:8000/tools/email-validator -d "[email protected]"
{"code":200,"message":"Email address is valid","email":"[email protected]"}

❯ curl -XPOST http://localhost:8000/tools/email-validator -d "email=nepcodex.com"
{"code":200,"message":"Email address is invalid","email":"nepcodex.com"}

❯ curl -XPOST http://localhost:8000/tools/email-validator
{"code":400,"message":"Email address is required."}
Next, let’s leverage our feature toggle.
import { Router } from "express";
import unleash from "../lib/unleash";

const router = Router();

router.post("/email-validator", (req, res, next) => {
  if (unleash.isEnabled("email-validator")) {
    const pattern = /@/;
    const email = req.body.email;
    let response: Record<string, unknown>;
   // redacted
  }
  next();
});

export default router;
If we toggle between the features using the dashboard, we get a different result. By default, Node.js SDK polls every 15 seconds for the update.
❯ curl -XPOST http://localhost:8000/tools/email-validator -d "[email protected]"
{"code":200,"message":"Email address is valid","email":"[email protected]"}
❯ curl -XPOST http://localhost:8000/tools/email-validator -d "[email protected]"
<!DOCTYPE html>
<html lang="en">
<head>
<meta charset="utf-8">
<title>Error</title>
</head>
<body>
<pre>Cannot POST /tools/email-validator</pre>
</body>
</html>
So, when the toggle is switched off, the behavior mimics that of a 404 route, effectively handling the absence of the feature. Conversely, when the toggle is turned on, the feature comes to life, enabling its functionality.
Now, let’s take things a step further by introducing a variant that incorporates advanced pattern checking. Within the Unleash server, I’ve introduced two variants—‘advanced’ and ‘basic’—to cater to different use cases.
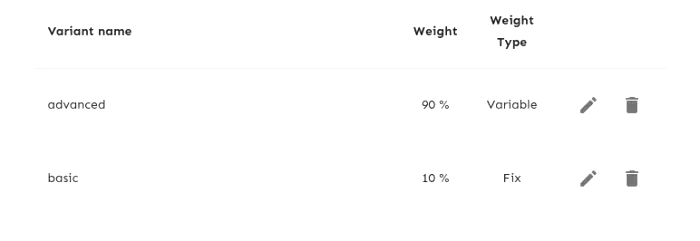
Variants for the toggle
However, to harness the full potential of these variants, I made a significant adjustment by changing the feature type from ‘Release’ to ‘Experiment.’ This transformation allows us to delve into more sophisticated and data-driven experimentation.
With this change in place, I proceeded to modify the route controller to accommodate the new feature type and its associated variants.
// snip
router.post("/email-validator", (req, res, next) => {
  if (unleash.isEnabled("email-validator")) {
    const email = req.body.email;
    let response: Record<string, unknown>;
    let pattern: RegExp;
    if (!email) {
      response = { code: 400, message: "Email address is required." };
      res.status(400).json(response);
    } else {
      let isValid: boolean | undefined;
      const variant = unleash.getVariant("email-validator");
      if (variant.name === "basic") {
        pattern = /@/;
        isValid = pattern.test(email);
      } else if (variant.name === "advanced") {
        pattern =
          /^(([^<>()\[\]\\.,;:\s@"]+(\.[^<>()\[\]\\.,;:\s@"]+)*)|(".+"))@((\[[0-9]{1,3}\.[0-9]{1,3}\.[0-9]{1,3}\.[0-9]{1,3}])|(([a-zA-Z\-0-9]+\.)+[a-zA-Z]{2,}))$/;
        isValid = pattern.test(email);
      }
     // snip
  }
  next();
});

export default router;
After making the transition to the ‘Experiment’ feature type and refining the route controller accordingly, I put our setup to the test with a payload. This payload was valid for the ‘basic’ variant but didn’t meet the criteria for the ‘advanced’ variant. The outcome of this test provides valuable insights into the behavior of our feature variants.
❯ curl -XPOST http://localhost:8000/tools/email-validator -d "email=contact@nepcodex" -H "host: nepcodex.com"
{"code":200,"message":"Email address is invalid","email":"contact@nepcodex"}
❯ curl -XPOST http://localhost:8000/tools/email-validator -d "email=contact@nepcodex" -H "host: nepcodex.com"
{"code":200,"message":"Email address is valid","email":"contact@nepcodex"}
To emphasize, this demonstration has showcased the power of variants in Unleash, highlighting their ability to adapt quickly based on their assigned weights. While this specific scenario may not require such complexity, it illustrates the flexibility Unleash offers when it comes to feature flag strategies. With this, we conclude the server-side setup, having laid the foundation for effective feature flag management and experimentation within our project.
Serving Unleash proxy API for client-side
Now that we’ve successfully completed the configuration on the server side, it’s time to replicate the same process for our Next.js application. Fortunately, the setup for the Next.js app closely parallels that of the server, ensuring a streamlined and consistent approach to feature flag management across both components of our project.
require("dotenv").config();
const { createApp } = require("@unleash/proxy");
const port = +process.env.UNLEASH_PROXY_PORT || 3000;

console.log(process.env.UNLEASH_PROXY_PORT);
const app = createApp({
  unleashUrl: process.env.UNLEASH_API_URL,
  unleashApiToken: process.env.UNLEASH_API_KEY,
  clientKeys: [process.env.WEB_PROXY_SECRET],
  refreshInterval: 1000,
});

app.listen(port, () =>
  console.log(`Unleash Proxy listening on http://localhost:${port}/proxy`)
);
Within this context, it’s important to note that the clientKeys play a pivotal role as they must be included in the requests to access this proxy. With our configuration in place, it’s now time to put this implementation to the test and witness the real-time feature flag control in action.
❯ curl http://localhost:4000/proxy -H "Authorization: b5758cb6fead016da791d69b85532f7d77f07b6a6ff621e111baffd029aeefc5"
{"toggles":[{"name":"email-validator","enabled":true,"variant":{"name":"advanced","enabled":true}}]}
In the above request, it’s essential to underline that the value provided in the authorization header corresponds to the client key designated for our Next.js application. This client key serves as the passport, granting access to the feature flags and toggles through the proxy. With this clarified, let’s proceed to verify the functionality of our implementation by conducting thorough testing.
Integrate Unleash on Next.js
In order to make requests to our server, it’s imperative to set up Cross-Origin Resource Sharing (CORS) for seamless communication. This can be effortlessly achieved by utilizing the ‘cors’ package. Within my Next.js application, I’ve established a straightforward email validator, accompanied by the user-friendly styling of Tailwind CSS, following these steps.
import { Button, Card, TextInput } from "ui";
import { ChangeEvent, SyntheticEvent, useEffect, useState } from "react";

const validateEmail = async (email: string) => {
  const res = await fetch(
    `${process.env.NEXT_PUBLIC_WEB_API_URL}/tools/email-validator`,
    {
      method: "POST",
      body: new URLSearchParams({
        email: email,
      }),
    }
  );
  return res.json();
};

export default function Web() {
  const [textInput, setTextInput] = useState("");
  const [isSubmitting, setIsSubmitting] = useState(false);
  const [response, setResponse] = useState(null);
  const [isSuccess, setIsSuccess] = useState(null);
  const [isValid, setIsValid] = useState(null);
  const [isError, setIsError] = useState(false);

  const handleTextInputChange = (event: ChangeEvent<HTMLInputElement>) => {
    if (response) {
      setResponse(null);
    }
    setTextInput(event.target.value);
    setIsError(null);
  };
  const handleSubmit = async (event: SyntheticEvent) => {
    event.preventDefault();
    setIsSubmitting(true);
    try {
      const response = await validateEmail(textInput);
      setResponse(response);
      setIsSuccess(true);
    } catch (e) {
      setIsSuccess(false);
      setIsError(true);
    } finally {
      setIsSubmitting(false);
    }
  };
  useEffect(() => {
    if (!isSubmitting && response) {
      setIsError(false);
      if (response.message.includes("invalid") || response.code !== 200) {
        setIsValid(false);
      } else {
        setIsValid(true);
      }
    }
  }, [isSubmitting, response, isSuccess]);

  return (
    <>
      <Card>
        <TextInput
          placeholder="Enter some text"
          onChange={handleTextInputChange}
          value={textInput}
          className="col-span-3"
        />
        <Button type="submit" onClick={handleSubmit} className="col-span-1">
          Validate
        </Button>
        {response && (
          <div className={`text-${isValid ? "purple" : "red"}-500 col-span-4`}>
            {response.message}
          </div>
        )}
        {isError && (
          <div className="text-red-500 col-span-4">Something went wrong.</div>
        )}
      </Card>
    </>
  );
}
The code snippet provided above will render as follows, giving us a visual representation of the email validator’s functionality and its interaction with the Unleash feature flags.
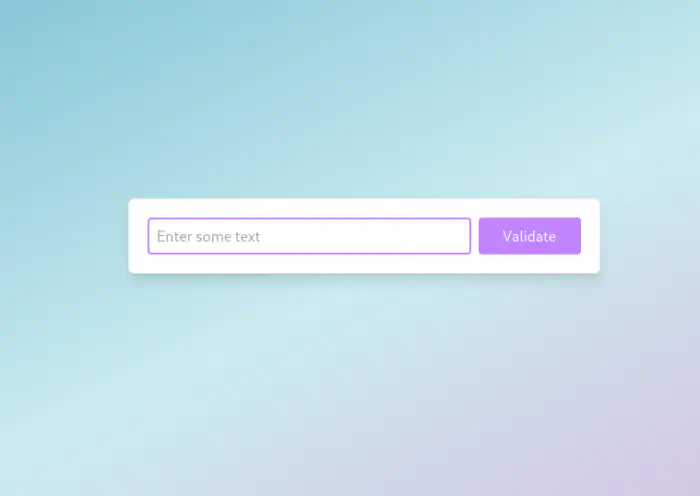
The email validator’s view
Indeed, while the code may not be aesthetically refined, it effectively serves its purpose for this blog post, providing a tangible demonstration of the email validator’s functionality within our project.
Now, moving forward, I’ve initiated the setup of the Unleash proxy react client within the primary ‘_app.tsx’ file. This strategic integration brings our Next.js application one step closer to harnessing the full potential of feature flags managed by Unleash.
import "../styles/globals.css";
import type { AppProps } from "next/app";
import dynamic from "next/dynamic";

const FlagProvider = dynamic(() => import("@unleash/proxy-client-react"), {
  ssr: false,
});
const config = {
  url: process.env.NEXT_PUBLIC_UNLEASH_PROXY_URL,
  clientKey: process.env.NEXT_PUBLIC_APP_SECRET,
  refreshInterval: 15,
  appName: "web",
  environment: process.env.NEXT_PUBLIC_ENVIRONMENT || "development",
};

function MyApp({ Component, pageProps }: AppProps) {
  return (
    <FlagProvider config={config}>
      <Component {...pageProps} />
    </FlagProvider>
  );
}

export default MyApp;
In this section, you’ll notice that I’ve employed dynamic imports to bring in the ‘FlagProvider’ component. This dynamic import strategy ensures that the component remains client-side rendered, preserving the intended behavior. With this in place, I’ve harnessed the ‘useFlag’ hook to efficiently check the state of the toggle.
To enhance the user experience, I’ve implemented a mechanism to display an error message if the feature flag is not used. This refinement has resulted in a more streamlined and cohesive codebase, improving both functionality and user feedback. The complete code has been refactored to align with these enhancements, as outlined below.
import { Button, Card, TextInput } from "ui";
import { ChangeEvent, SyntheticEvent, useEffect, useState } from "react";
import { useFlag } from "@unleash/proxy-client-react";
import Error from "next/error";

// snip

function EmailValidator() {
  // Everything moved to this component
}

export default function Web() {
  const [isLoading, setIsLoading] = useState(true);
  const isEmailValidatorEnabled = useFlag("email-validator");
  useEffect(() => {
    if (isEmailValidatorEnabled) {
      setIsLoading(false);
    }
  }, [isEmailValidatorEnabled]);

  return (
    <>
      {isEmailValidatorEnabled && <EmailValidator />}
      {!isLoading && !isEmailValidatorEnabled && <Error statusCode={404} />}
    </>
  );
}
With these adjustments, we’ve successfully achieved our expected results. Toggling the feature flag now instantly enables or disables the associated functionality, eliminating the need for manual refreshing and providing a seamless user experience.
What Next?
Unleash has recently incorporated a series of informative guides into its documentation library, one of which focuses on the fundamental principles for developing and expanding feature flag systems. This comprehensive guide not only covers best practices but also provides access to various other resources essential for effectively working with feature flags. You can explore these invaluable insights by following this link: Feature Flag Best Practices.
Final Words
I trust you found this blog post insightful and informative. If you have any feedback or questions, please don’t hesitate to leave a comment. Your input is invaluable, and I’m here to address any queries or further discussions you might have. Thank you for joining me on this journey of feature flag and toggle implementation with Unleash!
Check my post about ARP spoofing and insecure protocols (Practical Guide).
Repository link: https://github.com/kriss-u/unleash-nepcodex