It’s essential to have analytics in your app if you need help with your product decision. Not only does it give us an insight into how users are using our app but also helps us decide to experiment with different features. So, this post is the continuation of my previous posts about remote configuration and feature flag management. Here, I will integrate Mixpanel into React Native App. Furthermore, I will add some analytics that I think are useful in any scenario. However, I will be omitting typescript for this sample to make it comprehensible. Nevertheless, I suggest using Typescript on your project. “Analytics using react native mixpanel”
Check my post about feature flag management and remote config using Flagsmith.
What is Mixpanel?
Mixpanel is an analytics solution that works in both server-side and client-side technologies. There are other platforms similar to Mixpanel such as Amplitude, Firebase Analytics, etc. I chose Mixpanel because of my experience with using it. However, this post mostly focuses on integrating an analytics platform to react to native apps rather than a detailed description of Mixpanel.
Bootstrap React Native App
To create a new react native application, I used Expo SDK. However, we can definitely bootstrap it using React Native CLI. I have put the link to the guide below.
https://reactnative.dev/docs/environment-setup
Once I completed all the pre-requisites, I initialized a project as follows.
npx react-native init NepCodeXAnalytics
Once this is complete, I started the metro bundler and ran the project in android.
yarn start
yarn android
This gives us the following screen.

React Native App
Add Mixpanel Library
Now, let’s add the Mixpanel library for react native.
Reference: https://developer.mixpanel.com/docs/react-native-quickstart
yarn add mixpanel-react-native
After this, we have to rebuild android. Whenever we update a package that has native code, we have to re-run the run-android command.
Firstly, we have to create a Mixpanel instance that we have to re-use everywhere. We could also use Context API to share the instance but I don’t recommend it because it might be uninitialized when you open a screen directly. Here, I will create a config file, “mixpanel.js” with the following code.
import {Mixpanel} from 'mixpanel-react-native';

const mixpanel = new Mixpanel('Your Project Token');

mixpanel.init();

export default mixpanel;
You can get your project token from the Mixpanel Setup Guide.
Add properties to each event
Suppose, you have mobile and web versions for the same application. In this case, you might want to send a property “Source” to each event. If the mobile app emits the event, then we use the value “App”. In the web, we would use “Web”. To do so, we have to invoke a method, registerSuperProperties. So, our initialization file would look as follows.
// Redacted
mixpanel.init();
mixpanel.registerSuperProperties({Source: 'App'});

export default mixpanel;
In this way, we can add super properties. Other examples include the users of the plan are on, e.g. Free, Premium, etc. I hope you get the idea.
Create a native stack navigation
I will do my first event setup with react native navigation. In my setup, I will track the routes the user is on automatically.
So, let’s install react native navigation, stack navigator and its dependencies.
yarn add @react-navigation/native @react-navigation/native-stack react-native-screens react-native-safe-area-context
In this guide, I am using a stack navigator. However, there are other navigators on top of it such as top navigators, bottom navigators, etc.
Let’s modify the code of App.js as follows.
import React from 'react';

import {NavigationContainer} from '@react-navigation/native';
import {createNativeStackNavigator} from '@react-navigation/native-stack';

const Stack = createNativeStackNavigator();

function App() {
  return (
    <NavigationContainer>
      <Stack.Navigator>
        {/* TODO: Stack screens go here */}
        {/* <Stack.Screen name="Home" component={HomeScreen} /> */}
      </Stack.Navigator>
    </NavigationContainer>
  );
}

export default App;
So, we have to create multiple screens. Here, I will create a Home, Profile, Contact, and Privacy Policy to demonstrate. So, let’s create dummy screens.
function App() {
  return (
    <NavigationContainer>
      <Stack.Navigator>
        <Stack.Screen name="Home" component={Home} />
        <Stack.Screen name="Profile" component={Profile} />
        <Stack.Screen name="Contact" component={Contact} />
        <Stack.Screen name="Privacy Policy" component={PrivacyPolicy} />
      </Stack.Navigator>
    </NavigationContainer>
  );
}
I have imported four screens. The code is similar to each other. For example, for Home, it’s the following.
import React from 'react';
import {View, Text, StyleSheet} from 'react-native';

export const styles = StyleSheet.create({
  container: {
    flex: 1,
    alignItems: 'center',
    justifyContent: 'center',
  },
});

export default function Home() {
  return (
    <View style={styles.container}>
      <Text>This is Home.</Text>
    </View>
  );
}
Now, I want to do a slight modification to the home screen. I will add some buttons for navigating to other screens.
// Snip
export const styles = StyleSheet.create({
  container: {
    flex: 1,
    flexDirection: 'row',
    alignItems: 'center',
    justifyContent: 'space-around',
  },
});

export default function Home() {
  const navigation = useNavigation();
  return (
    <View style={styles.container}>
      <Button
        title="Profile"
        onPress={() => {
          navigation.navigate('Profile');
        }}
      />
      <Button
        title="Contact"
        onPress={() => {
          navigation.navigate('Contact');
        }}
      />
      <Button
        title="Privacy Policy"
        onPress={() => {
          navigation.navigate('Privacy Policy');
        }}
      />
    </View>
  );
}
Our final HomeScreen looks as follows.
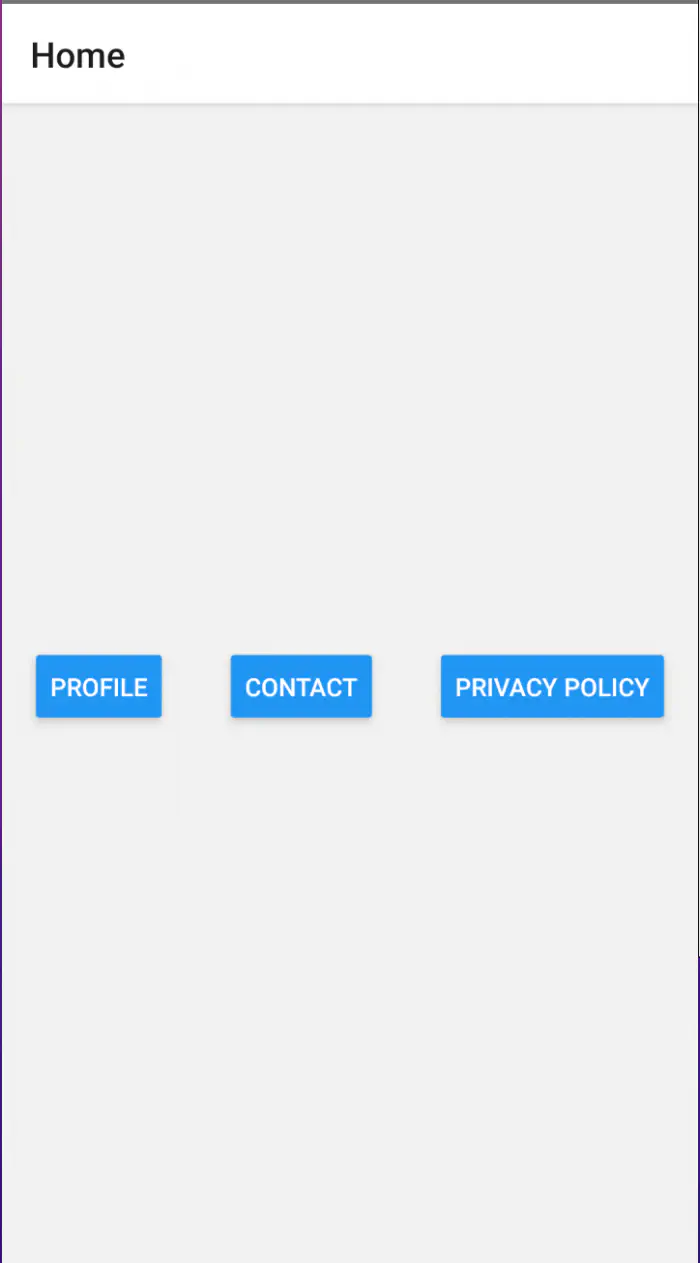
Home Screen with native stack navigation
Send events in each route
A screen can re-render many times. So, we don’t want to send repeated Mixpanel events when a user is on a screen. But first, I will create a callback that I can use to track events.
import {useCallback} from 'react';
import mixpanel from '../config/mixpanel';

export default function useTrackEvent(eventName) {
  return useCallback(
    properties => {
      try {
        mixpanel.track(eventName, properties);
      } catch (e) {
        console.error(e);
      }
    },
    [eventName],
  );
}
Now that I have a method to track events, I am going to add this to our navigation container component.
Firstly, I need a ref for our navigation container and the current route.
const navigationRef = useNavigationContainerRef();
const routeNameRef = useRef();
Now, I have to use this in our NavigationContainer component as follows. The following code performs an analytics event when the current route is different from the previous route.
function App() {
  const navigationRef = useNavigationContainerRef();
  const routeNameRef = useRef();
  return (
    <NavigationContainer
      ref={navigationRef}
      onReady={() => {
        // This gets the route name when navigation is ready. This happens only once.
        routeNameRef.current = navigationRef.getCurrentRoute().name;
        // Do analytics when ready!
      }}
      onStateChange={() => {
        const previousRouteName = routeNameRef.current;
        const currentRouteName = navigationRef.getCurrentRoute().name;

        if (previousRouteName !== currentRouteName) {
          // Do analytics stuff here!
        }

        // Save the current route name for comparing later. Basically, it repeats the process
        routeNameRef.current = currentRouteName;
      }}>
      {/* Redacted */}
    </NavigationContainer>
  );
}
Now, we have to track the event.
function App() {
  const navigationRef = useNavigationContainerRef();
  const routeNameRef = useRef();

  const trackRouteName = useTrackEvent('View Screen');

  return (
    <NavigationContainer
      ref={navigationRef}
      onReady={() => {
        // This gets the route name when navigation is ready. This happens only once.
        routeNameRef.current = navigationRef.getCurrentRoute().name;
        trackRouteName({'Screen Name': routeNameRef.current});
      }}
      onStateChange={() => {
        const previousRouteName = routeNameRef.current;
        const currentRouteName = navigationRef.getCurrentRoute().name;

        if (previousRouteName !== currentRouteName) {
          trackRouteName({'Screen Name': currentRouteName});
        }

        // Save the current route name for comparing later. Basically, it repeats the process
        routeNameRef.current = currentRouteName;
      }}>
      {/* Redacted */}
    </NavigationContainer>
  );
}
Now, let’s move to a different screen from the app and see the result in Mixpanel Events.
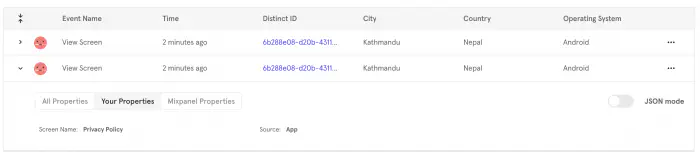
Mixpanel View Screen Event with Custom Super properties
As you can see, we are now tracking each screen the user traverses the app without needing any explicit code. This doesn’t stop here. If you have user authentication, you can identify the users and set the user properties. For example, you can set their name, plans they are on, their first login time, their no. of logins, etc.
Since I have covered the important bits, you can find the remaining information from Mixpanel’s documentation. If you still need help or if you have a certain use case, feel free to comment down.