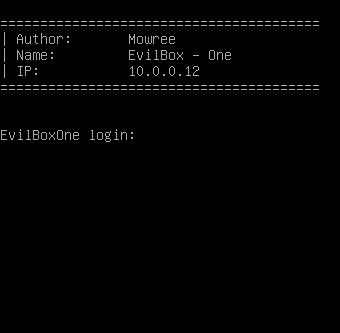
EvilBox is a Vulnhub machine rated as easy by the author Mowree. I have tried this machine on VirtualBox and it works fine on the default setting. However, you might want to change the network type to NAT Network if you are using one. Furthermore, this machine is a new machine at the time of writing. So, I recommend you try this on your own. “EvilBox Writeup – Vulnhub – Walkthrough”
Link to the machine: https://www.vulnhub.com/entry/evilbox-one,736/
Identify the target
First of all, I identified the IP address of the target machine.
fping -aqg 10.0.0/24
From the fping scan, I identified that the IP address of the target machine is 10.0.0.12. Likewise, my IP address is 10.0.0.4.
Scan open ports
Next, we have to scan the open ports on the machine. This would give us information about its exposed services on the network.
sudo nmap -v -T4 -p- -A -oN nmap.log 10.0.0.12
Ports 22 and 80 are open. Also, Nmap shows the operating system being Debian. However, this has nothing to do with this CTF challenge. So, I brute-forced the directories on the server.
Bruteforcing directories
Firstly, I tried on the server root.
gobuster dir -r -u http://10.0.0.12/ -w /usr/share/seclists/Discovery/Web-Content/directory-list-2.3-medium.txt -x php,html,txt -o dir.log 
I found an interesting path /secret that is empty. So, I further bruteforced to find other paths inside of it.
gobuster dir -r -u http://10.0.0.12/secret/ -w /usr/share/seclists/Discovery/Web-Content/directory-list-2.3-medium.txt -x php,html,txt -o dir-secret.log
I found a PHP script inside the /secret path. The script is empty and since I have nowhere to go from there, I fuzzed the GET parameter on it.
ffuf -c -r -u 'http://10.0.0.12/secret/evil.php?FUZZ=/etc/passwd' -w /usr/share/seclists/Discovery/Web-Content/common.txt -fs 0
Local file inclusion (LFI)
Up to now, we found that command allows the inclusion of local files of the target.

Also, we see that there is a user “mowree”. Let’s check the source code of evil.php. To do this, we have to use a PHP wrapper to show the content in a different format than PHP. This is because PHP files are executed by the server.
Reference: https://book.hacktricks.xyz/pentesting-web/file-inclusion
php://filter/convert.base64-encode/resource=evil.phpUsing this gives us the following encoded text.
PD9waHAKICAgICRmaWxlbmFtZSA9ICRfR0VUWydjb21tYW5kJ107CiAgICBpbmNsdWRlKCRmaWxlbmFtZSk7Cj8+Cg==We get the PHP script as follows after decoding this.
base64 -d <<< PD9waHAKICAgICRmaWxlbmFtZSA9ICRfR0VUWydjb21tYW5kJ107CiAgICBpbmNsdWRlKCRmaWxlbmFtZSk7Cj8+Cg==
The above code is vulnerable to RFI if only the PHP configurations “allow_url_open” and “allow_url_include” are allowed. By default, these are restricted. Here, this is the same case. Therefore, we cannot do RFI and execute a backdoor by including files from a remote machine (in this case my local machine).
Thus, I have to search sensitive files that would give me access to the machine. Since I have a user, I tried checking files from its home directory. Luckily, I found a public key in the /home/mowree/.ssh/authorized_keys file. Then, I checked if I can access the private key and I could.

The private key is encrypted by a passphrase. We can see that above. Now, I have to crack the passphrase. So, I copied the content to a file “id_rsa” on my local machine, changed its permissions and fed it to john the ripper.
chmod 600 id_rsaWe have to crack the hash of the passphrase. Therefore, we need a tool called ssh2john.py to generate the hash. Hence, we have to download the script from the repo of john the ripper. I already have that.
~/ssh2john.py id_rsa | tee hash
john hash --wordlist=/home/kali/rockyou.txt

As we can see above, I was successful at cracking the passphrase. Now, I can easily log in.

Root privilege escalation
The root privilege escalation is also simple in this machine. When I checked the permissions on the file /etc/passwd, I found out that anyone can write on this file.

This file looks as follows.

The “x” in a row represents that the hash of the password of the user is stored in the /etc/shadow file. Upon removing the “x”, we could remove the password. But this didn’t work in here. So, I updated this with my custom password “root” for the user root.
openssl passwd -1
I used openssl to generate the hash of the word “root”. Then, I copied the hash to the /etc/passwd file of the target. I updated the password of the user root as follows.

Now, I used the password “root” to get access to the root user.
su -l root
Check my other writeup: Shenron 2 Walkthrough – Vulnhub – Writeup
