Ripper from Vulnhub is an easy/medium machine depending on how the user takes it. Firstly, I would like to thank the author of the machine, Sanjay Babu for making it public. Also, if you haven’t tried it yet, I would like you to try it by yourself, and then come here to see the solution. Also, this is the stripped-down version of what I did. Obviously, I tried many things to realise that it’s a simple machine. So, welcome to “Ripper Walkthrough - Vulnhub - Writeup”.
Link to the machine: https://www.vulnhub.com/entry/ripper-1,706/
Walkthrough of VulnCMS - Vulnhub
Identify the target
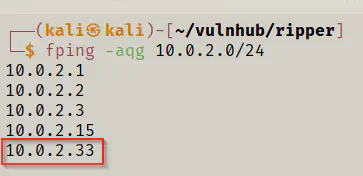
As usual, I started the enumeration by identifying the IP address of the target.
fping -aqg 10.0.2.0/24
Scan open ports
Then, I looked for open ports on the target.
nmap -T4 -sC -sV -p- --min-rate=1000 10.0.2.33 -oN nmap.log

As we can see above, we have one interesting service available at port 10000 which is webmin. This service allows a user or administrator to remotely manage the machine. Hence, if we could get access to this server, we could enter the system. However, it’s not that easy.
Enumerate web server
Although I tried exploits relating to webmin, I didn’t get anything. Likewise, I tried directory enumeration which didn’t reveal anything valuable.
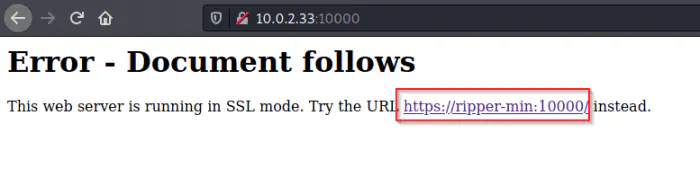
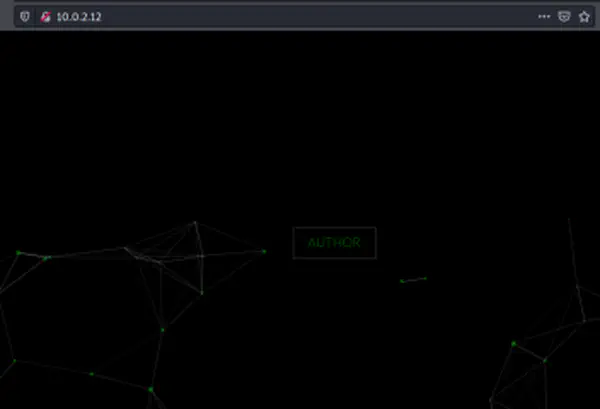
The webmin server didn’t work without SSL. Instead, I got a message that hinted me the host of the machine. So, I added it to hosts file, although there isn’t any use of it in upcoming steps.
sudo vi /etc/hosts

While enumerating, it’s always important to look at the robots.txt file. On the webmin’s robots.txt file, I got something on base64 format.
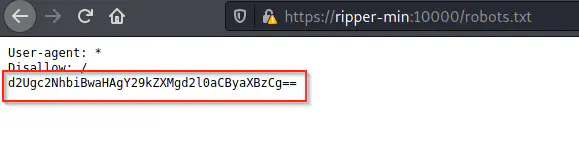
So, I decoded it.
echo d2Ugc2NhbiBwaHAgY29kZXMgd2l0aCByaXBzCg== | base64 -d

As we can see, they use rips which is a static source code analyser for vulnerabilities in PHP. Therefore, if I could access the location of rips on the webserver, I could access some files. After some manual works, I found that rips is hosted on the main server.
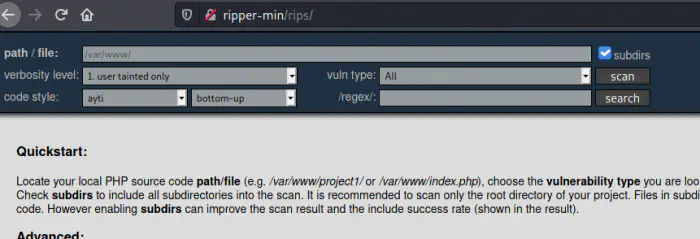
Then, I could scan some php files. So, I decided to recursively scan /var/www.
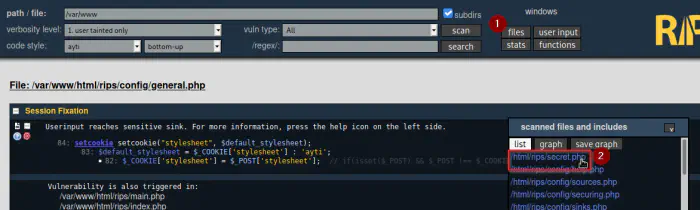
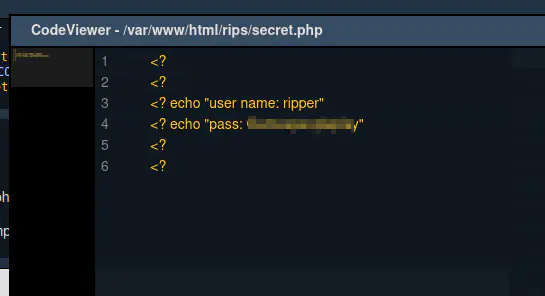
So, from this, I got the credentials of the user ripper.
ssh ripper@ripper-min

Then, I got the user’s flag.
ls -al
cat flag.txt
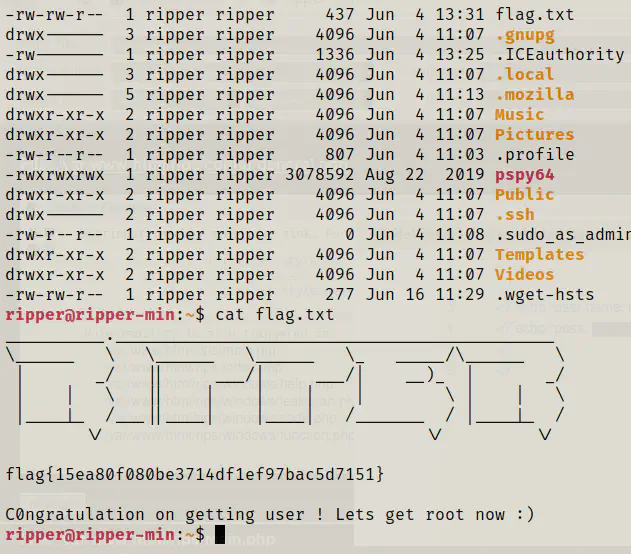
In this way, I completed the first challenge.
Getting root shell
Now that I have access to a user, I could look for different vulnerabilities like SUIDs, groups that the user belong to, and sudo permissions. However, I didn’t get anything on that. So, I checked for another user.
cat /etc/passwd | grep bash
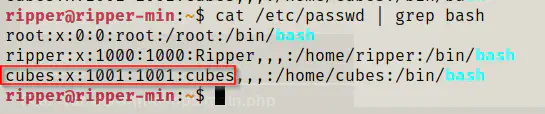
Here, we have a different user. So, I decided to look for files belonging to the user cubes that I have read access to.
find / -user cubes -type f -exec ls -al {} \; 2>/dev/null
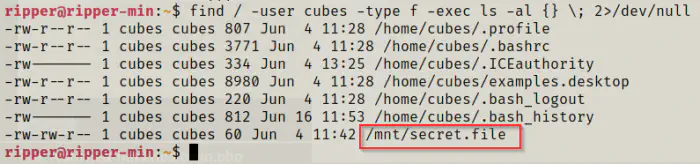
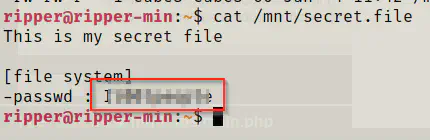
I got a secret file. Thus, I opened it and it contained the credentials of the user cubes.
cat /mnt/secret.file
Then, I could switch to the user ripper or login as ssh.
# From target
su cubes
# OR
# From local
ssh cubes@ripper-min
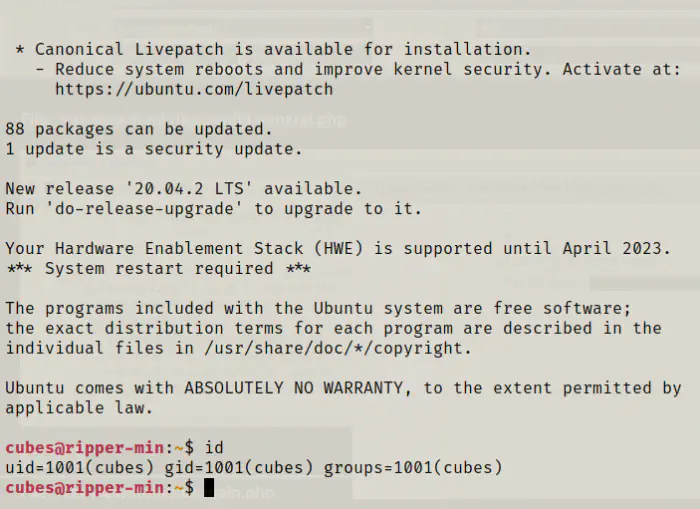
Once again, I did the same steps that I did for the user ripper. Likewise, I didn’t get anything. So, I checked for the files that the user cubes has access to.
find / -user cubes -type f -exec ls -al {} \; 2>/dev/null
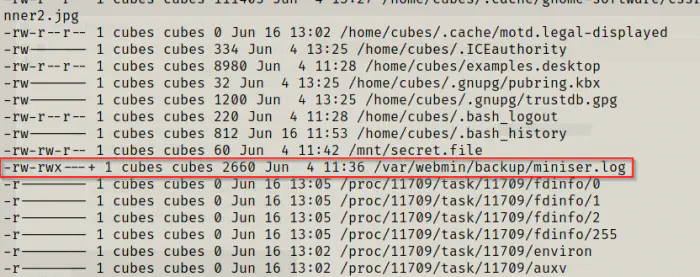
I found an interesting log file that the user is owner of. Hence, I opened the log.
cat /var/webmin/backup/miniser.log
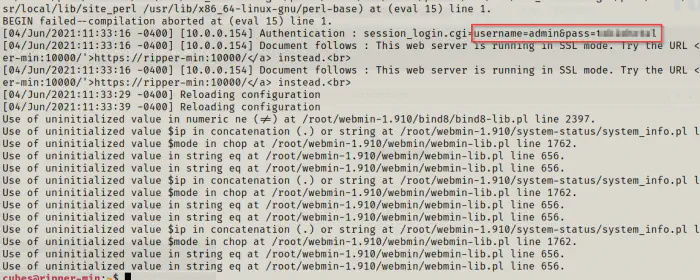
From here, I got the credentials to the admin user which I could use to login to the webmin server.
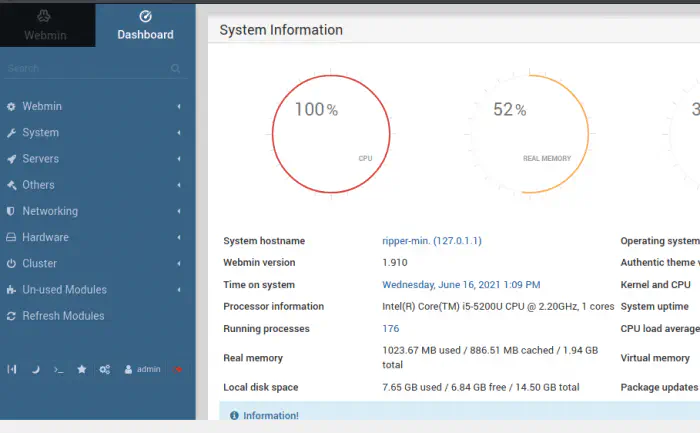
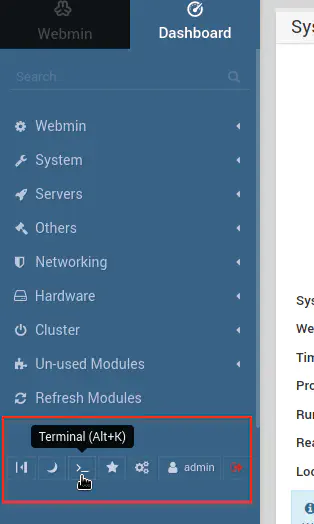
Now, I could just open the terminal.
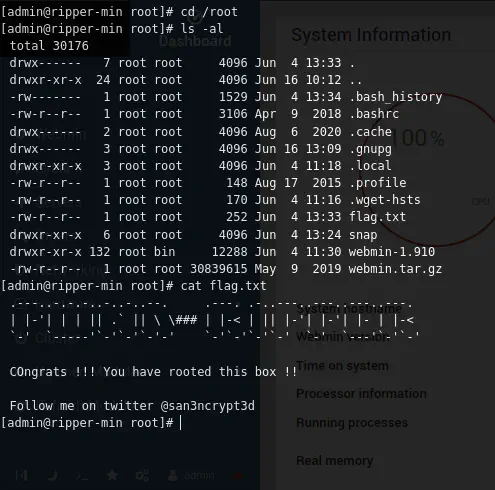
cd /root
ls -al
cat flag.txt
Conclusion
Although this machine didn’t have any difficult enumeration technique, it’s fun to do. To summarise the machine, you only need to look at robots.txt and finding files in linux.