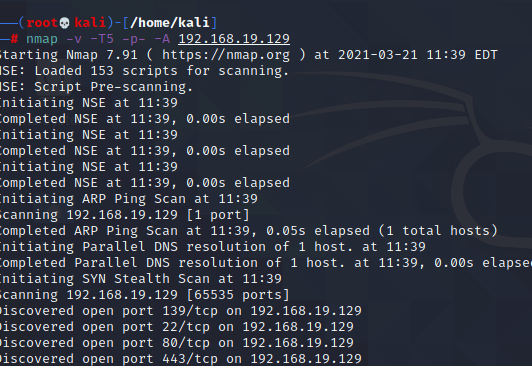
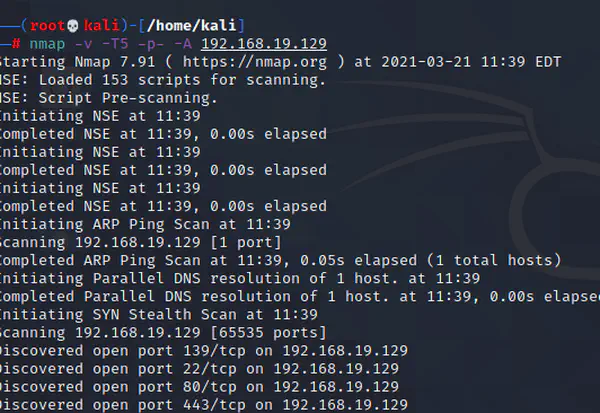
In the previous post, we performed some scans using Nmap and noted down the results. Now, in this post, I will make use of other ways with the help of existing information. Therefore, let’s try to hit the webserver of the target by opening the IP address of the target 192.168.19.129 in firefox.
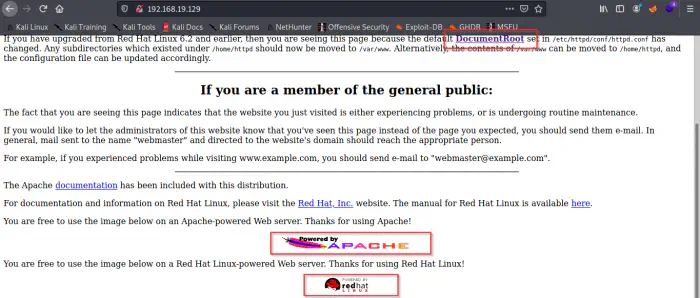
We saw the information about OS, webserver and some directory as well. Now, let’s click on the “Document Root” to see what happens.
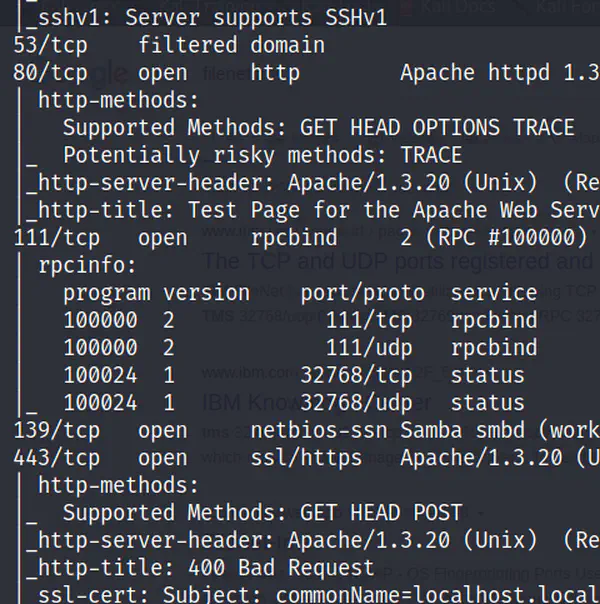
Here, we got the actual version of the apache which we had already found by Nmap.
Using ZAP
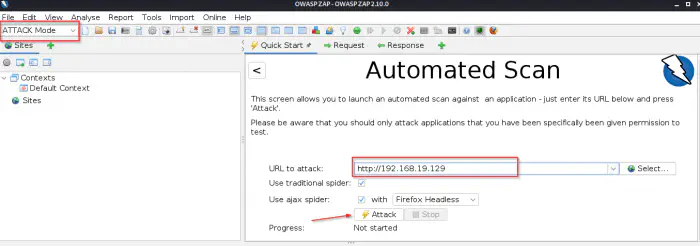
There is a tool called OWASP ZAP, which will look for any vulnerabilities in your web app. So, let’s use the tool in attack mode.
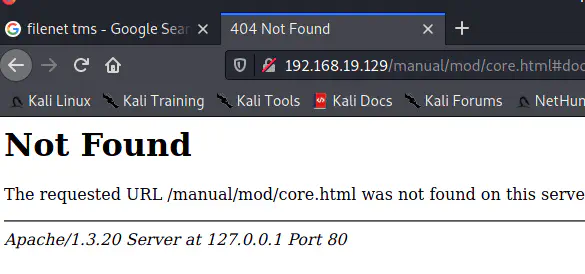
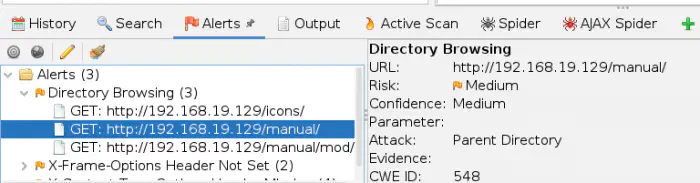
After running the attack, we got some alerts like follows. In addition to the previous results, it said that some directory browsing is possible. So, let’s head towards “/manual” URL path.
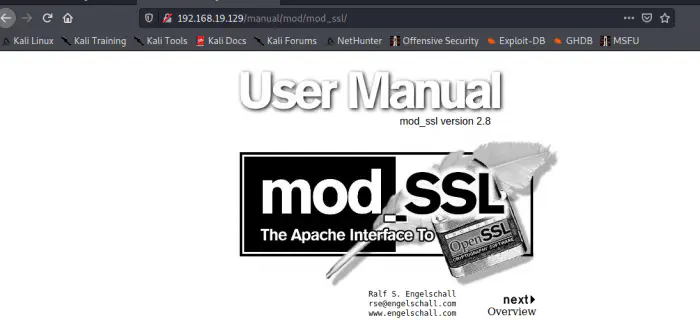
While going through the directory, we found out that there is mod_perl and mod_ssl extensions in apache. Furthermore, we also found out the version of mod_ssl.
Research on the result
Now, let’s do some research on the results on the internet or using a tool called searchsploit. I didn’t find any important for mod_perl. However, I found something for mod_ssl version 2.8. Below are the screenshots.
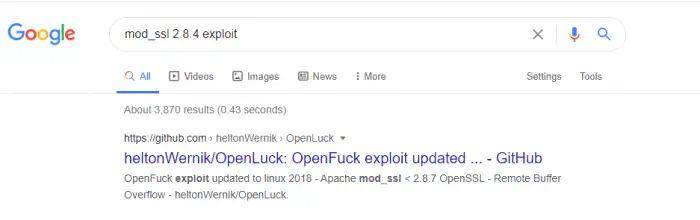

Since everything is on the internet now, let’s head towards the Open*uck Github repository and do as it says on its readme document. After compiling the source code and running the executable, we see the following screen.
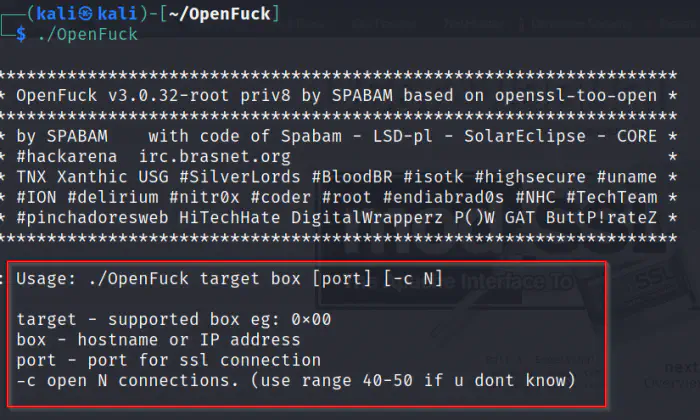
Now, as we scroll through the output, we see different offsets for different targets. Since we know our target is Apache in Red Hat Linux, let’s search for that.
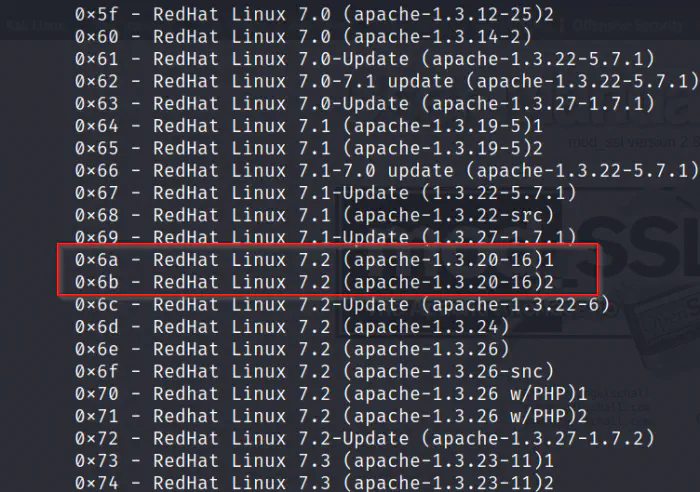
As in the above screenshot, there are two offsets that we can use. Let’s use the first one.
As we completed the command, we didn’t get an access to a shell. This means that it didn’t work. Therefore, we have to use another offset.
Finally, we are able to access the shell. Now, we can run some commands on the target machine.
As you can see above, the logged in user is root. So, let’s identify if that’s true by opening the /etc/shadow file which informs about system’s users’ passwords.
Yeah, we can access the file and from the file we also identified that there are two other users “john” and “harold”.
Further steps
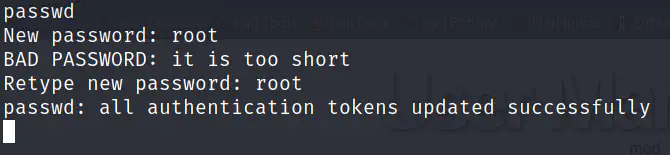
During our Nmap scans, we identified that there is an SSH service running on the machine as well. Now, we have already entered the system, we can change the root password by using command passwd.
Sequentially, in the new tab, we can try to log into SSH server.

So, we couldn’t access the machine due to the legacy version issue. Doing some research on Google, I found out that we can have a file called config inside the ~/.ssh folder of the attacker machine with the following lines of code.
Host 192.168.19.129
        KexAlgorithms +diffie-hellman-group1-sha1
        Ciphers aes128-ctr,aes192-ctr,aes256-ctr,aes128-cbc,3des-cbc
Now, let’s try to login once again.
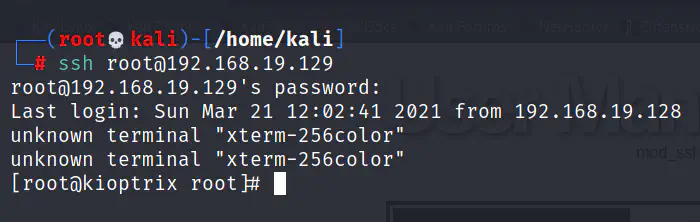
We are able to enter to the machine and have an SSH shell. Let’s try to fix the xterm-256color issue by introducing TERM variable by the following command.
![]()
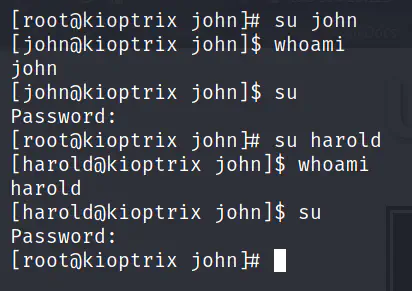
Since we have the SSH access, we can use the full potential of the target machine. Let’s try to log in as john and harold.
Conclusion
Here, in this blog post, we were able to enter to the target machine using a vulnerability in a version of mod_ssl which is an extension to the Apache webserver. Likewise, in the next blog post, we are trying to do the same using another vulnerability in SAMBA!