Introduction
This blog post is intended for tech enthusiasts who want to learn how to hack. When I first started, I was rather confused. Therefore, I am trying to explain each and every step through this blog post. However, there are some prerequisites that you must be aware of. Please look at my blog post about subnetting for what subnets are and another blog post for how to do subnetting. Now, what is a Kioptrix? Answering the question, Kioptrix images are hackable images that you can play with as much as you can in your virtual machine. If you head up to the website of VulnHub, you will find a number of images of different difficulty levels. Therefore, hacking Kioptrix Level 1 wouldn’t be that difficult. This is part 1 of the hacking walkthrough where I will mostly do the reconnaissance and find the vulnerabilities. Likewise, I will also help you to install the Kioptrix image in VMWare.
Setting up the environment
The first step of this walkthrough is setting up the environment to start hacking.
Download VMWare
Firstly, you have to install the VMWare workstation player if you haven’t already. Therefore, follow this website to get your free copy.
Download Kali Linux - The hacking OS
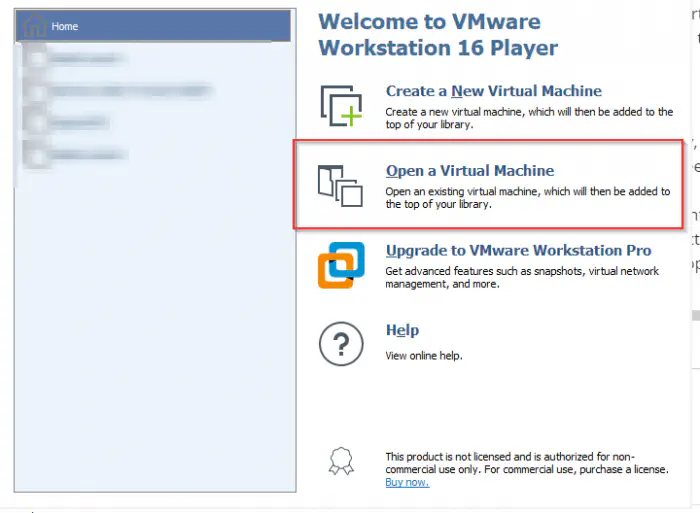
Now, the next step is to download Kali Linux which is a Linux distro based on Debian intended for security research purpose. You can get the VMWare image of Kali Linux from this website. After downloading it, extract the content to your disk. When the process is complete, open your VMWare workstation player. Then, in the player, choose an option to open a virtual machine and browse to your Kali Linux directory and choose the file. Now, choose the “I copied it” option to complete the process.
Download Kioptrix Level 1 - The hackable OS
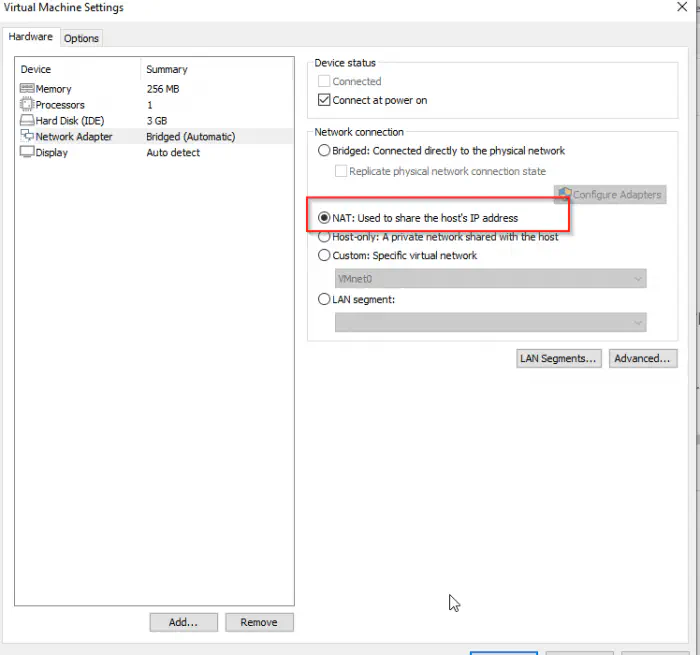
Similarly, you can do a similar thing with the Kioptrix image that you can download from this link. While setting up Kioptrix, make sure you use the NAT option in the network tab.
Troubleshooting some issues
Also, I noticed that the network connection is changed to Bridged as soon as it is turned on. So, to fix this, go to the directory of Kioptrix and open the configuration file in a text editor like notepad.

Now, find the following line and change the value to “nat” from “bridged”. If you don’t find the line, you can add one by yourself or once run the Kioptrix image and power off it using VMWare menu.
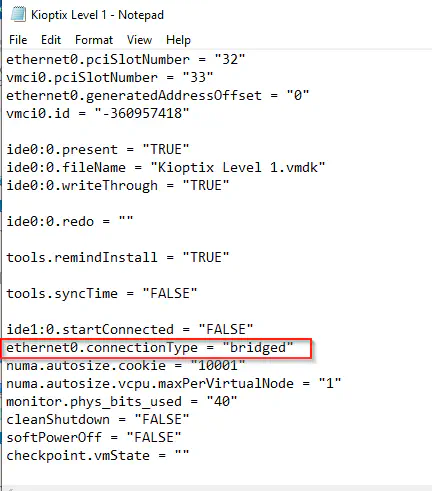
Before changing it to “nat”
Now, start Kali Linux and Kioptrix level 1 virtual machines in two different instances of VMware player.
The default username and password for newer Kali Linux from 2020 version is kali.
Conclusion
Up to this point, you have successfully configured the required environment to begin your first hacking session. Also, a quick note, make sure you store each result in your note-taking app with screenshots. In a real scenario, as an ethical hacker, you have to present the client with a detailed report of your attacks.
I will see you in the next part of this post.